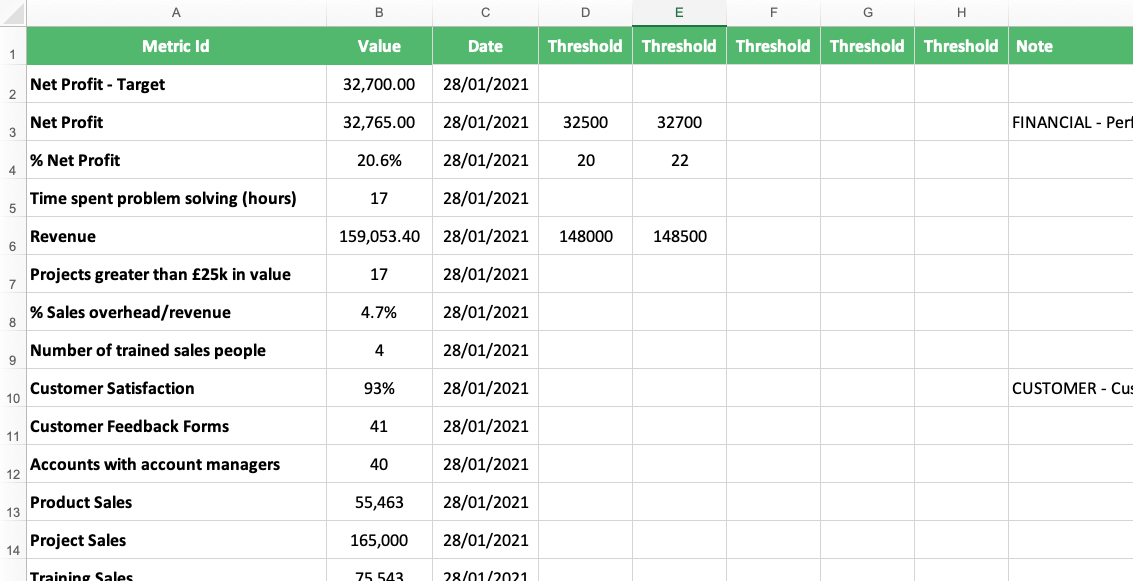
Data for a specific data can be imported into the application using the Advanced Spreadsheet Import feature. It is important to first make sure that your spreadsheet is formatted correctly.
An example spreadsheet is shown below, which conforms to the following format:
- Metric ID column on the left
- Value, Date and Threshold columns on the right
- Optional Notes column on the far right
The import process can be started from three places within the application:
Method 1: from the Welcome page
Click on Measure Updates
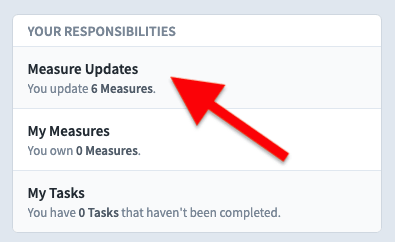
Then, click on the import icon next to the date selector in the top right of the page

Method 2: from within a Scorecard
Select a Scorecard
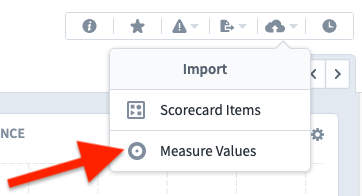
Then, click on the import icon in the toolbar at the top right of the screen
Select Measure Values
Method 3: from the Administration page
Click the cog in the bottom left of the screen. Select Imports in the Administration navigation bar. Click New Import in the top right of the screen.
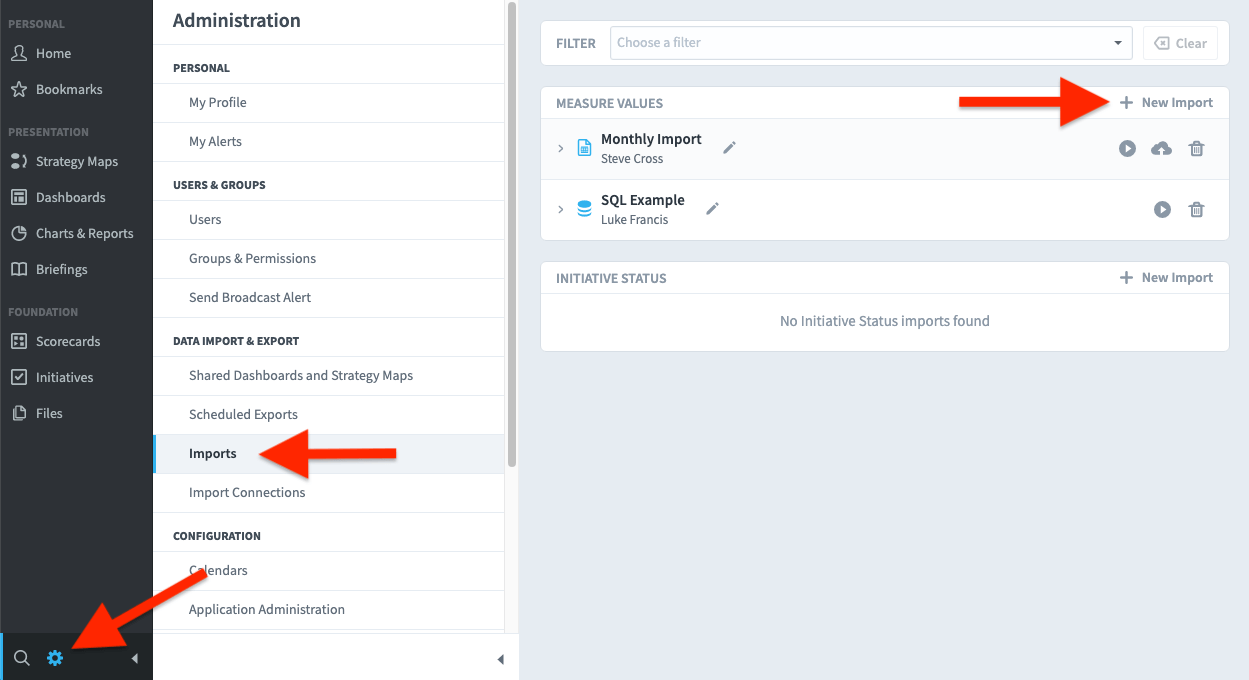
Regardless of which method you choose, you will next be presented with a pop-up that begins the nine step procedure for importing data for a specific date.
Step 1
Select Advanced Import
Click Next
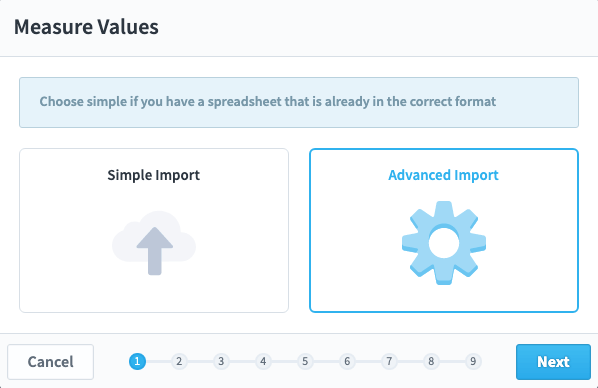
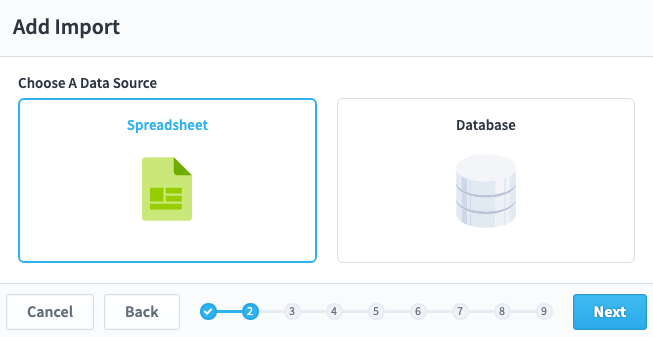
Step 2
Select Spreadsheet
Click Next
Step 3
Select the source file.
This can pulled from an external source, or you can select a file that has been previously uploaded into the Spider Impact file section.
Click Next
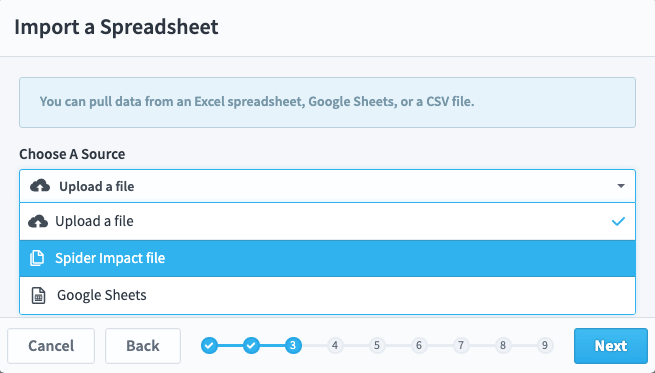
Note: If you are using a cloud version of the software, then you should be uploading your spreadsheets to the secure files area in the application.
Step 4
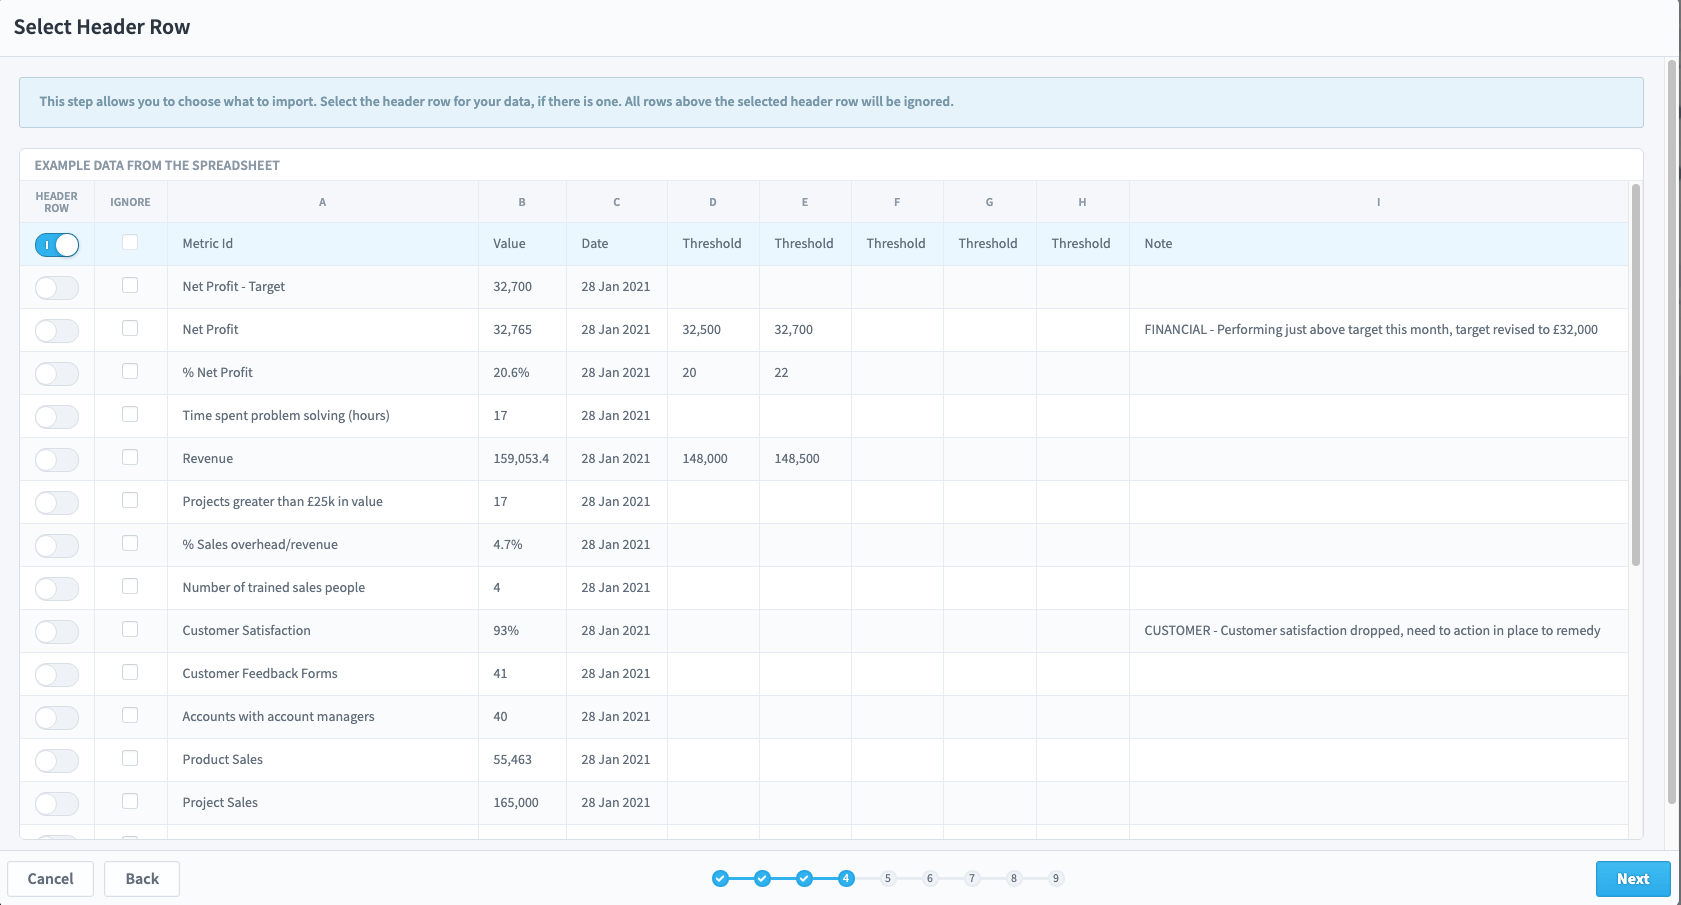
The source spreadsheet data will appear.
The date header row slider will be on. If there are rows you don’t want to import, you can deselect them by using the checkboxes in the Ignore column.
Click Next
Step 5
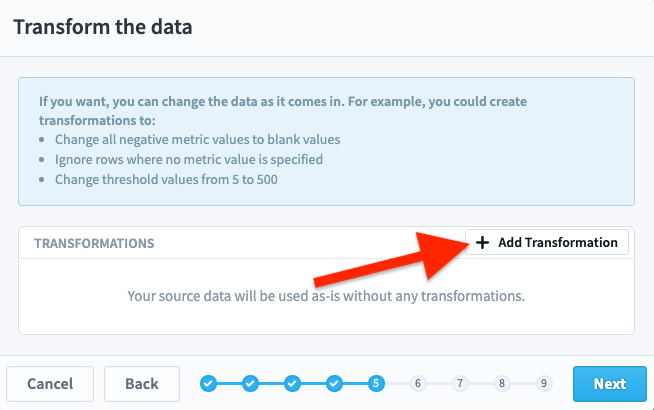
This step is an advanced feature where you can perform transform operations.
To do so, click on Add Transformation
Many types of transformation are available, but we will not apply any in this example
Click Next
Step 6
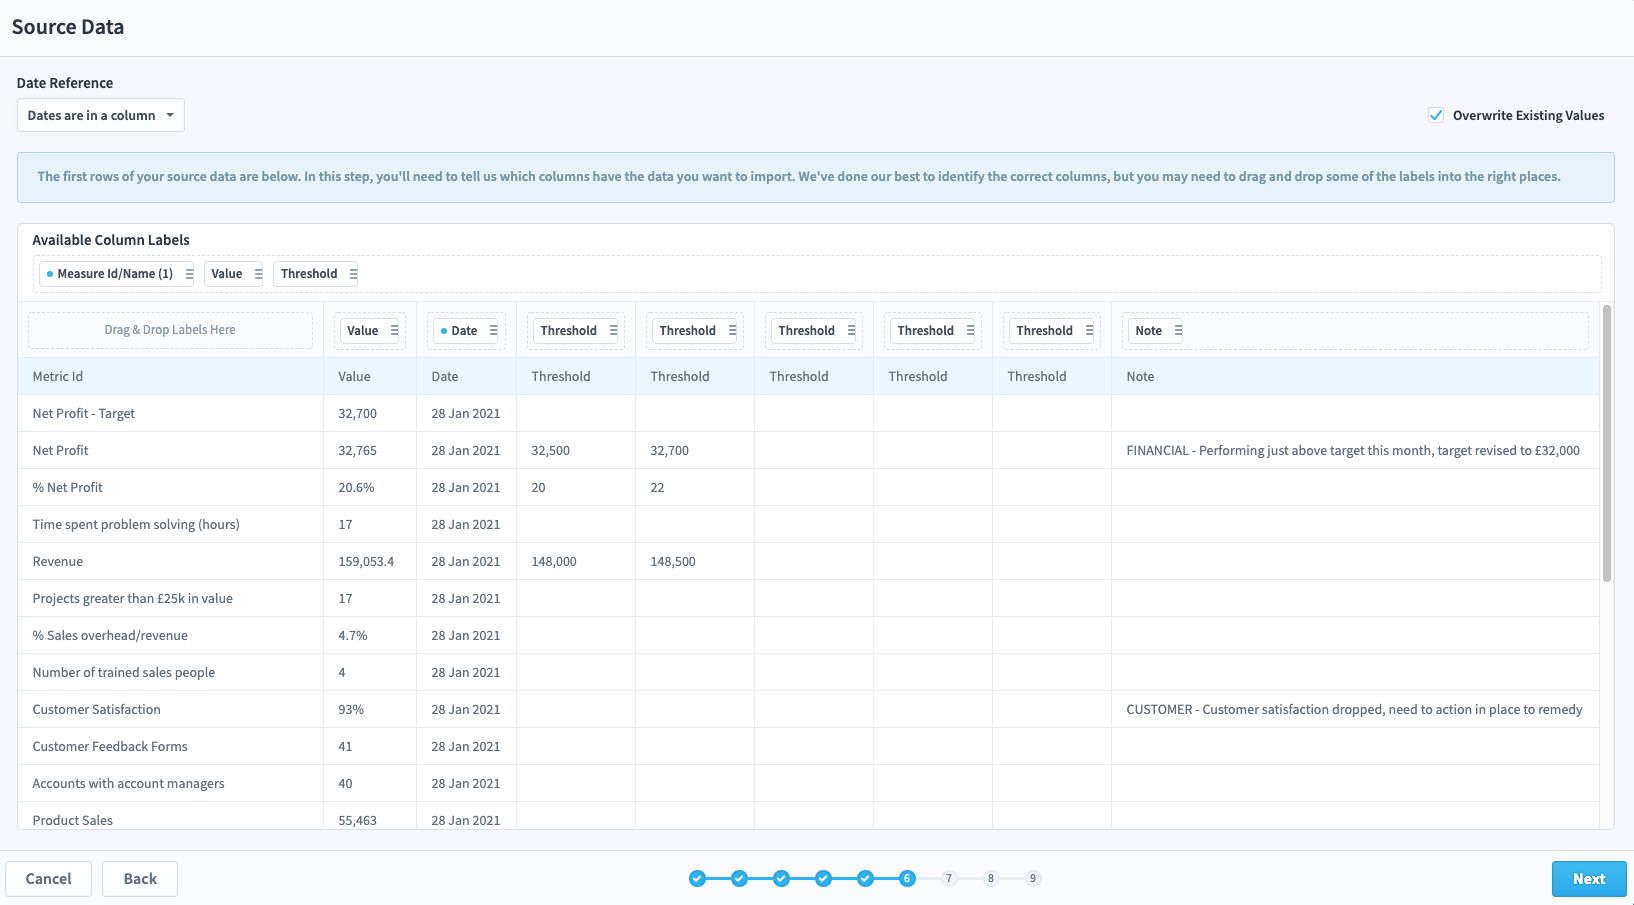
If the column names in your spreadsheet are the same as the names in the application, you don’t need to do anything in this step.
In this example, we need to identify the metric ID column.
By default, this import will overwrite all data in the system. If you do not want to overwrite the data, uncheck the Overwrite Existing Values box.
Click Next
Step 7
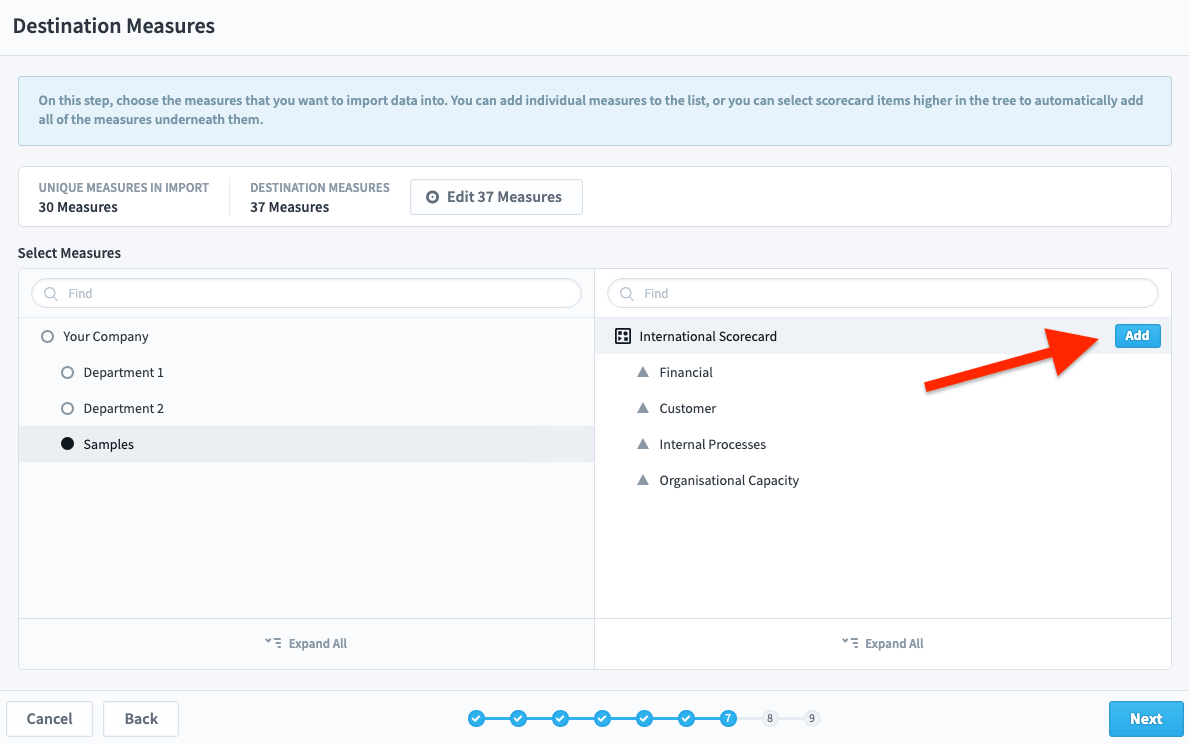
Identify the destination for the import.
In this example, we have selected the International Scorecard.
Click Add
You will see your Measures added under Destination Measures
Click Next
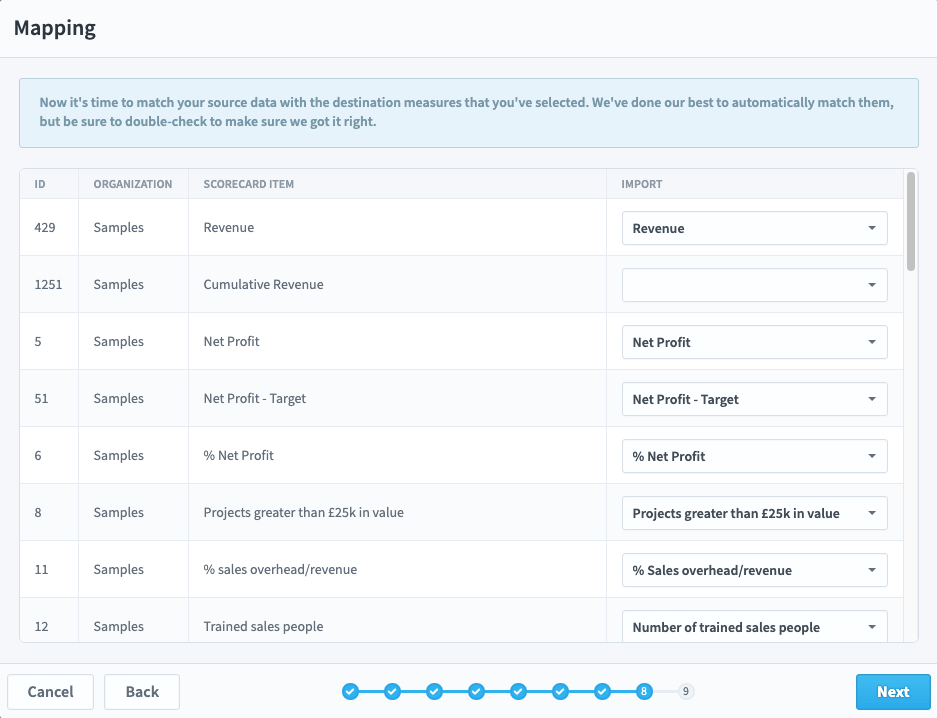
Step 8
If the Measure names you used in the spreadsheet are the same as the Measure names in the application, you don’t need to do anything in this step.
If not, you will need to identify the correct Measures in the source file to be mapped to Measures in the application.
Click Next
Step 9
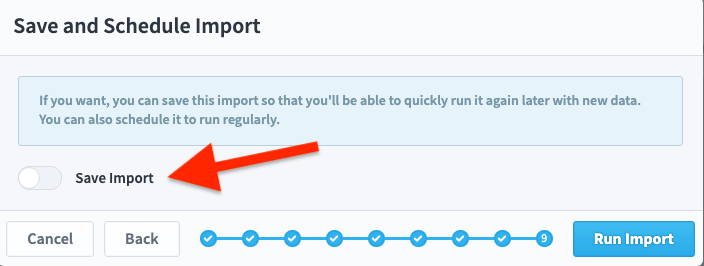
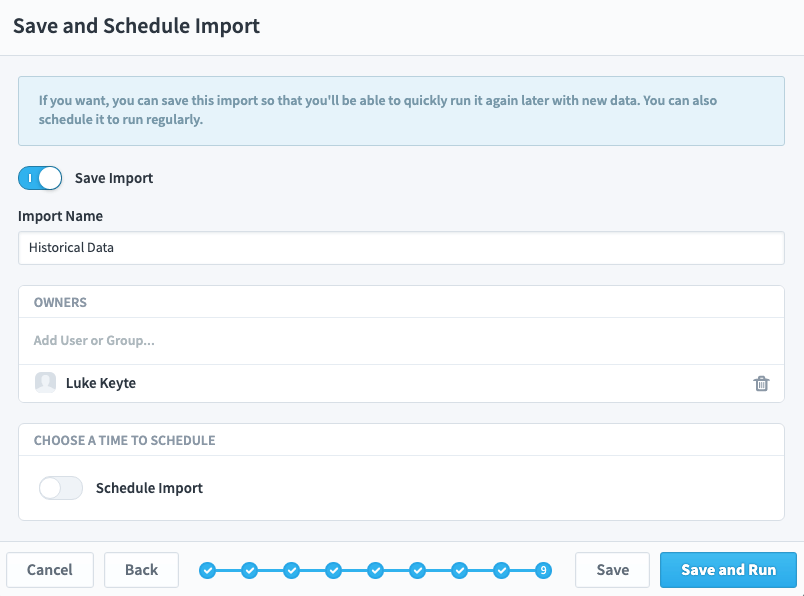
You can optionally save the import and create a schedule.
If you want to save the import, click on the Save Import slider and add a name to the Import Name field.
If you want to schedule a regular update, click on the Schedule Import slider. Select the date and time you want the import to take place.
Click Save and Run
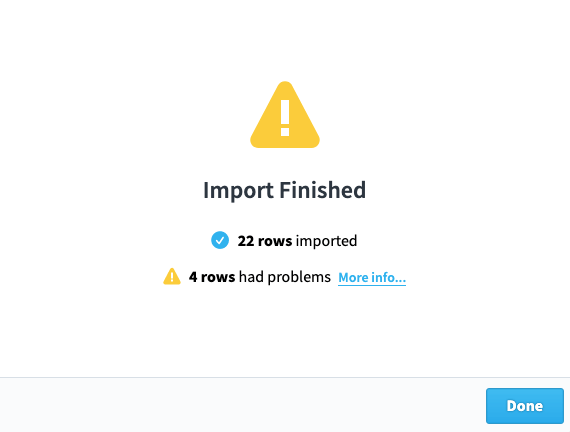
Import Finished
A pop-up appears giving you the status of the import.
If there is a problem, the details will appear here.
Click Done
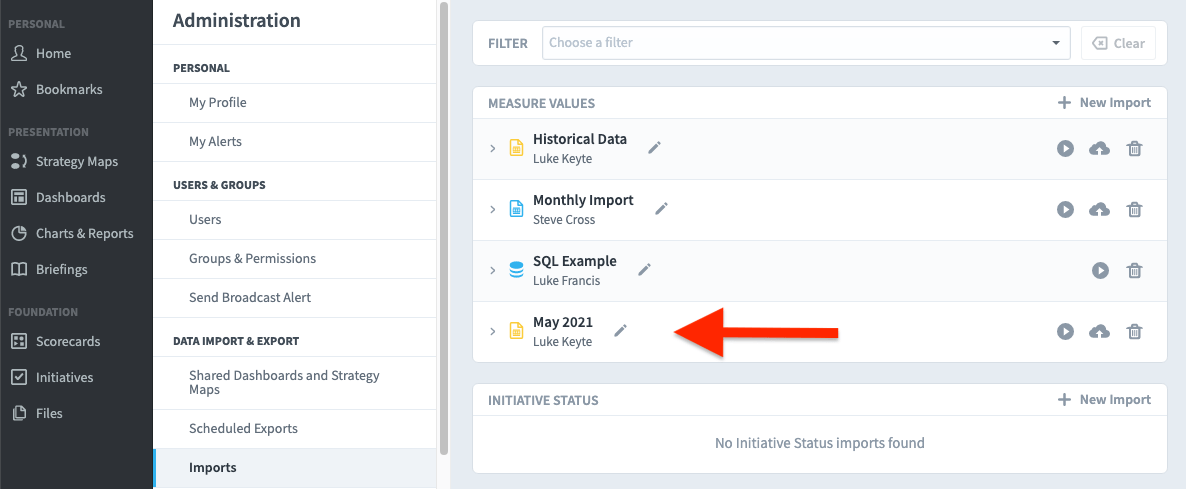
The import will now have appeared in the Import List and can be run or edited at any time.
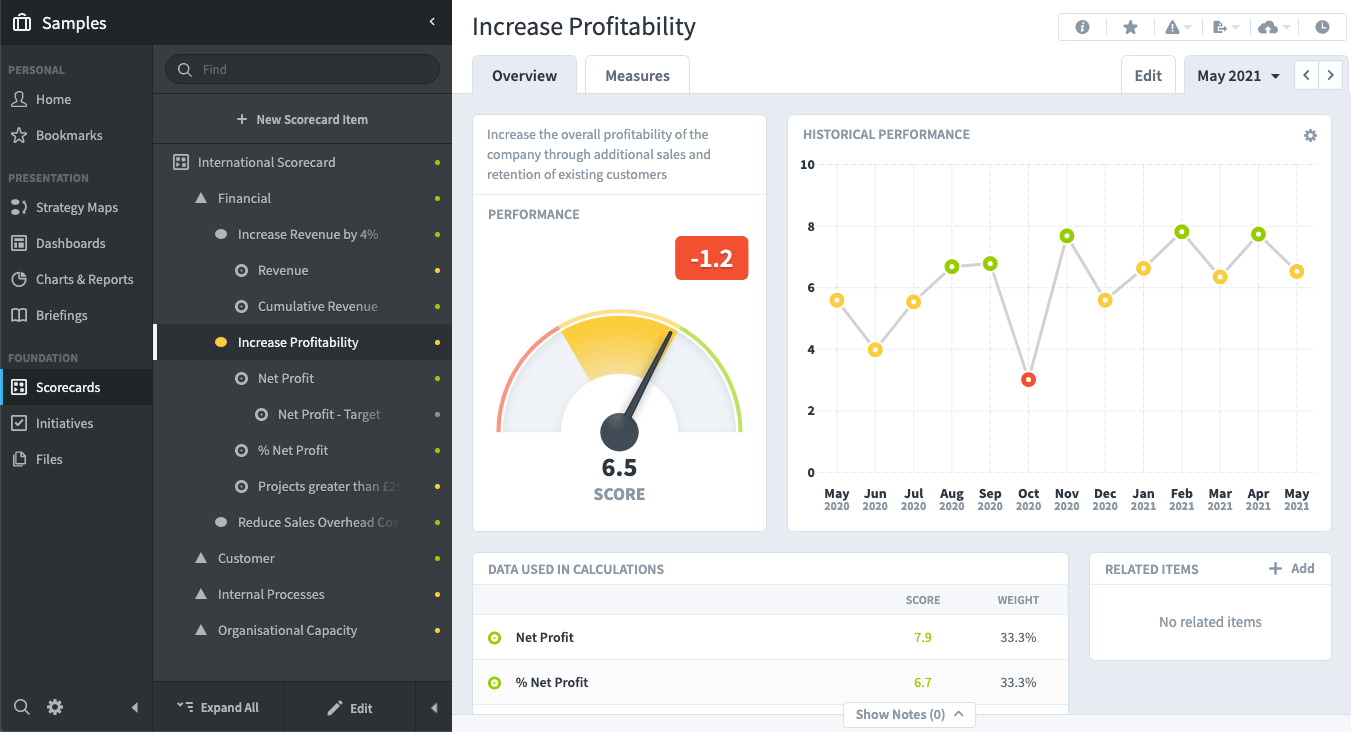
Clicking on Scorecards, you can see that the Measures have been updated with data for the specific date.
