The application is Group based. When a user signs in they are recognised as a User within a Group Type. The Group Type determines the permissions for a user.
There are three Group Types:
- Power Users – A power user can do anything
- Update Users – An Update user can own objectives and metrics, update actual values, write notes, set alerts and create tasks
- Viewers – A viewer can view the system
(A fourth group type, Interactive Users, also exists for legacy reasons. Please ignore for the purposes of this guide)
Within a Group Type, you can add as many Groups as you need. You can change the permissions of the Group based on the super-set of permissions allocated to the Group Type.
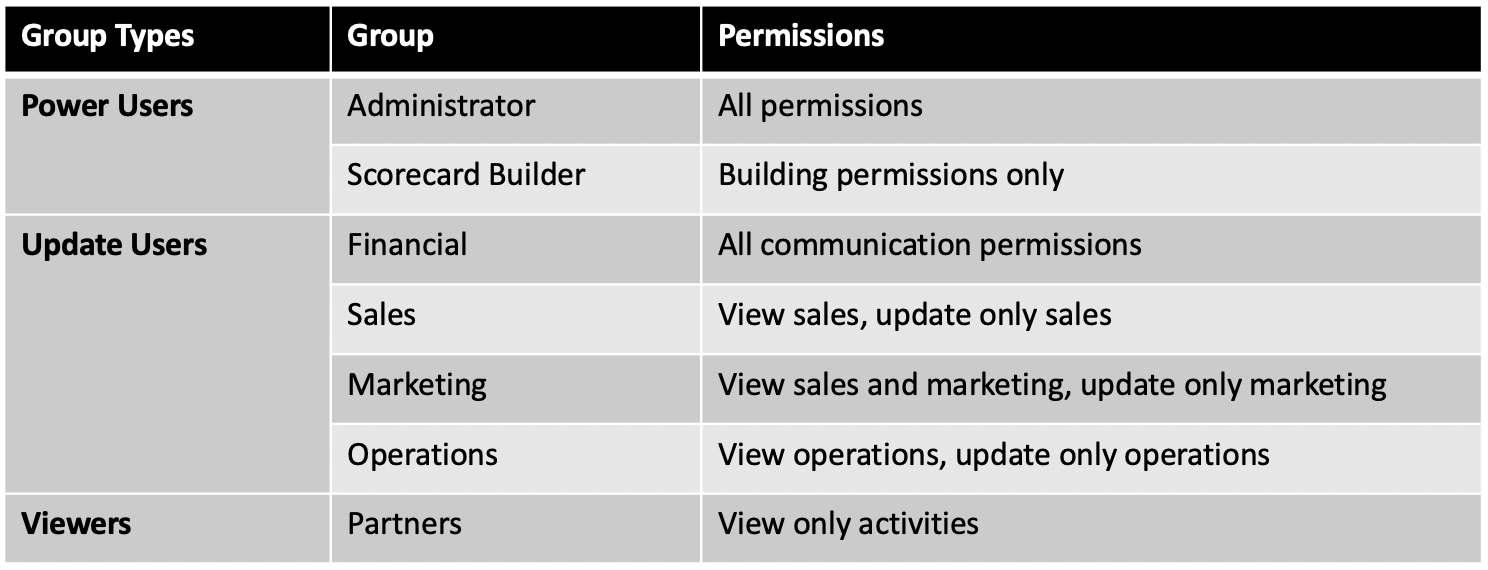
A typical configuration might look something like this:
To create a Group you need to be an Administrator. If you are an Administrator go to the Administration view.
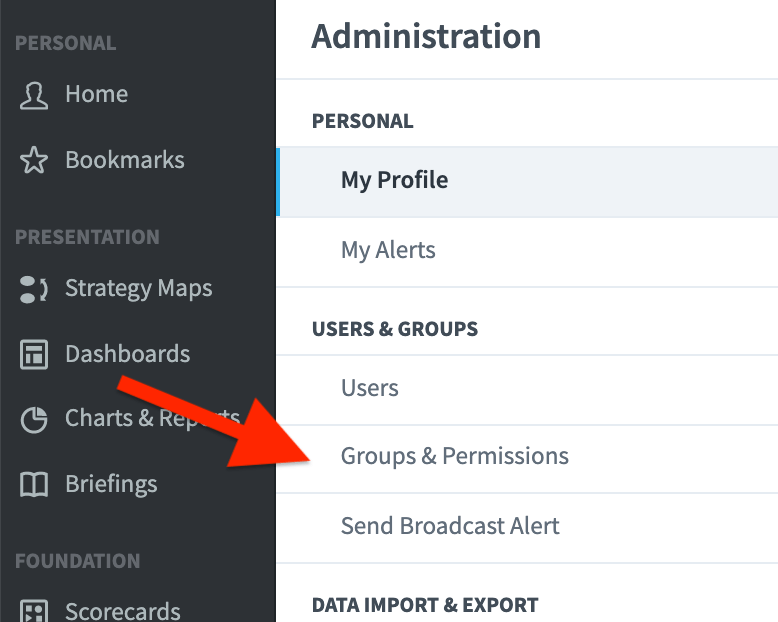
Click on the small cog at the bottom left-hand side of the screen to open the Administration view.

Click on Groups & Permissions in the Users & Groups section.
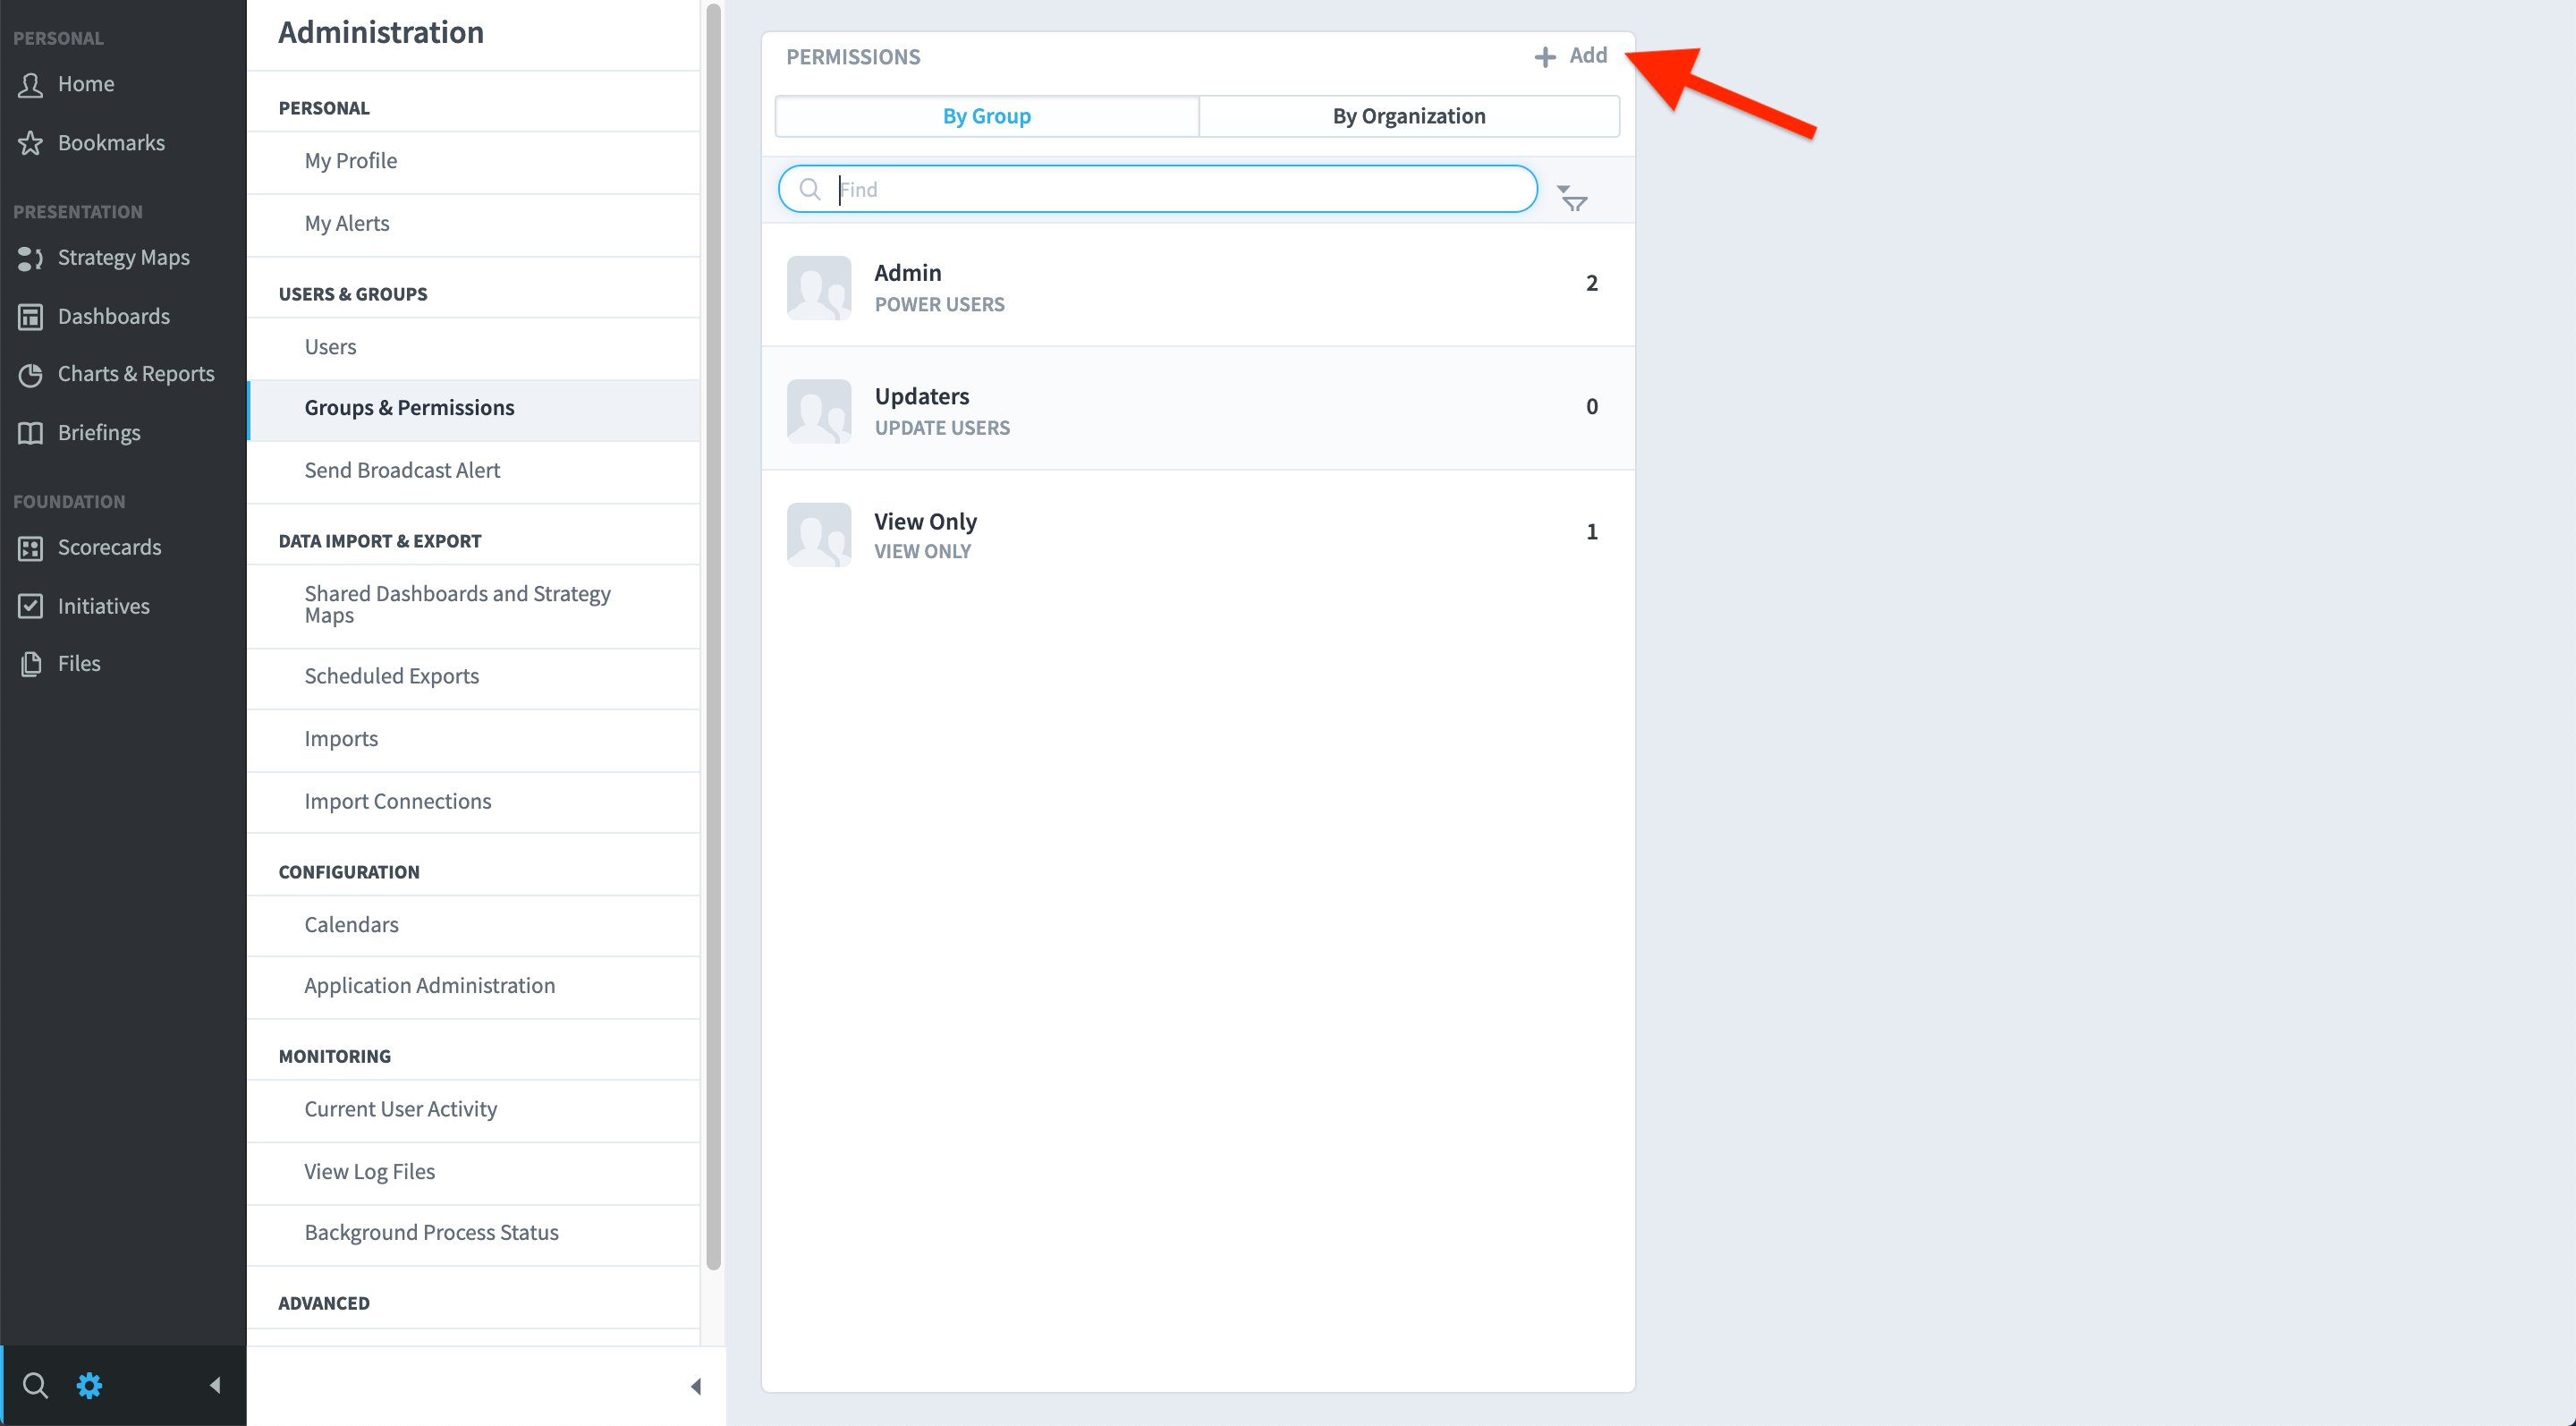
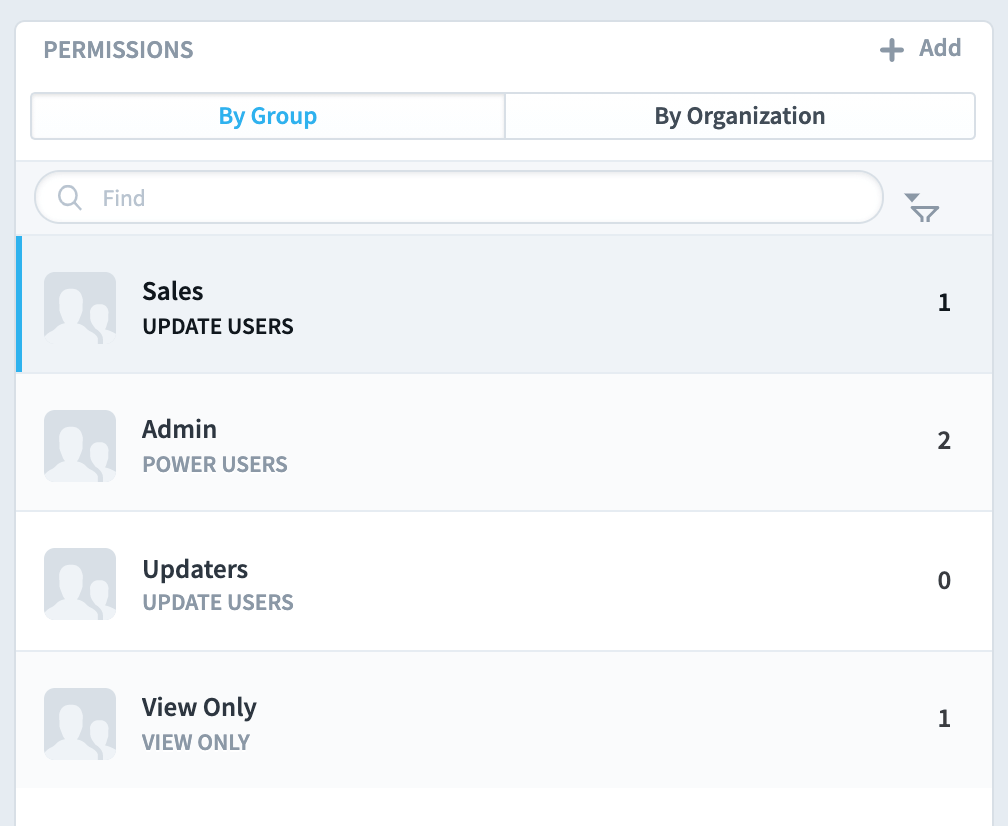
A screen similar to the one below will appear. Click on + Add to add a Group
The New Group panel will appear next to the Permissions panel.
Add the name of the new group (we have added Sales) and select the Group Type from the drop down list (we have selected Update Users).
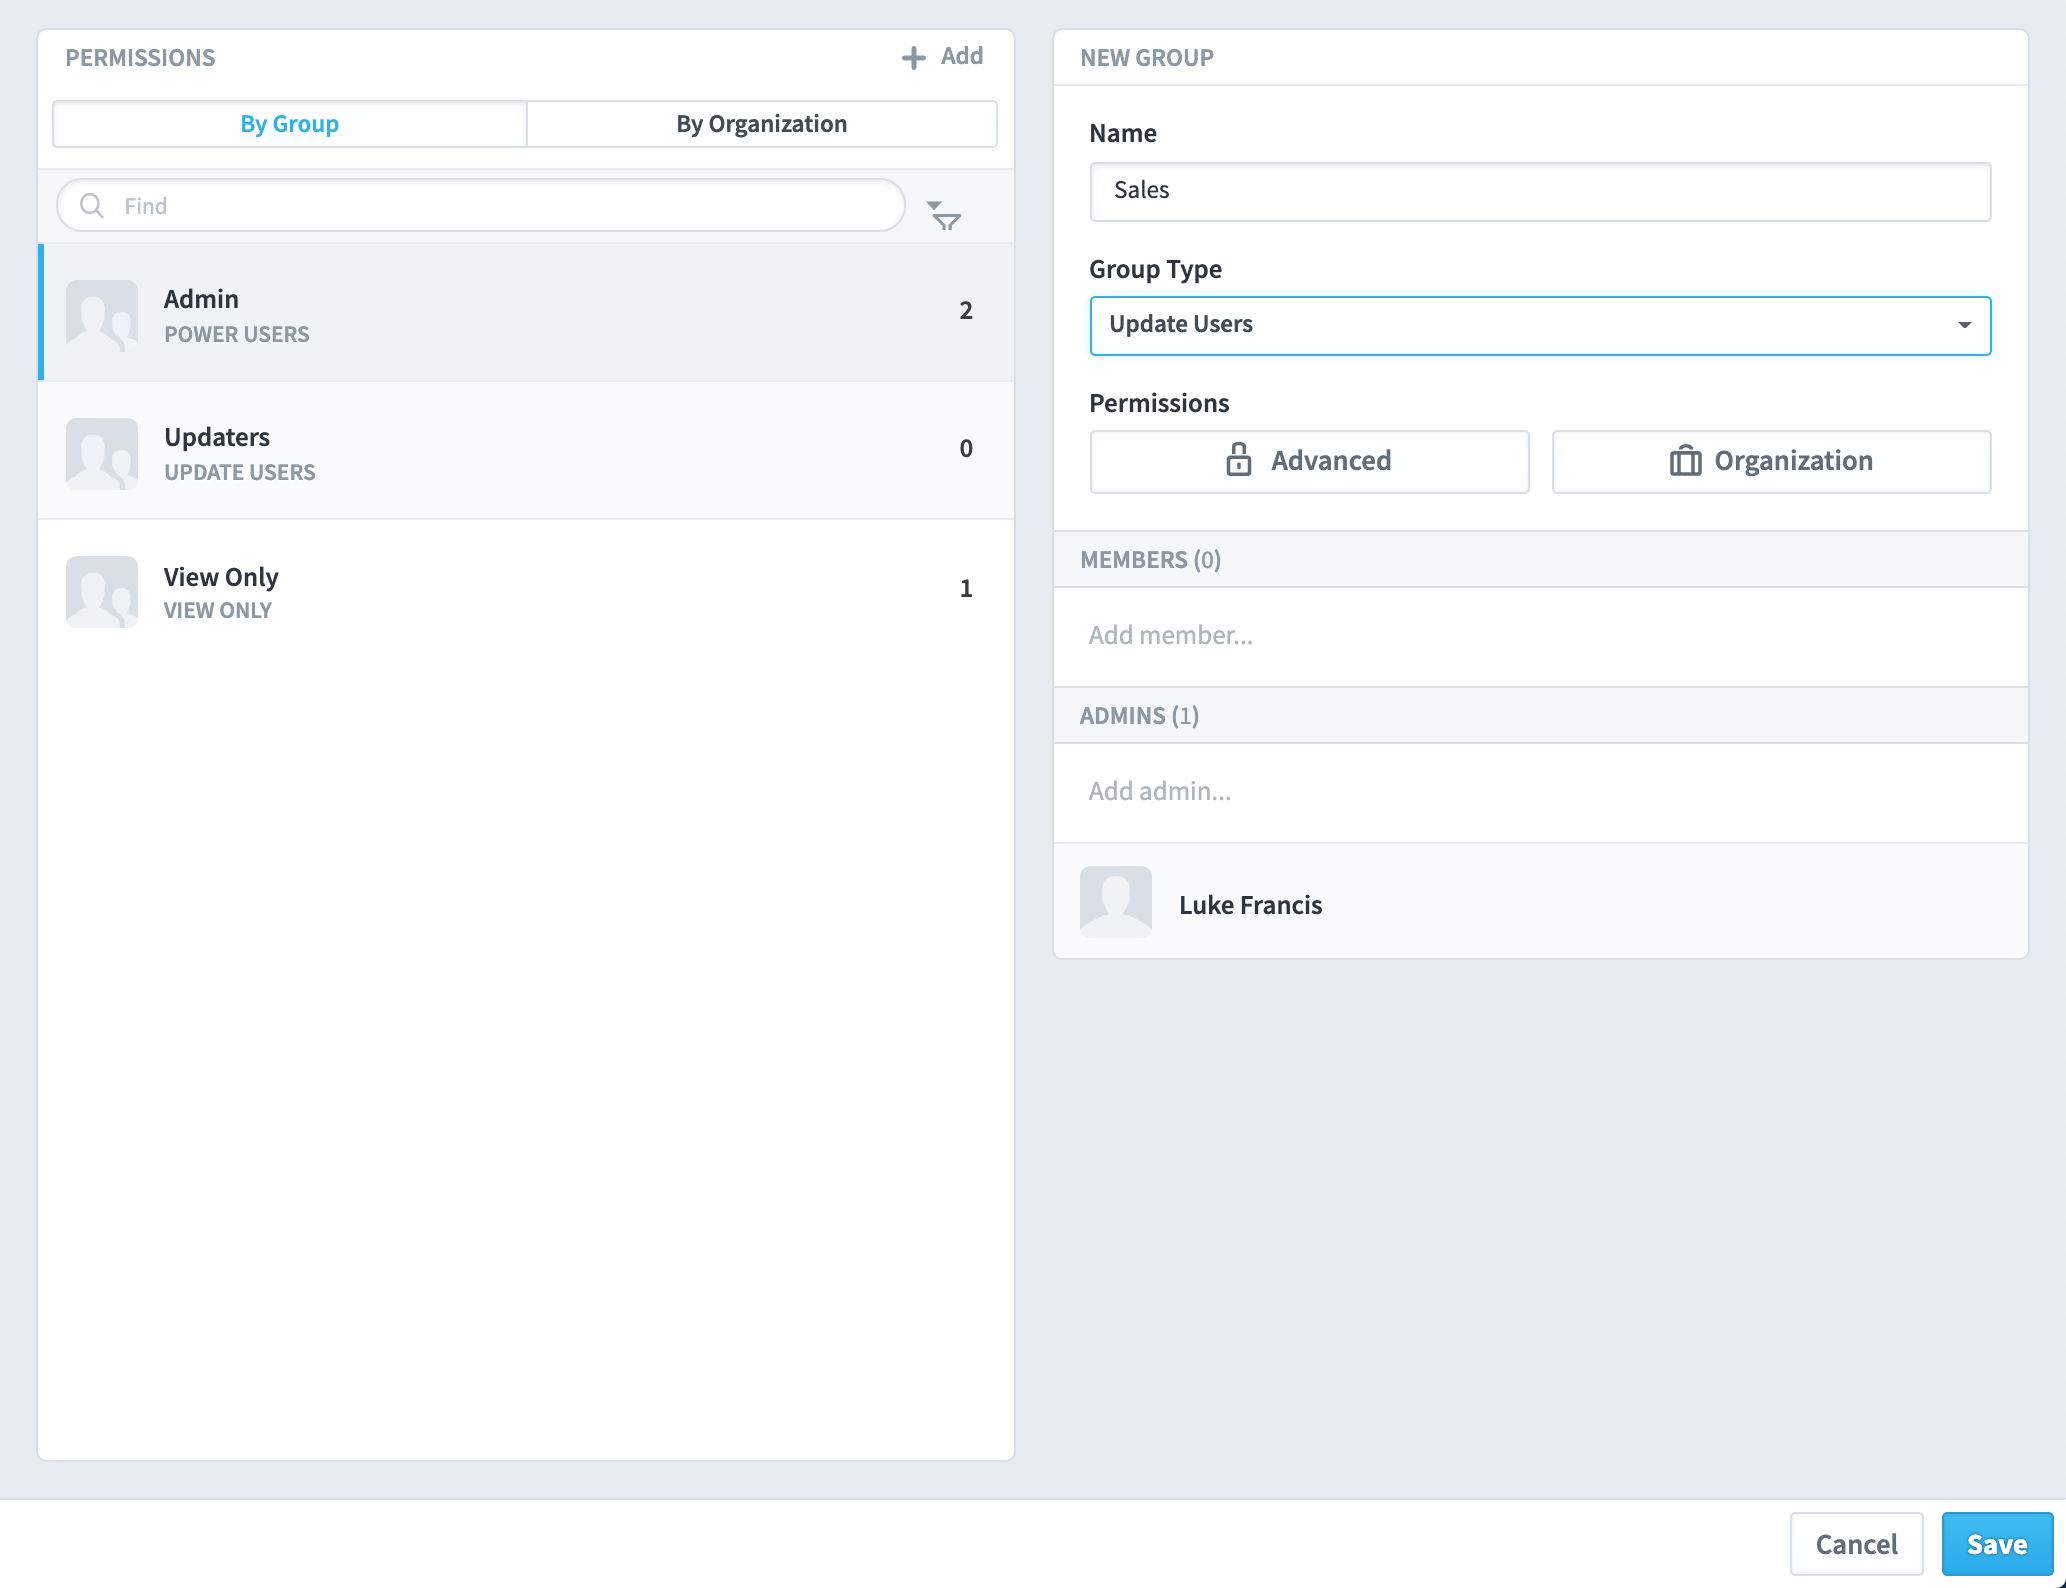
Important: click Save to save the group.
The new group will appear in the Permissions list (you may need to refresh the browser to see it).
In this case, Sales, has appeared in the list with a group type of Update User.
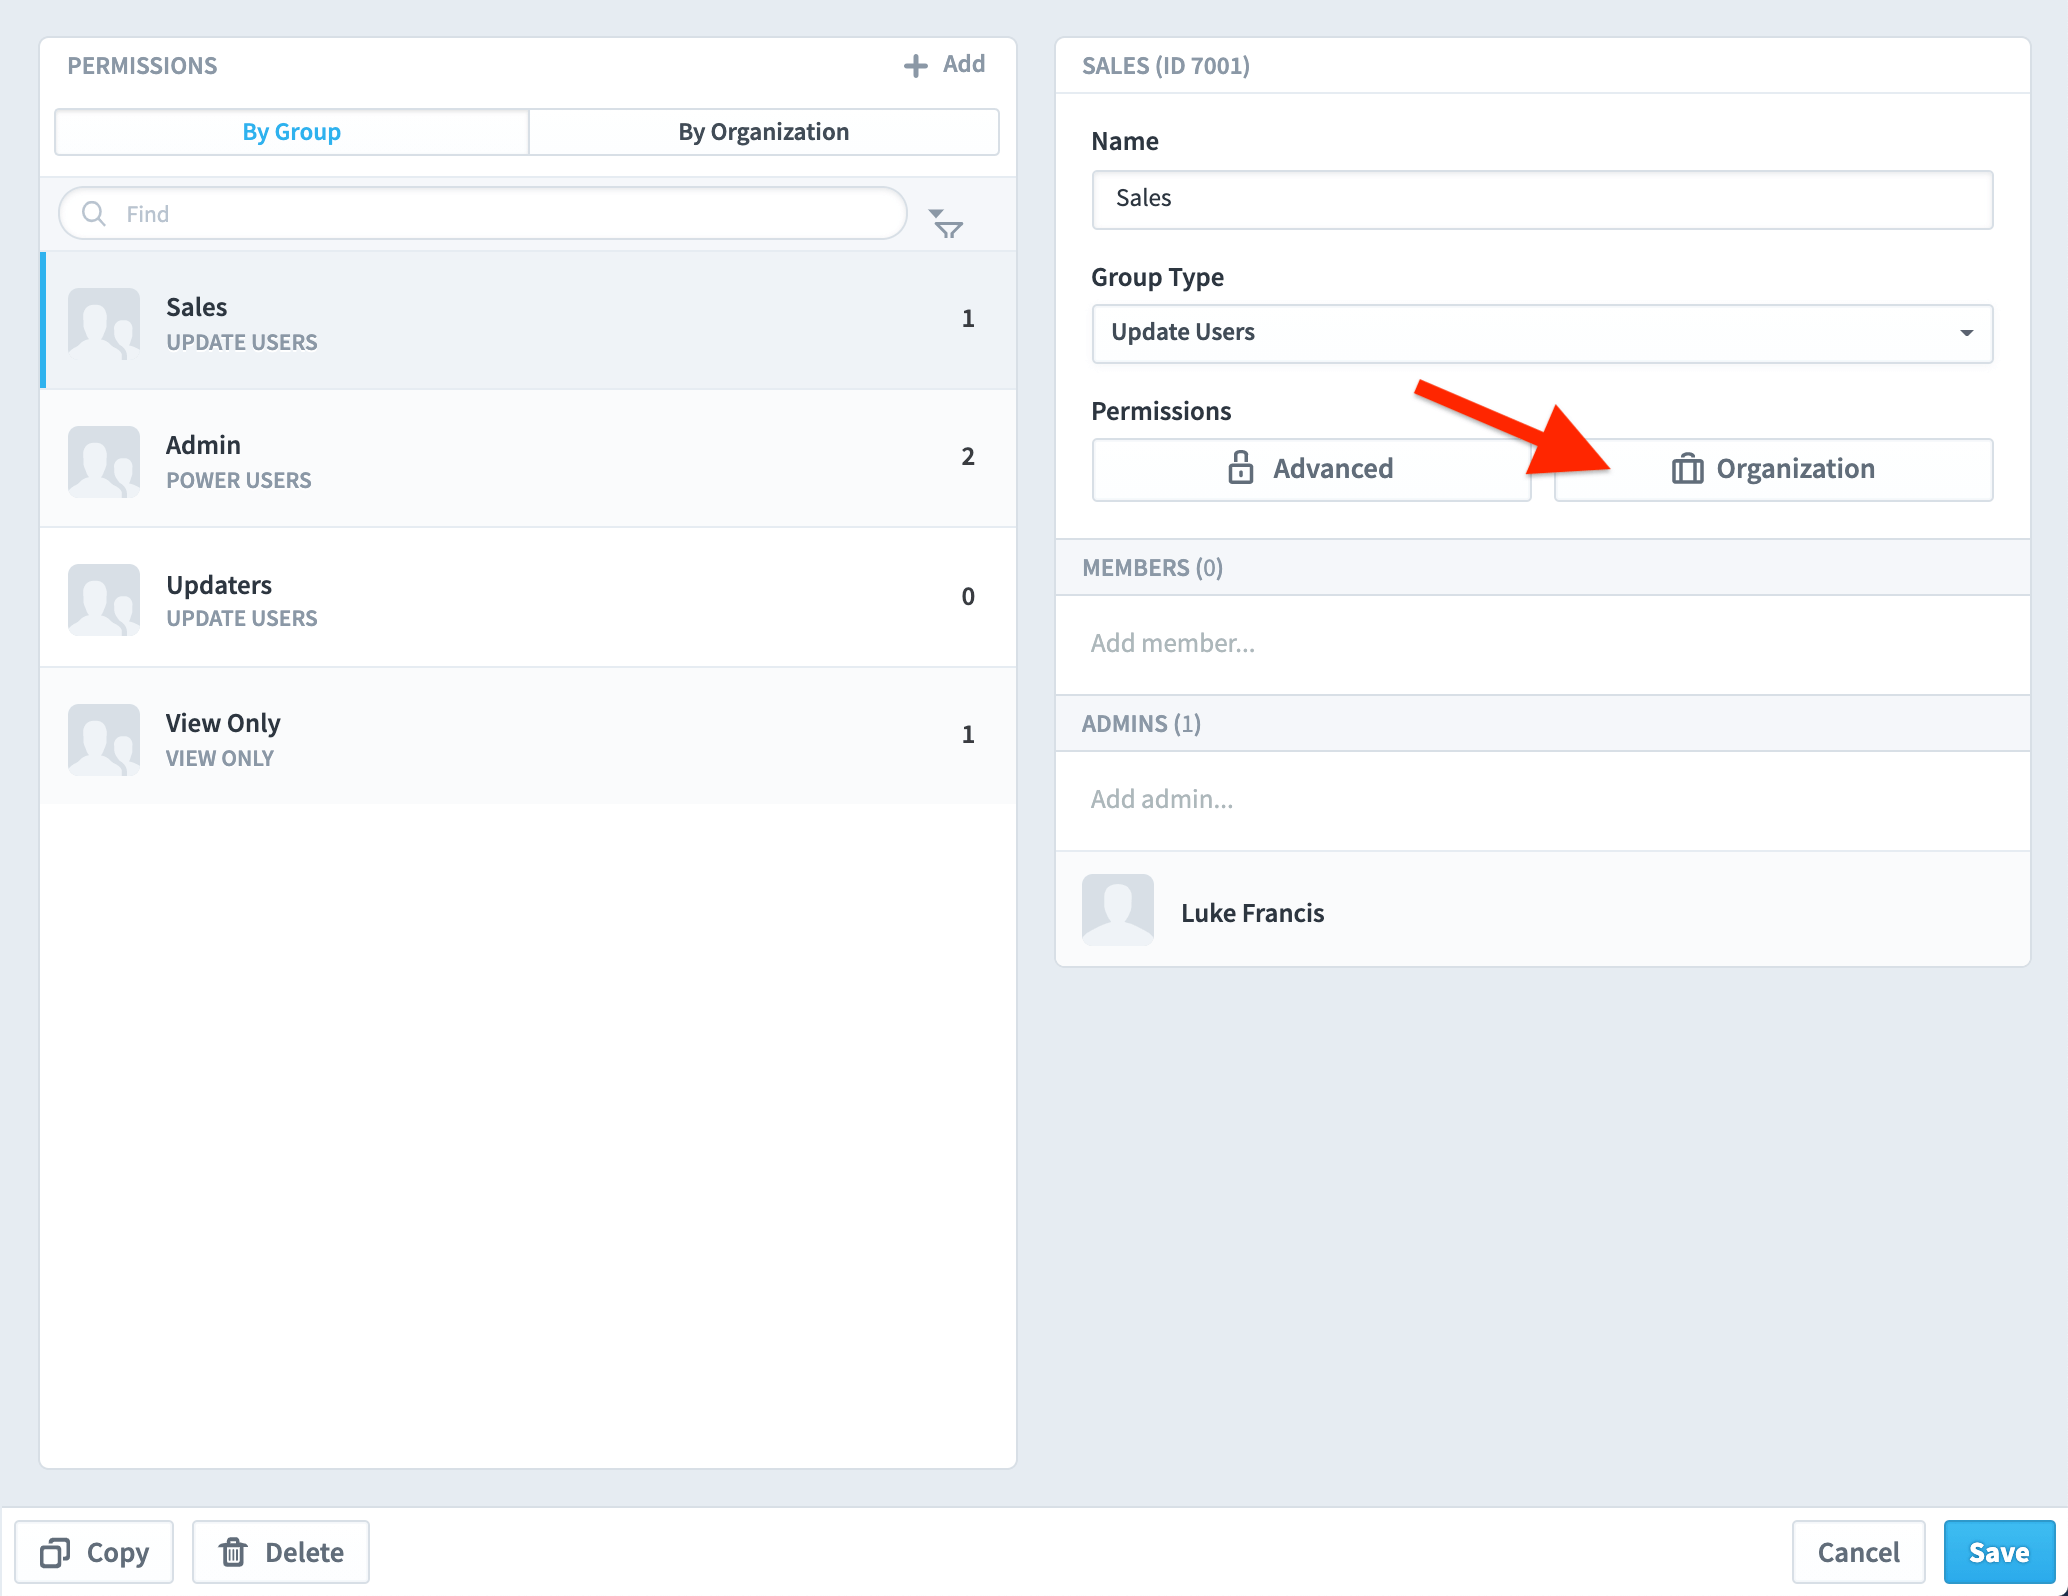
Click on Advanced under Permissions in the right-hand panel to open the Permissions dialogue.
The Permissions dialogue box will appear. By default, View All Organizations is selected. This is important. By default, everyone can see everything in the system. That is, they can view all of the organisations you have created in the Organisation drop-down list.
To restrict access a positive action or actions need to be taken.
The following dialogue box is for Update Users in the Sales Group.
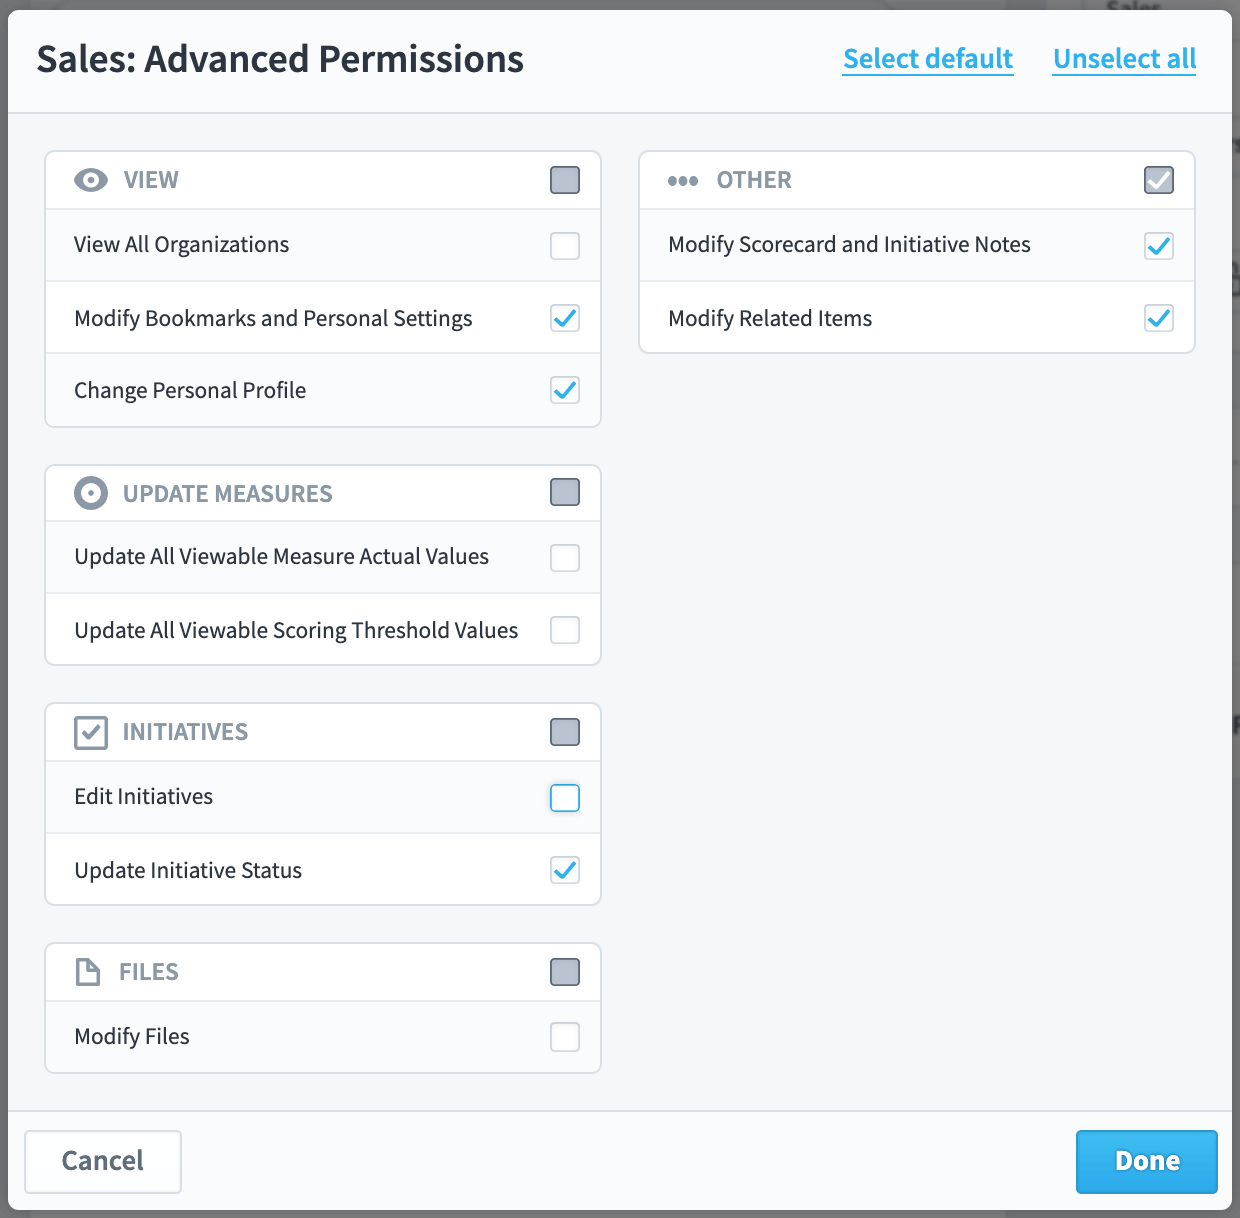
To restrict access, click on the checkboxes and remove the ticks. In this example we have un-checked View All Organizations, Edit Initiatives and Modify Files, and have therefore severely restricted access for the Sales group. Click Done and Save.
The Sales group has now been denied access to view all Organizations. To allow the Sales group to see Scorecards, Dashboards, Initiatives etc, in the Sales Organization, click on Organization next to the Advanced button.
The Sales: Organization Permissions dialogue will appear together with the Organization Tree. Highlight Sales on the list.
Note: Sales must have previously been added as an Organization (see Adding an Organization)
The Organization will appear in the list to the right. Click on the blue Done button.
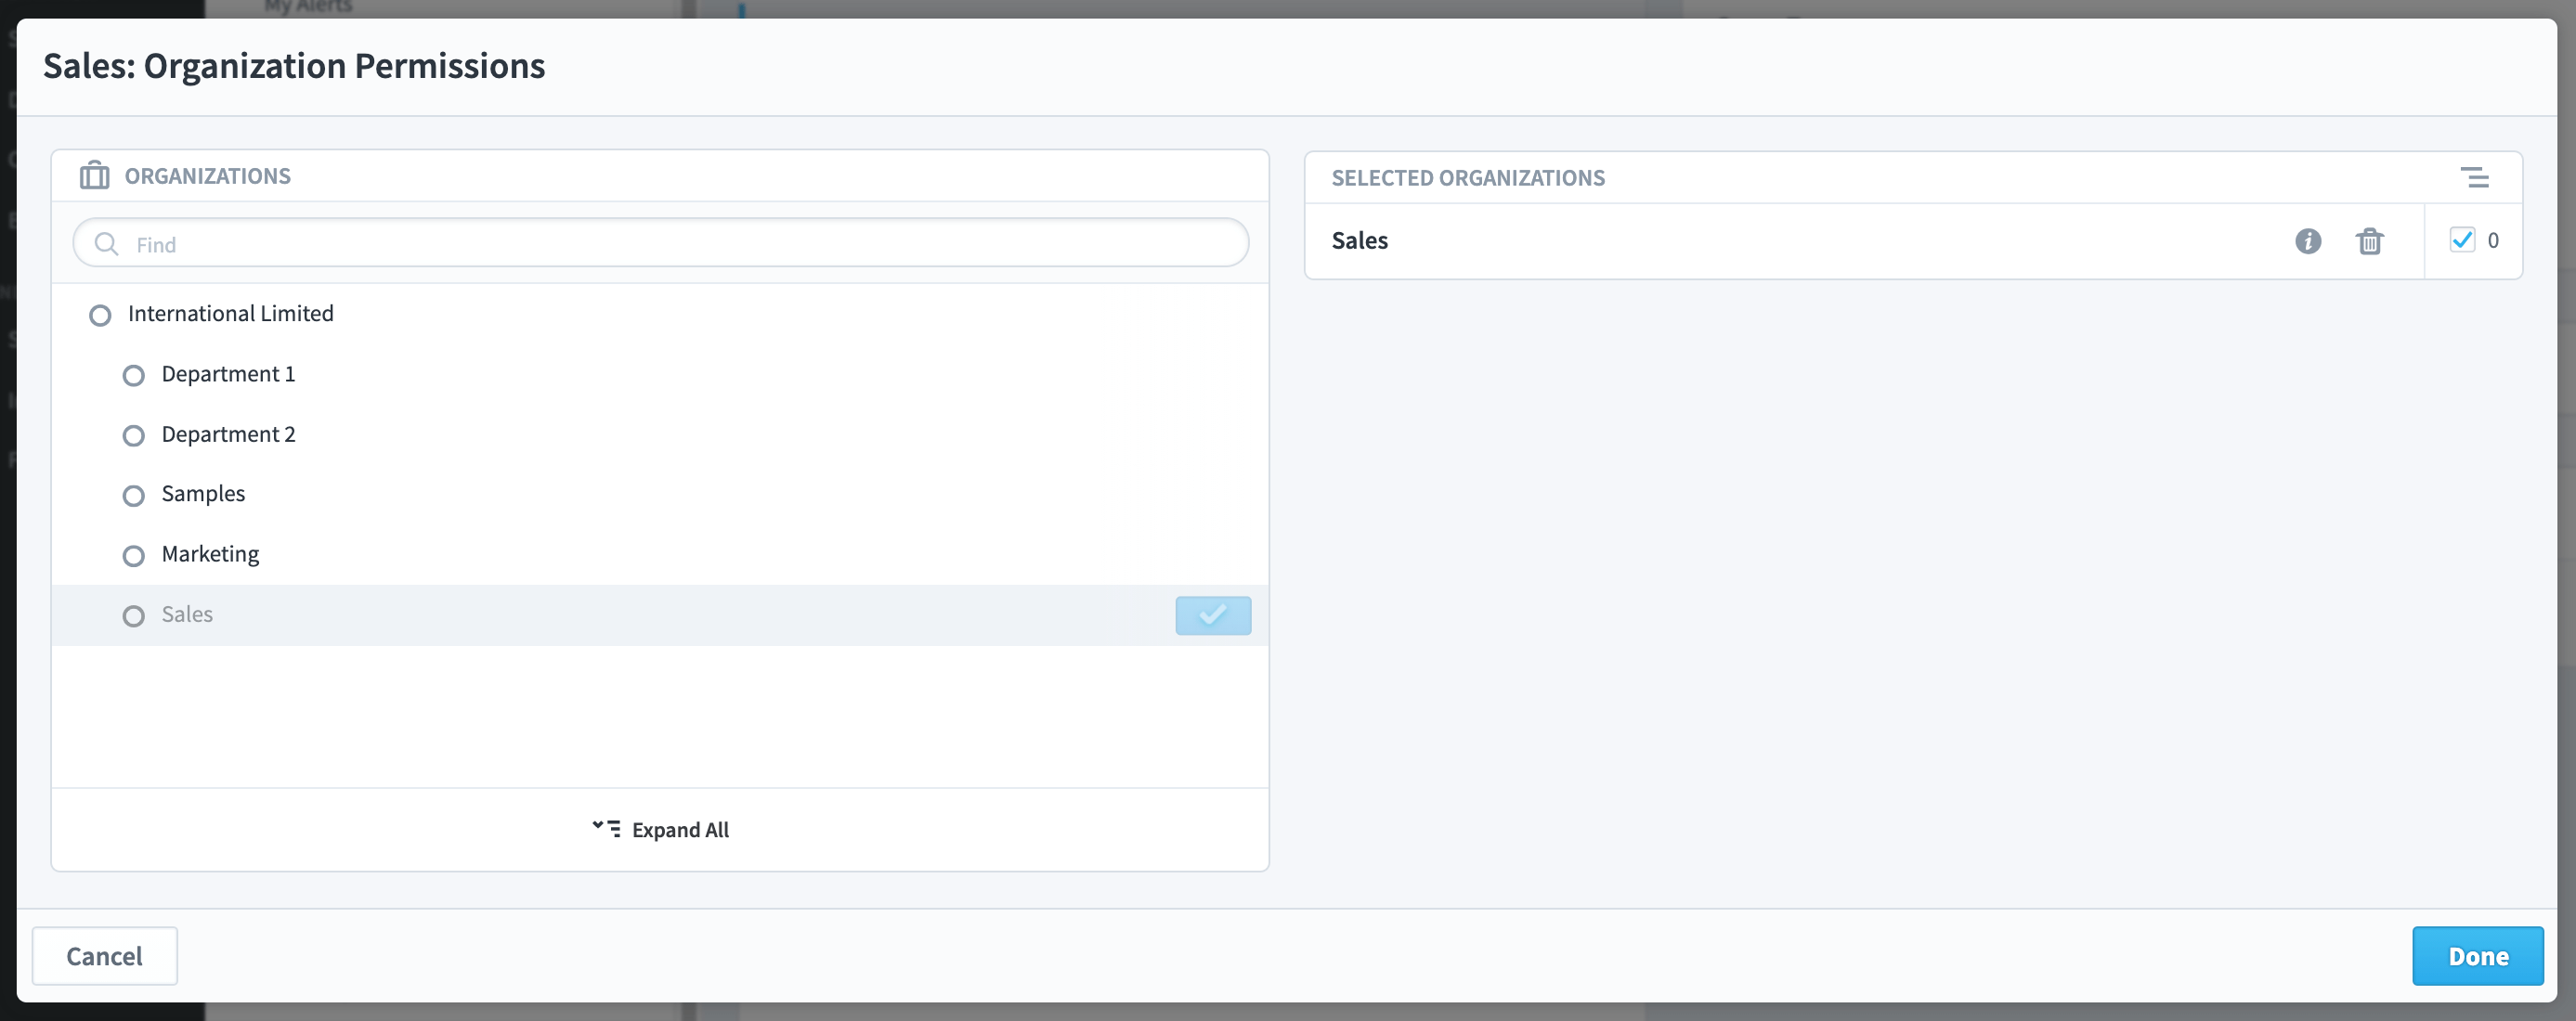
If you now add a User to the Sales Group their access will be restricted to the Sales Organization’s data. When they sign on, that is all they will see.
Important Note: If a User is added to multiple groups, they will inherit ALL of the access permissions defined. To restrict access, you must ensure Users are assigned to the appropriate group(s).
When adding a Group to the Power User group type, a different set of Permissions will be displayed (as will a much more restricted set if the Viewer group type is used). This is an example of the Power User permissions:
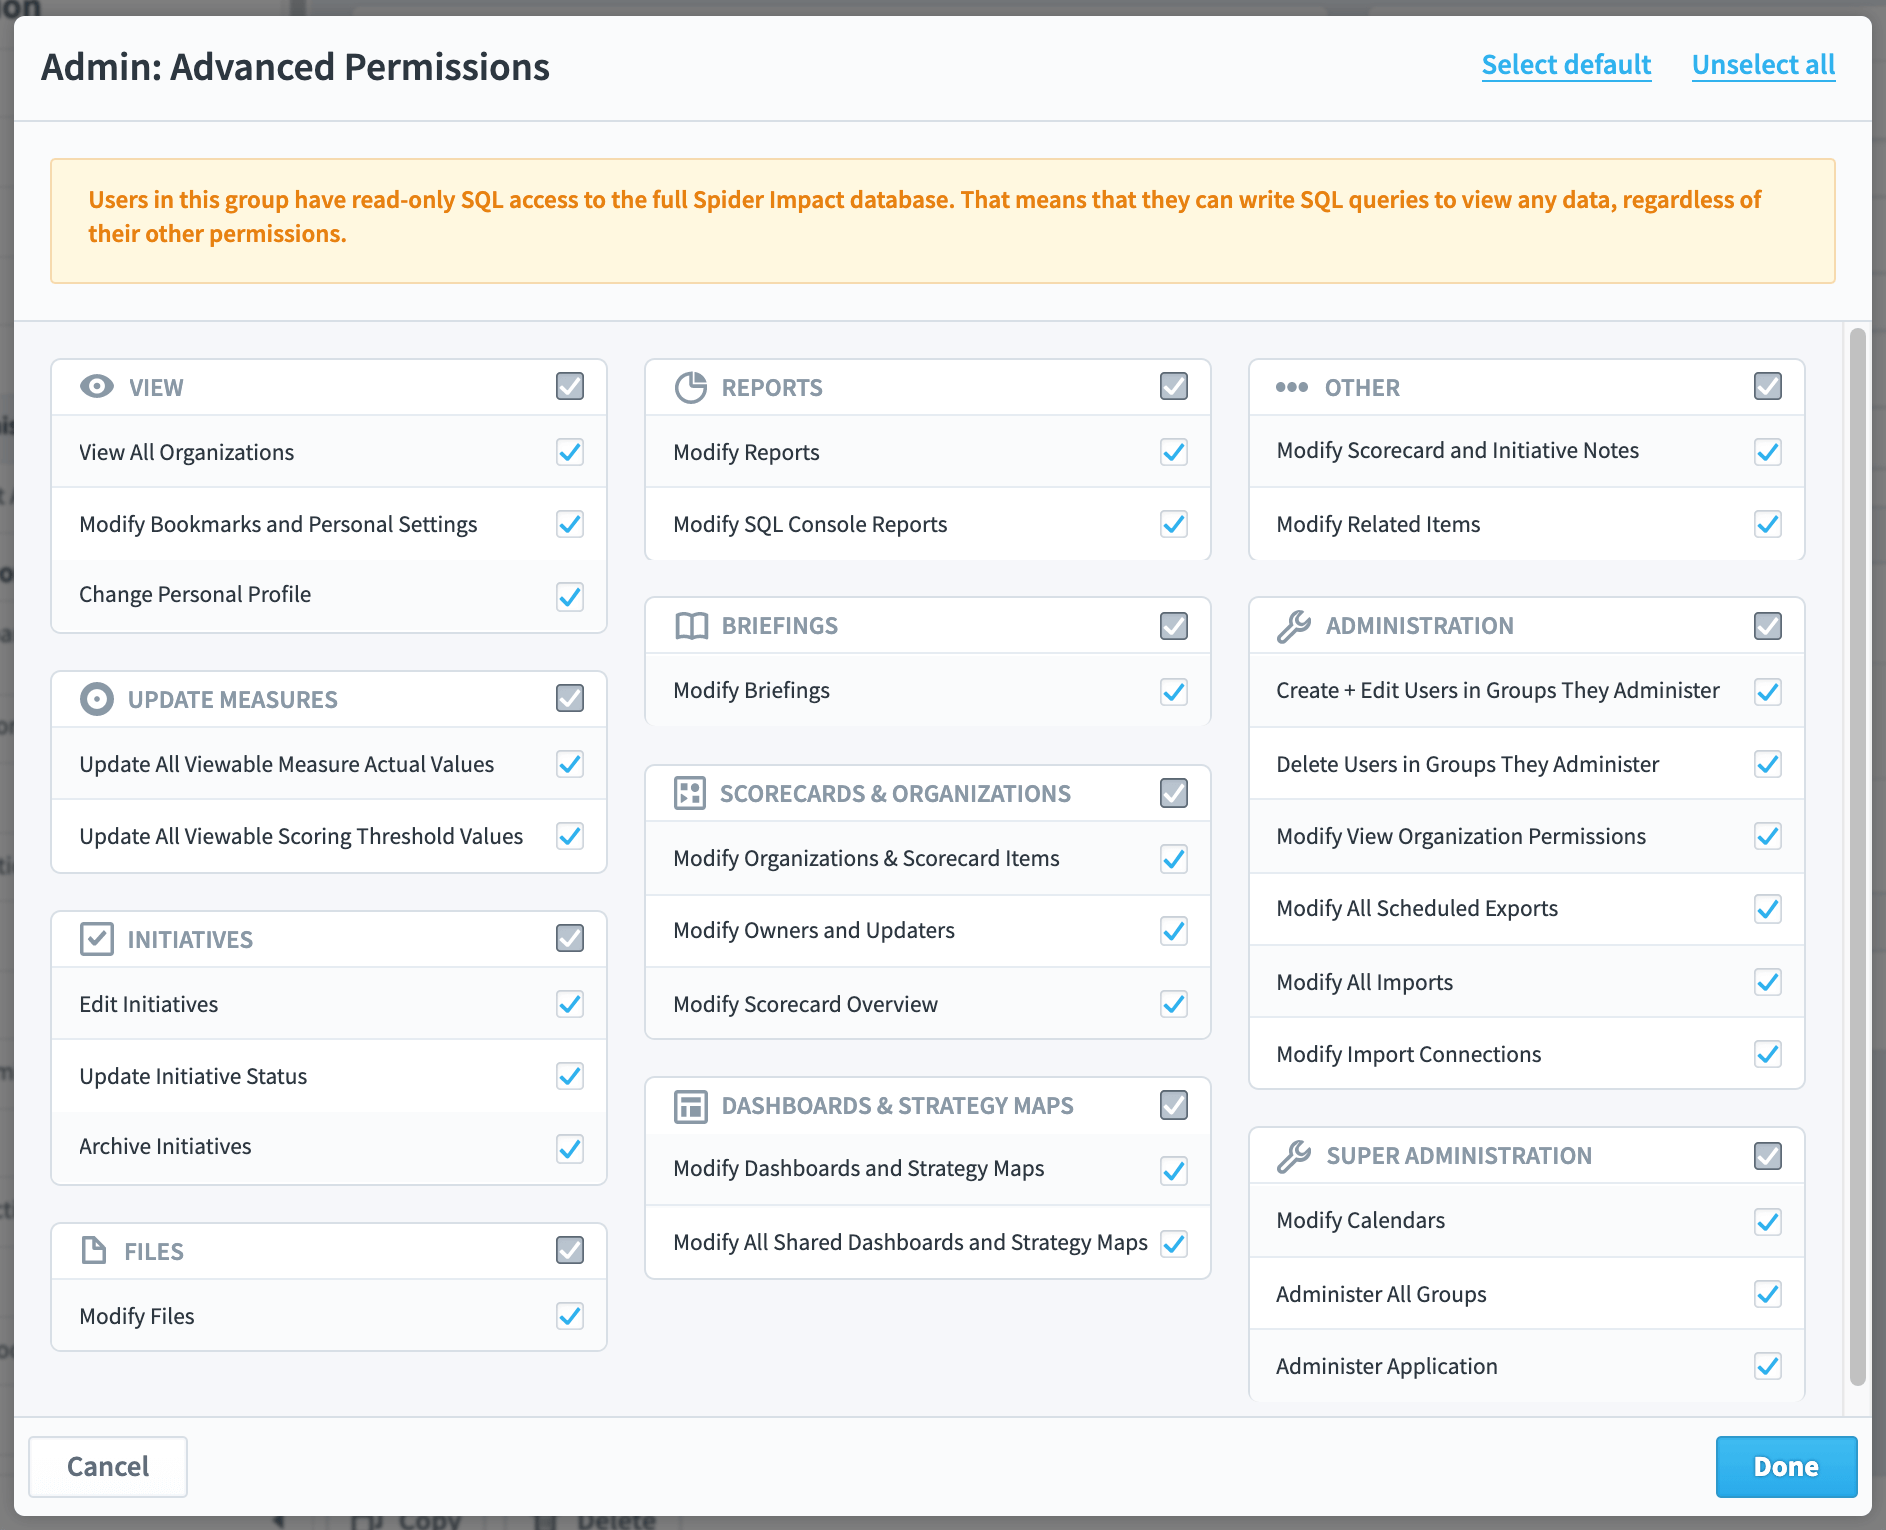
When adding Groups to the Power User group type, great care must be taken to ensure the appropriate level of permissions are granted, especially under the Administration and Super Administration sections.
