Importing data into Spider Impact can be achieved through the inbuilt import function. There are generally two steps that need to be undertaken:
- Define the connection to the data source
- Use the wizard to pull the data and map it to a scorecard
If you are importing data from a spreadsheet, then the import connection is already in place and you can skip step 1. Defining import connections is dealt with in the Defining Import Connections user guide. If you want to make a connection to a data source other than a spreadsheet or csv file, then refer to that guide.
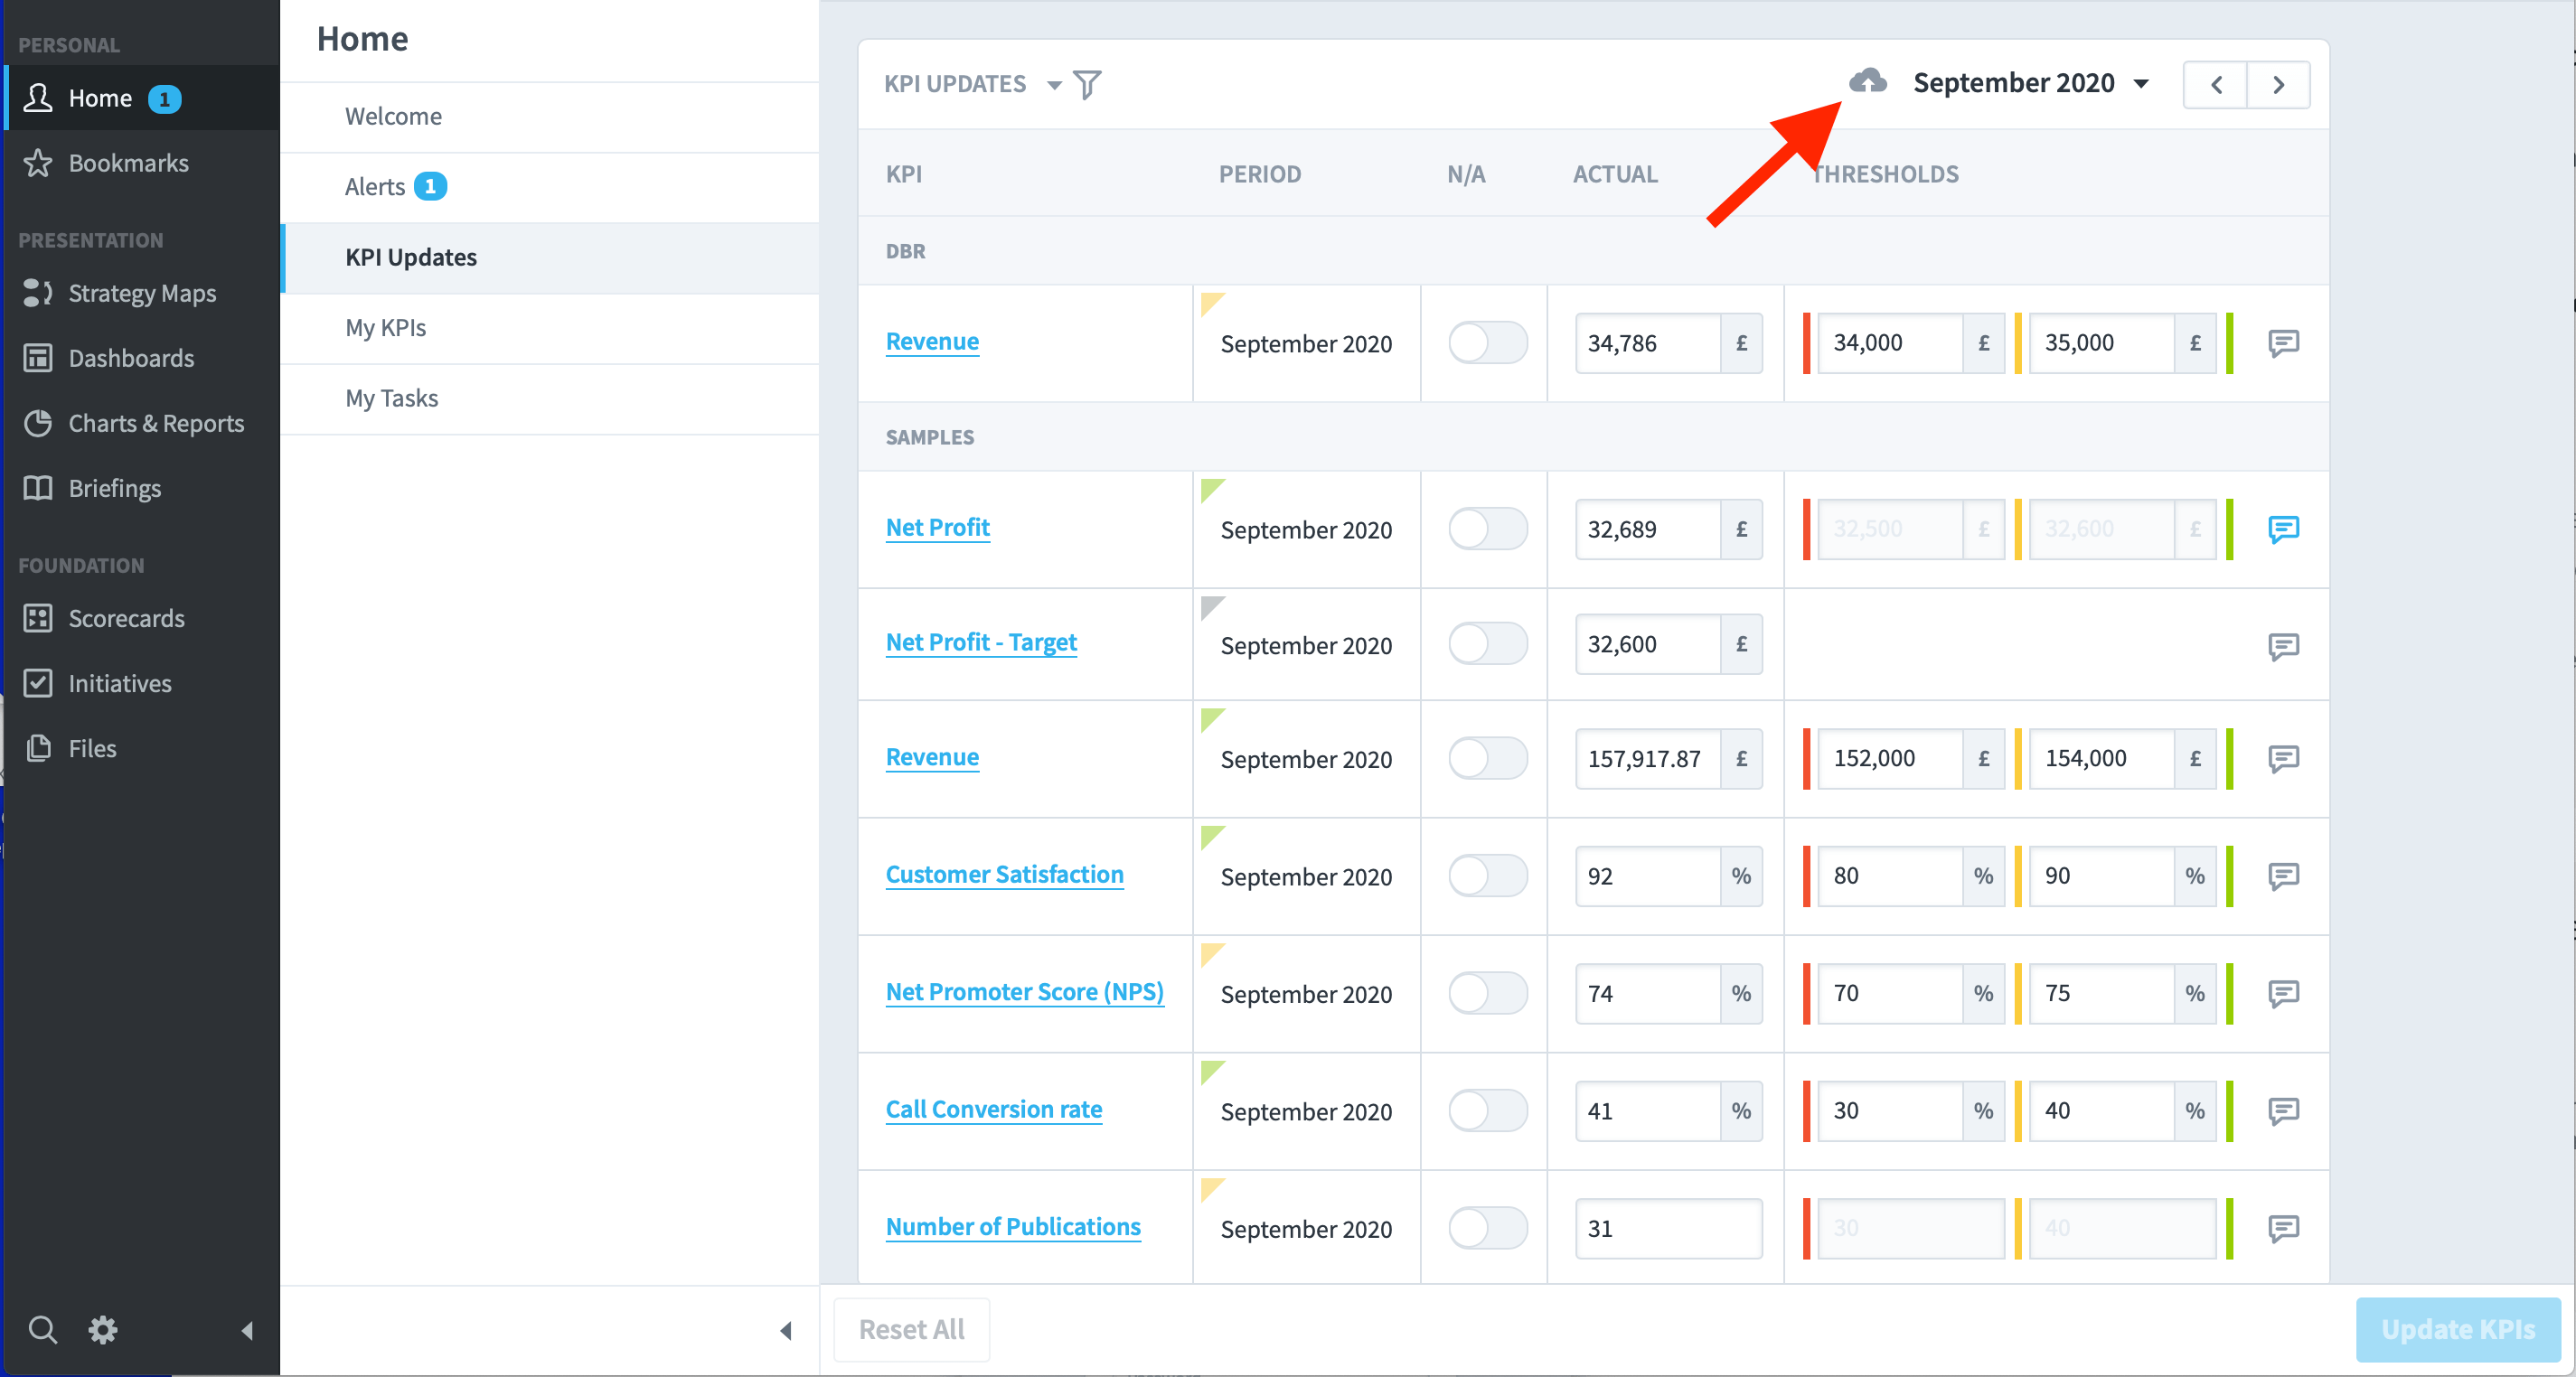
There are three places in the application where and import can take place. The first is from the My KPI Updates reached through the Welcome Screen. Log into the application and click on My KPI Updates, you will see the following screen:
The update icon is at the top next to the date selector.
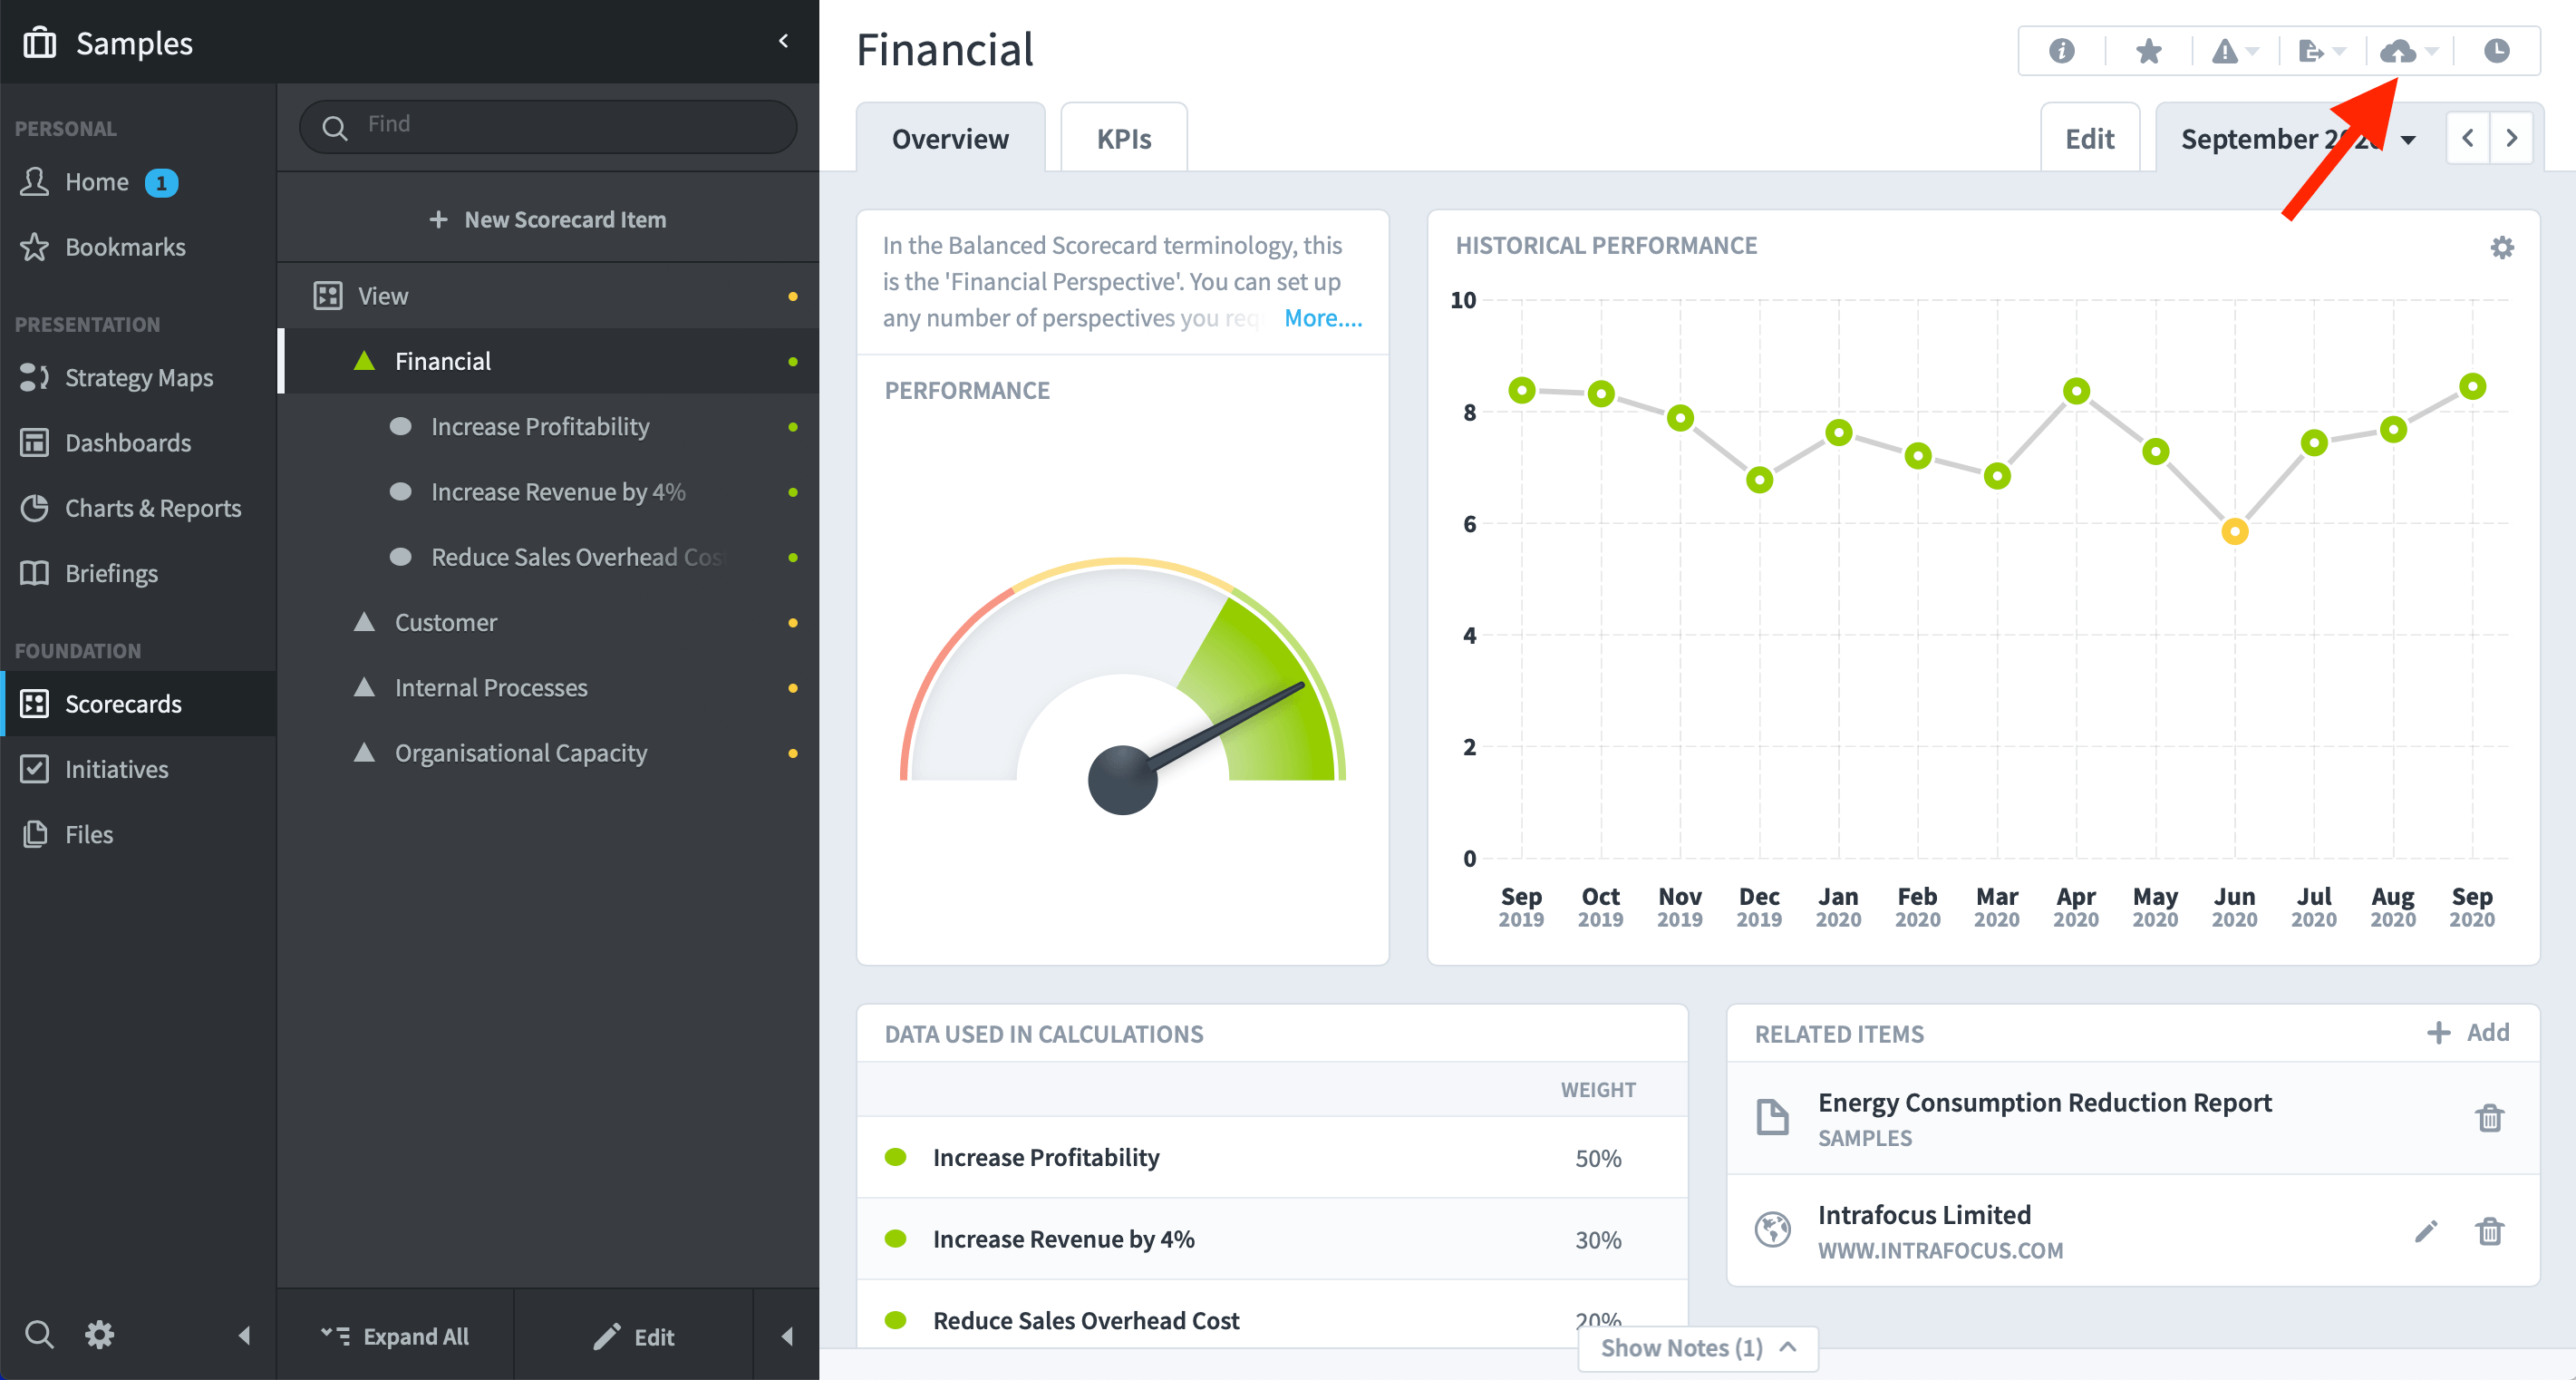
The second place an update can take place is from within a scorecard. Click on Scorecards in th main menu and go to any scorecard, the upload icon is in the toolbar at the top-right of the screen:
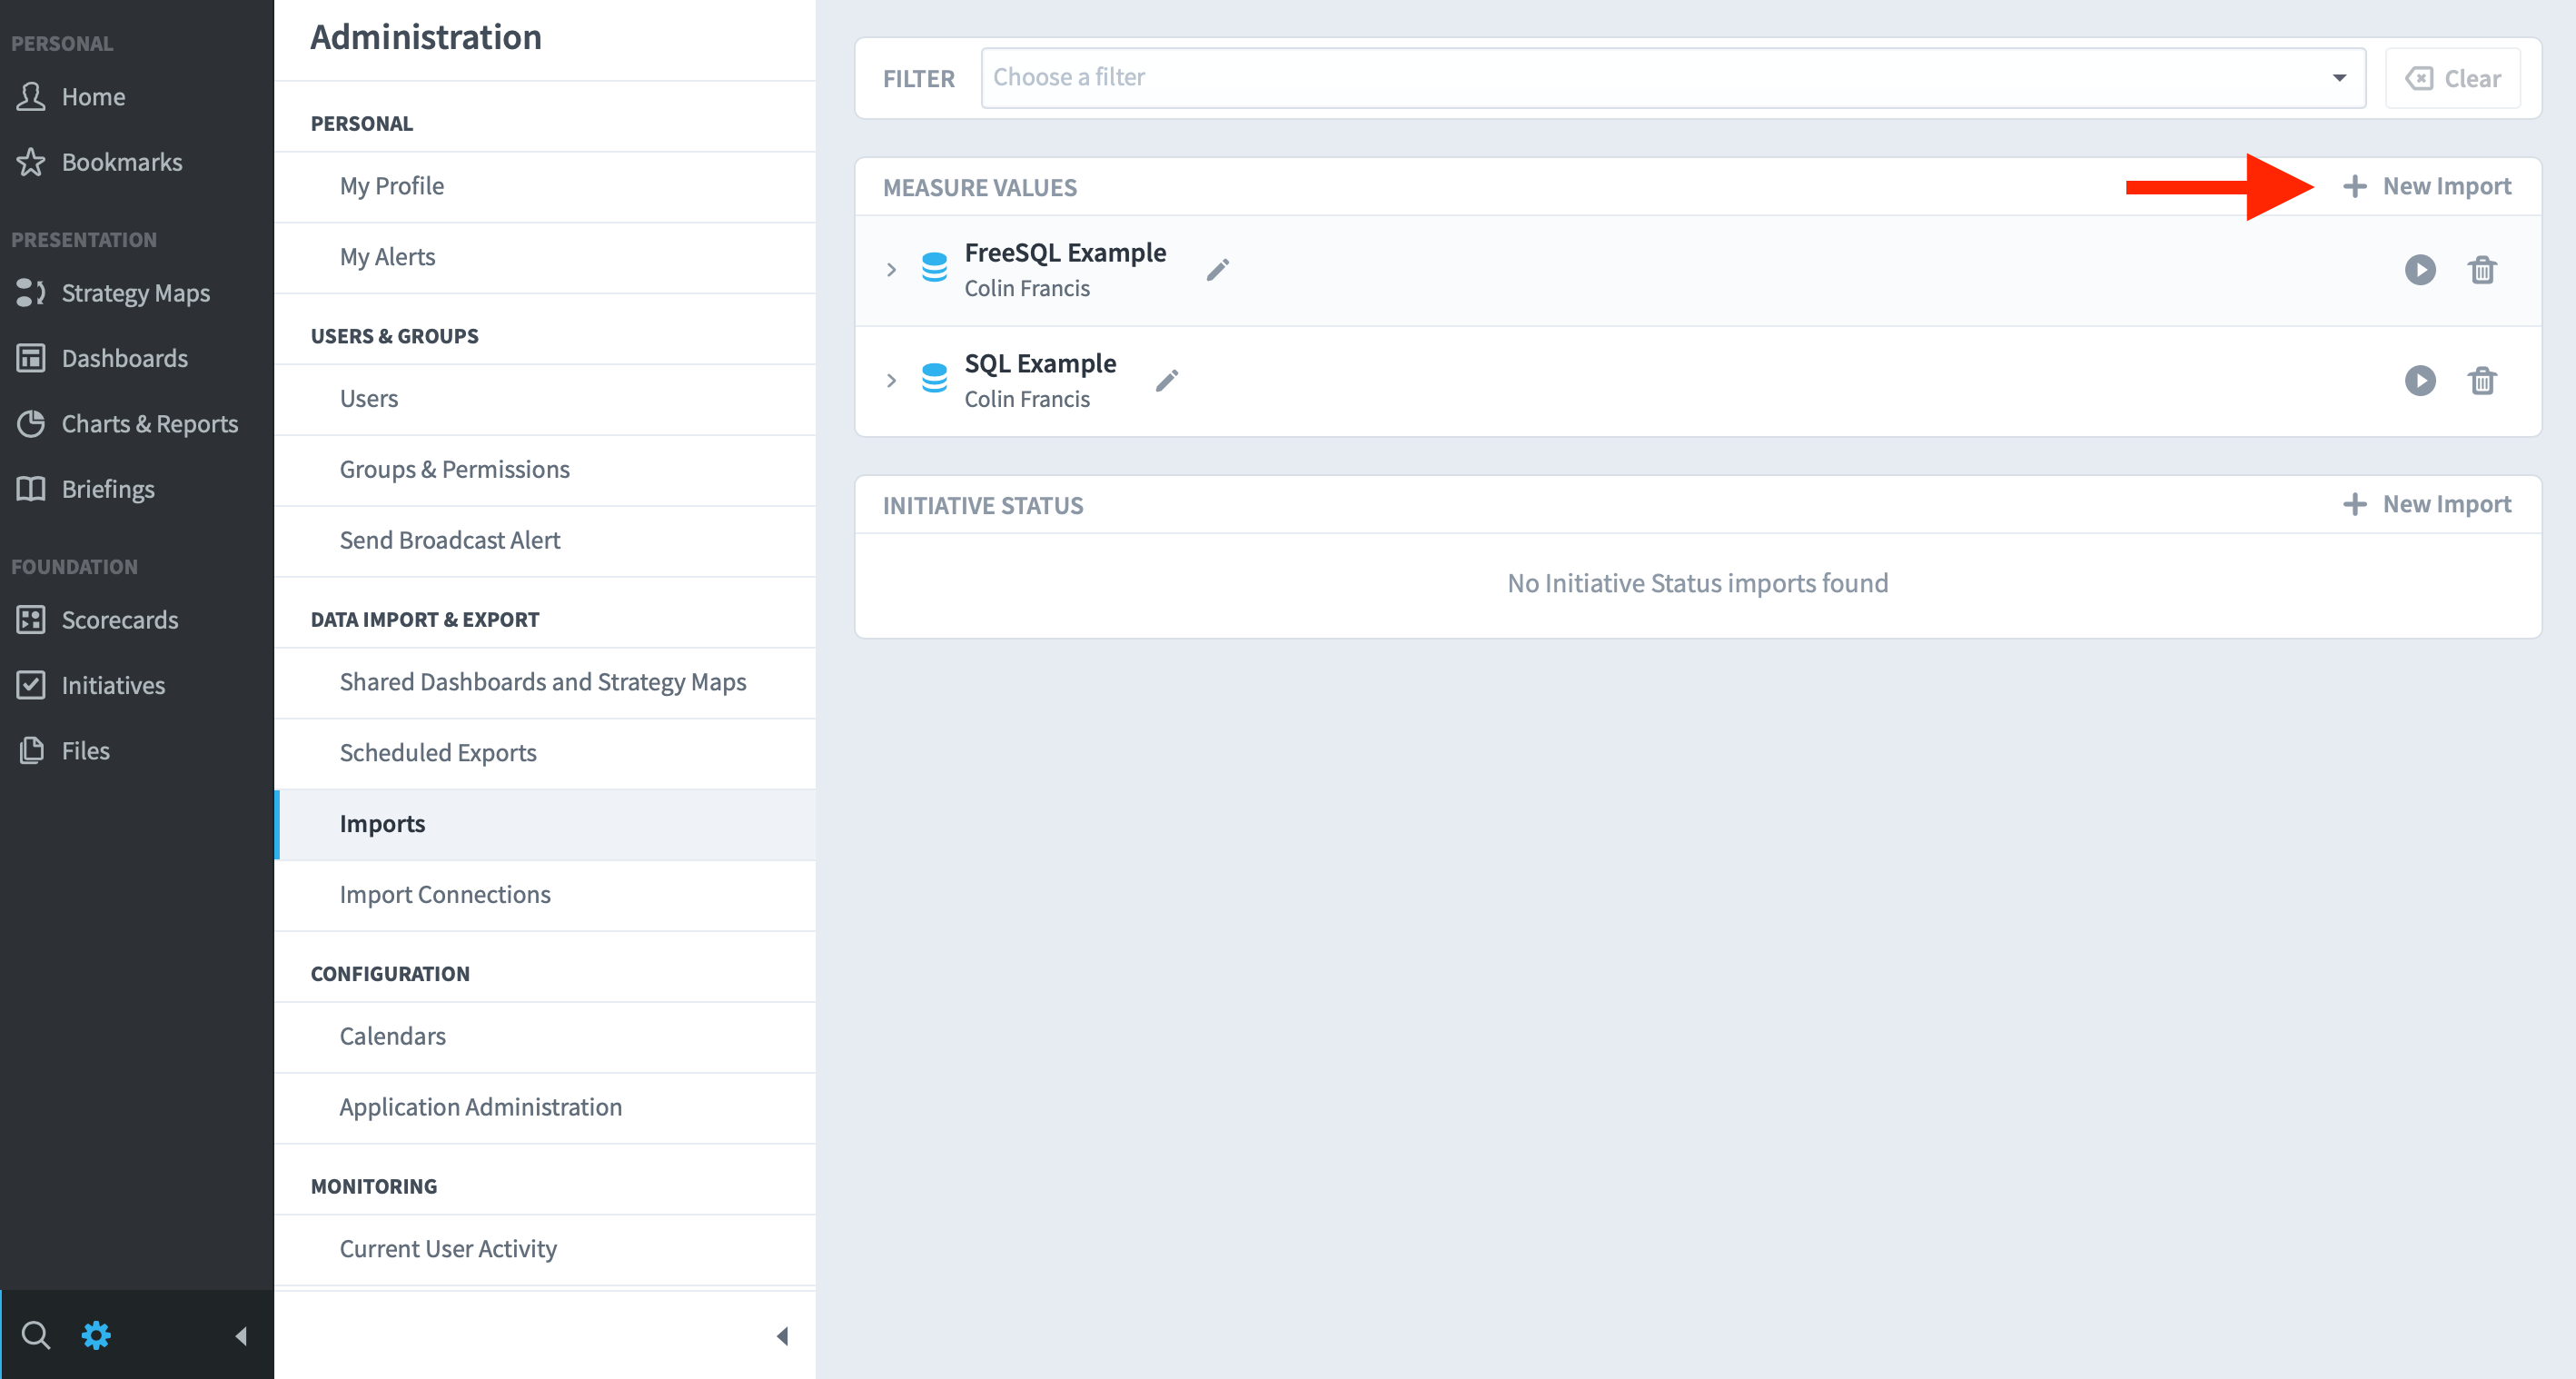
And finally, the third place the upload function can be found is in the Administration panel. Click on the small cog at the bottom-left of the screen to reach Administration. Click Imports. We will be working from this location to demonstrate how to import a spreadsheet and how to save the import to be used again and again. To start the import click on + New Import:
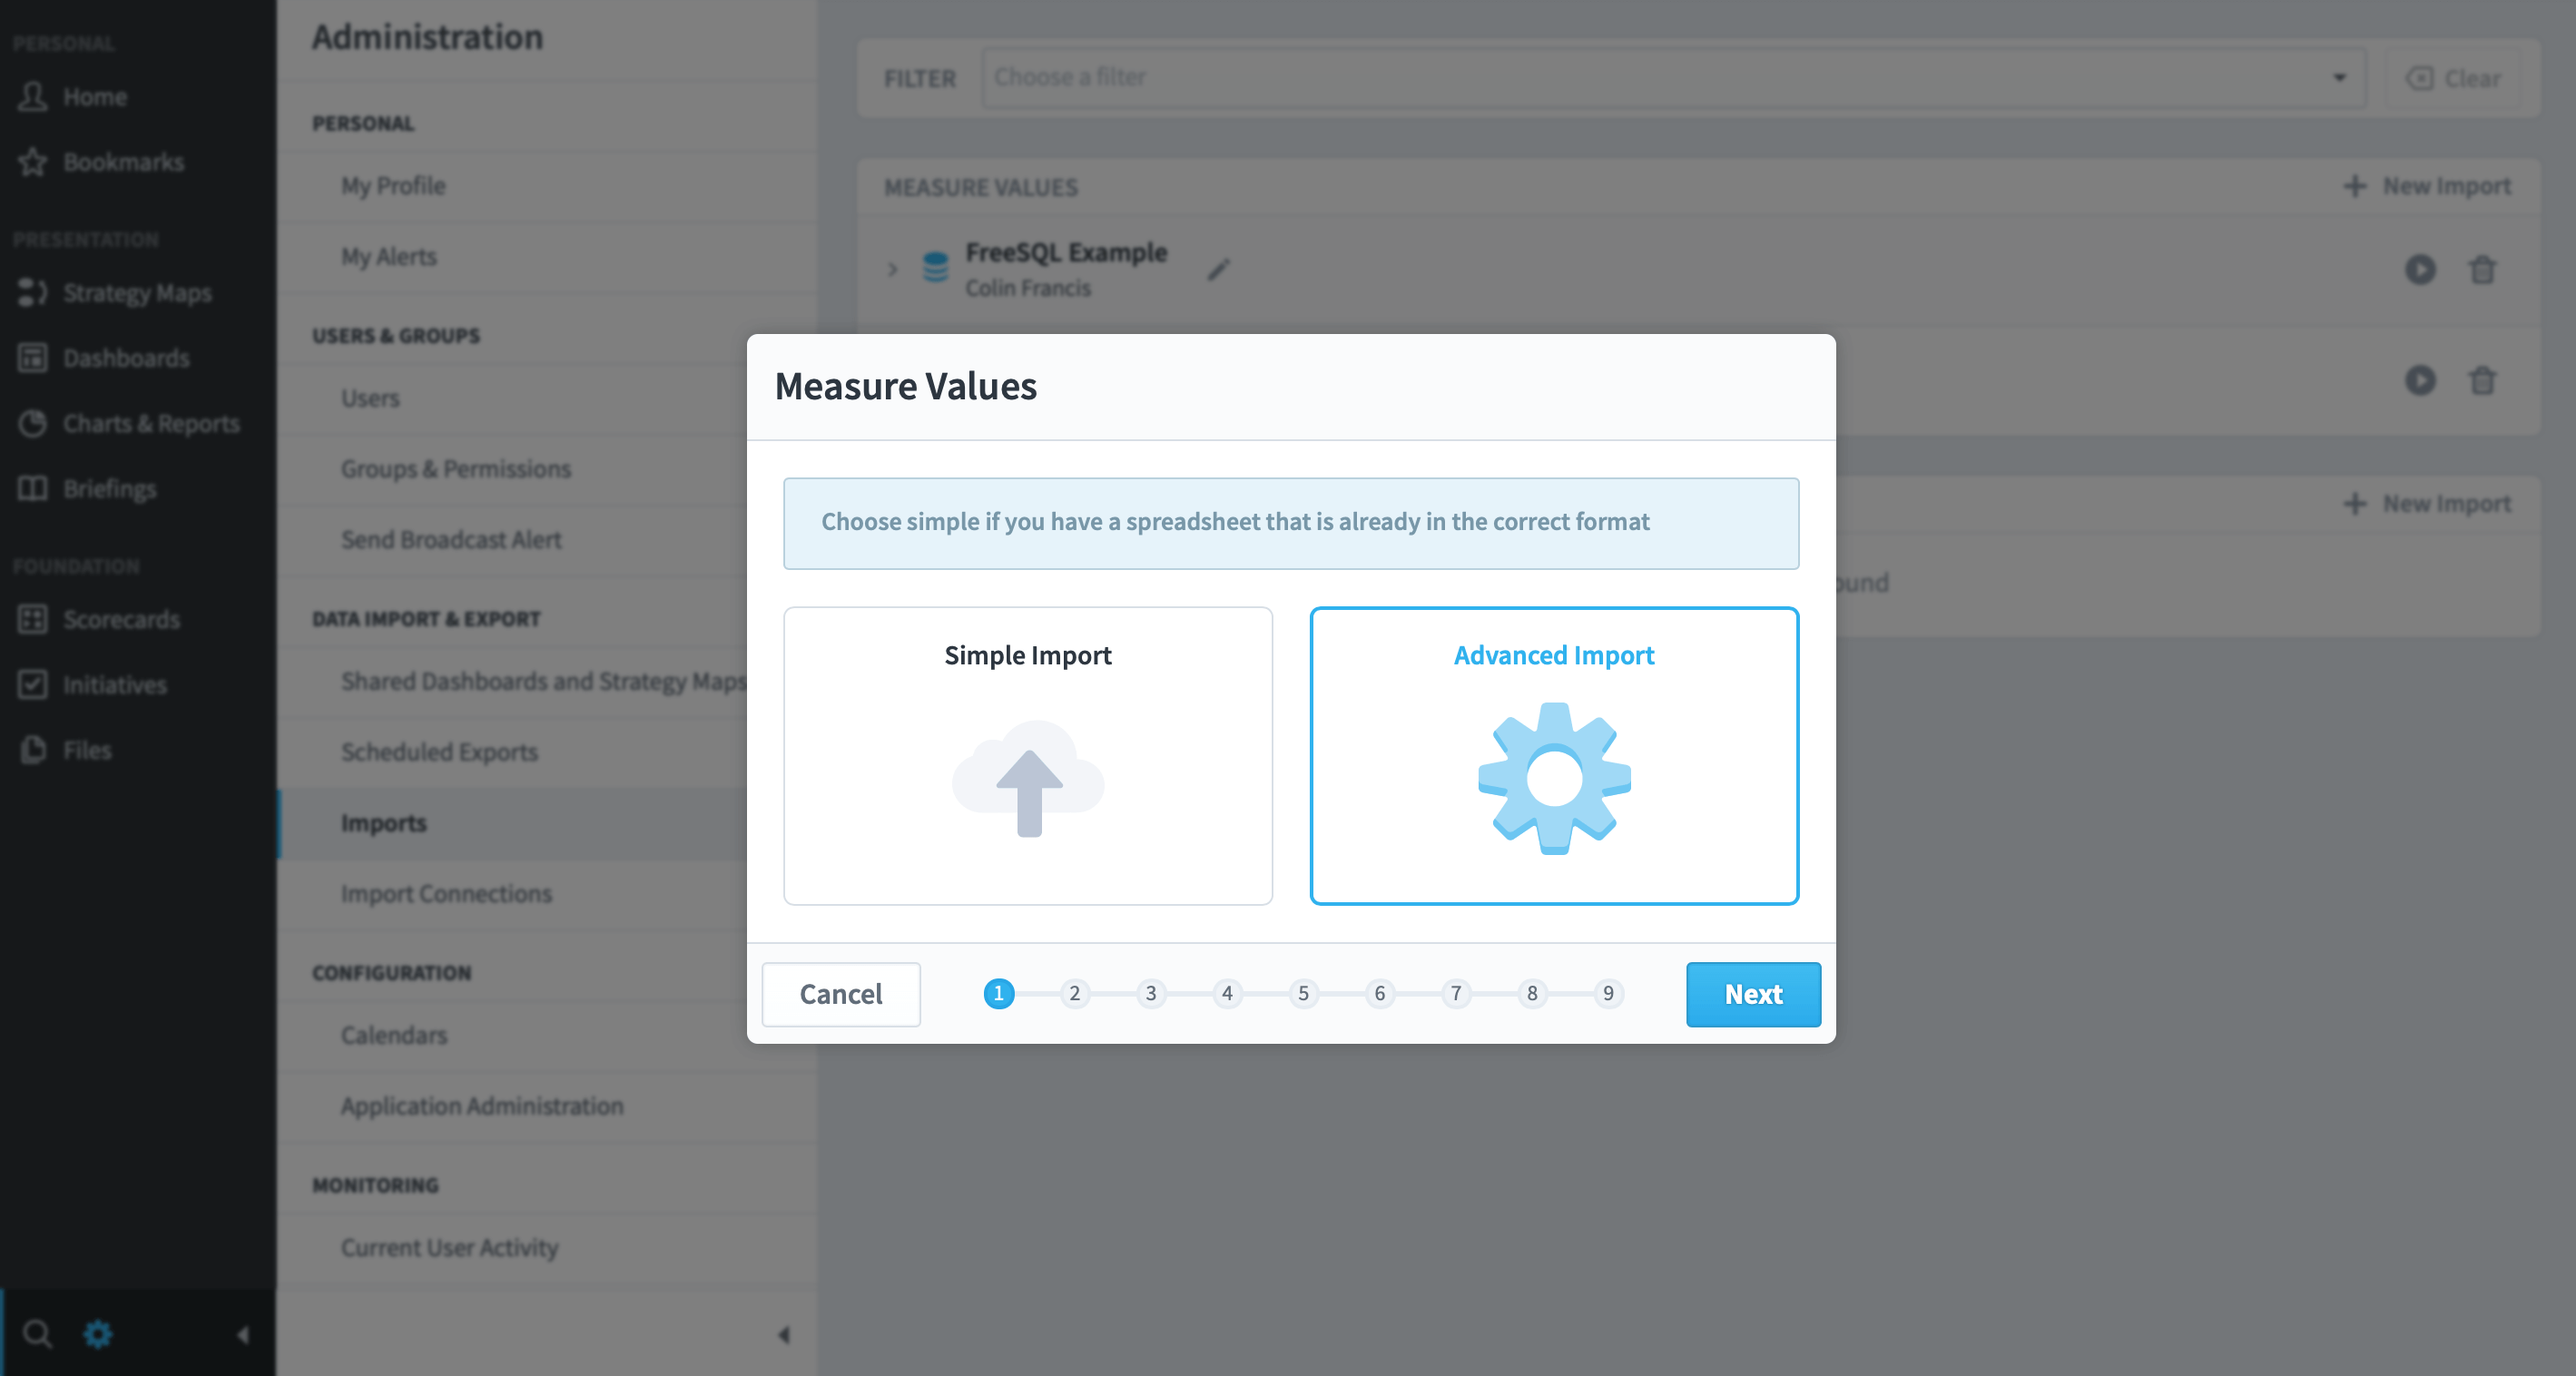
A dialogue box will appear asking if you want to create a Simple Import or an Advanced Import:
Step 1
Highlight the Advanced Import option. The Simple Update option will allow you to import a basic spreadsheet in a ridged format. You might find that to be a quick and easy option if you are not updating many KPIs. Click Next.
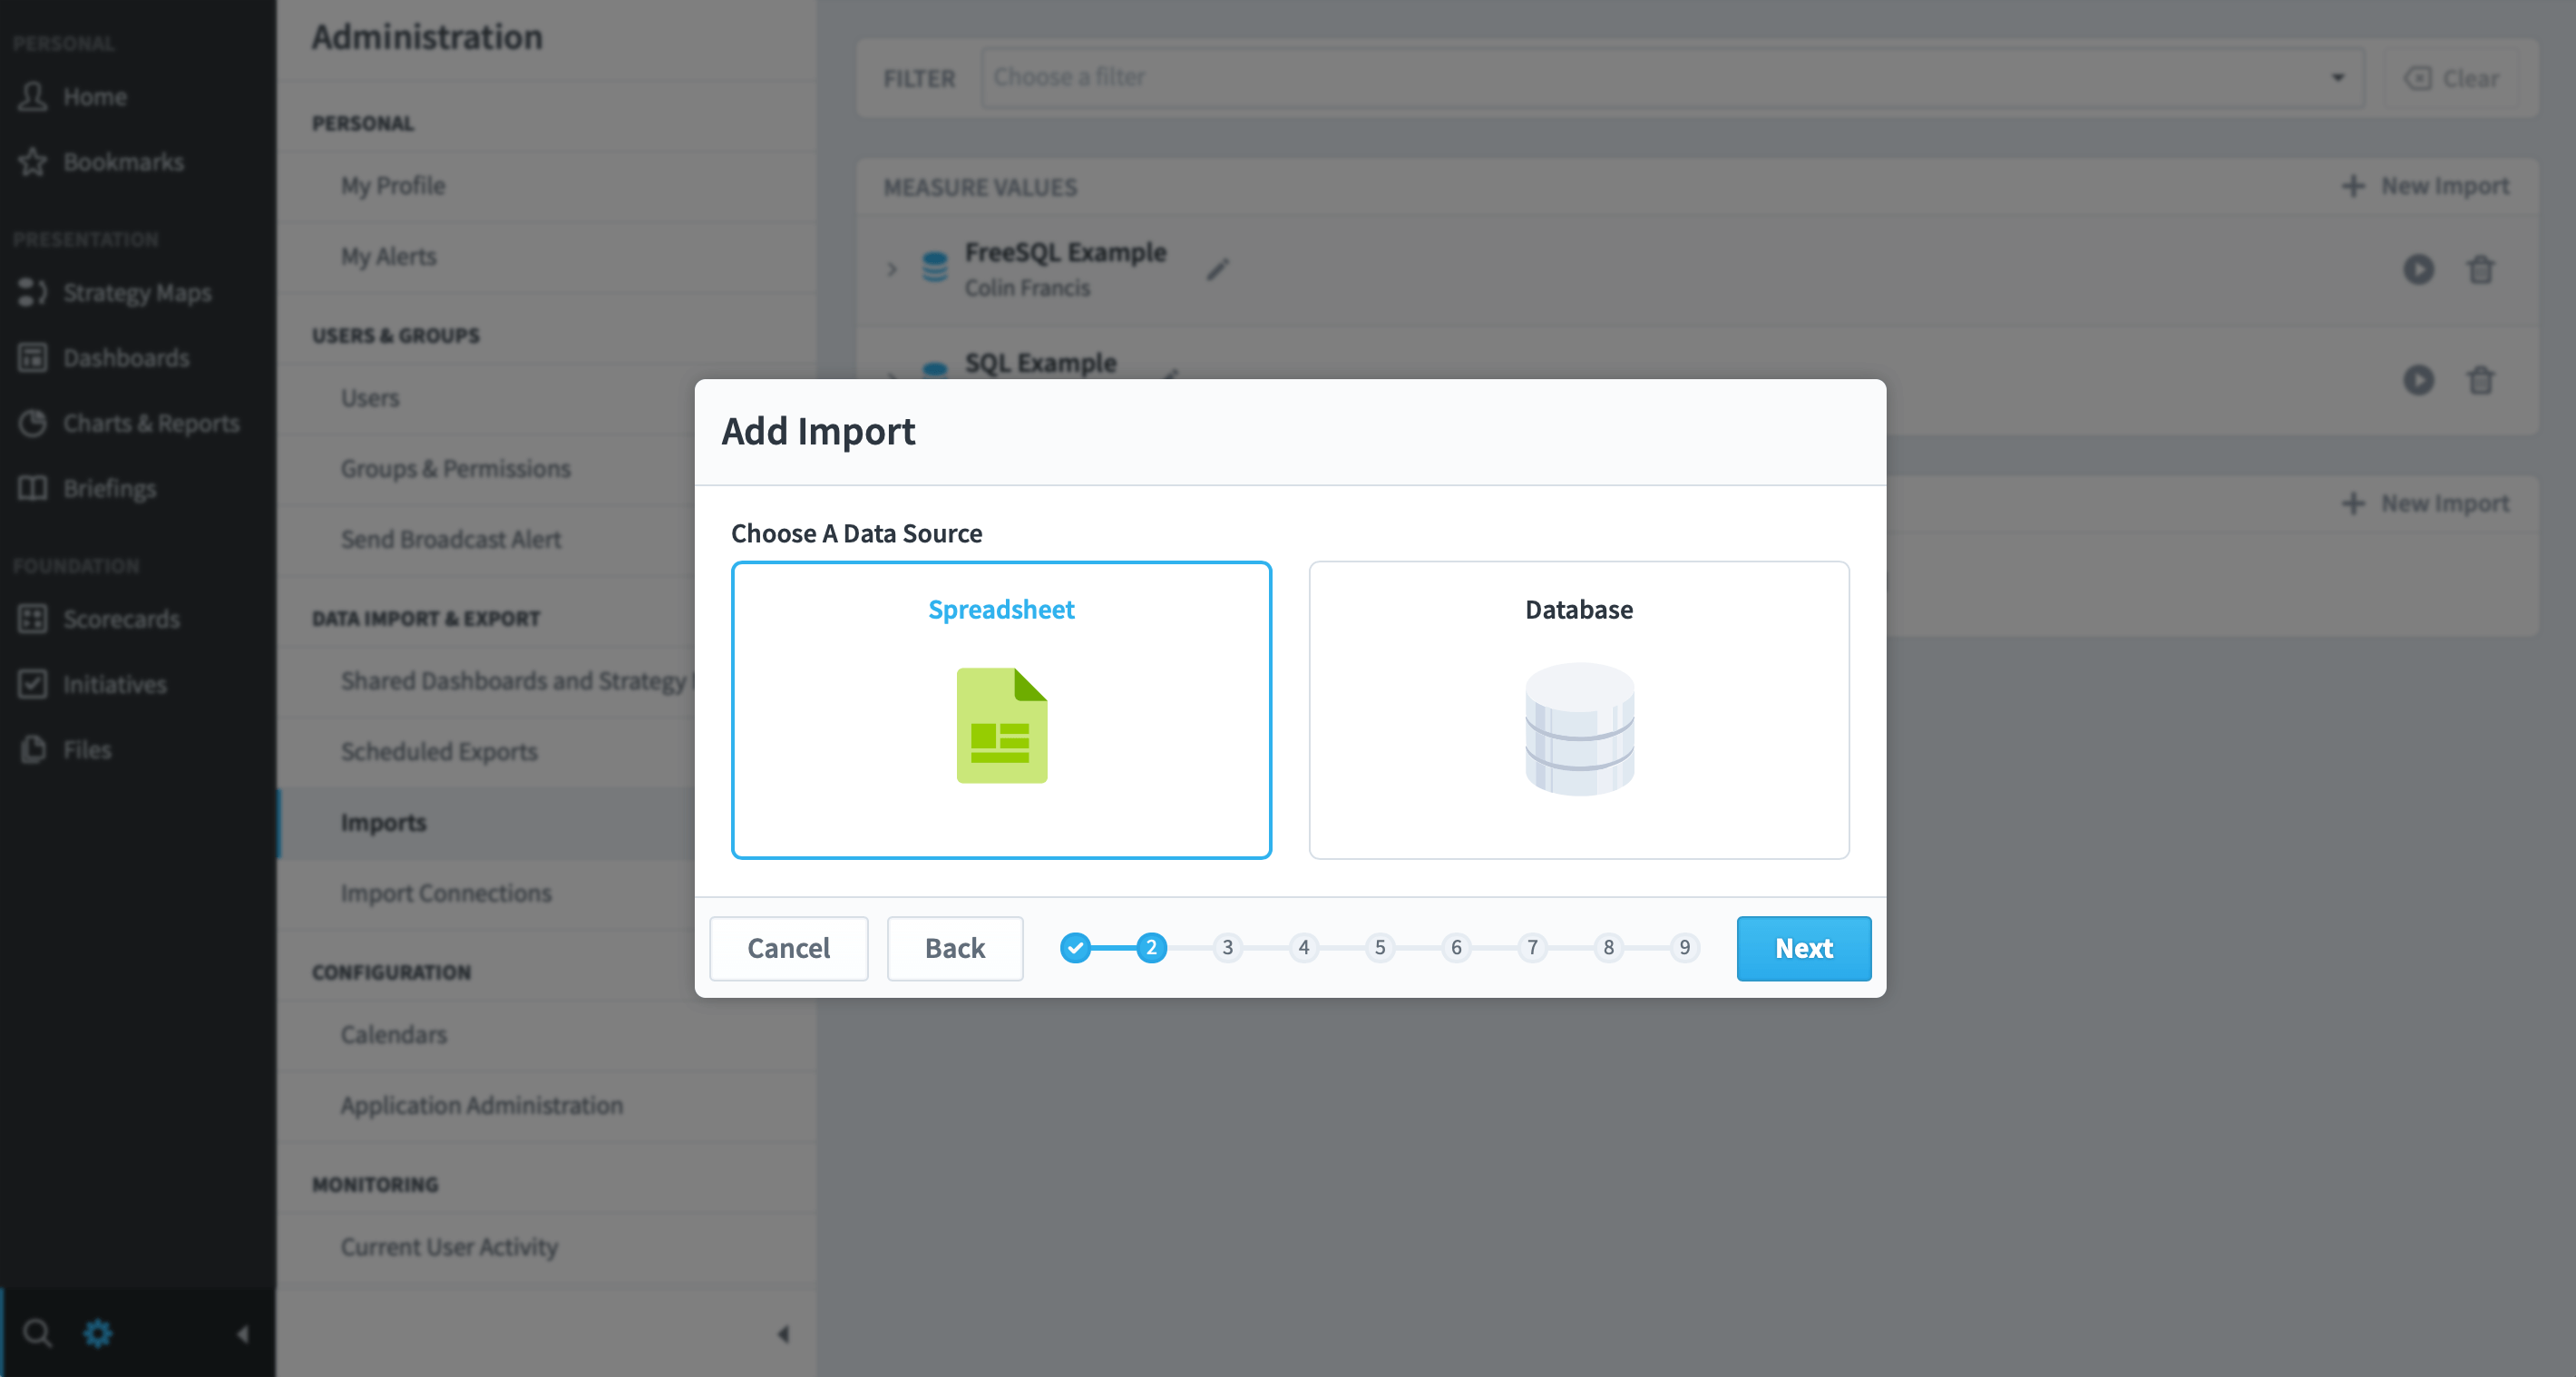
Step 2
Highlight the Spreadsheet option. Click Next.
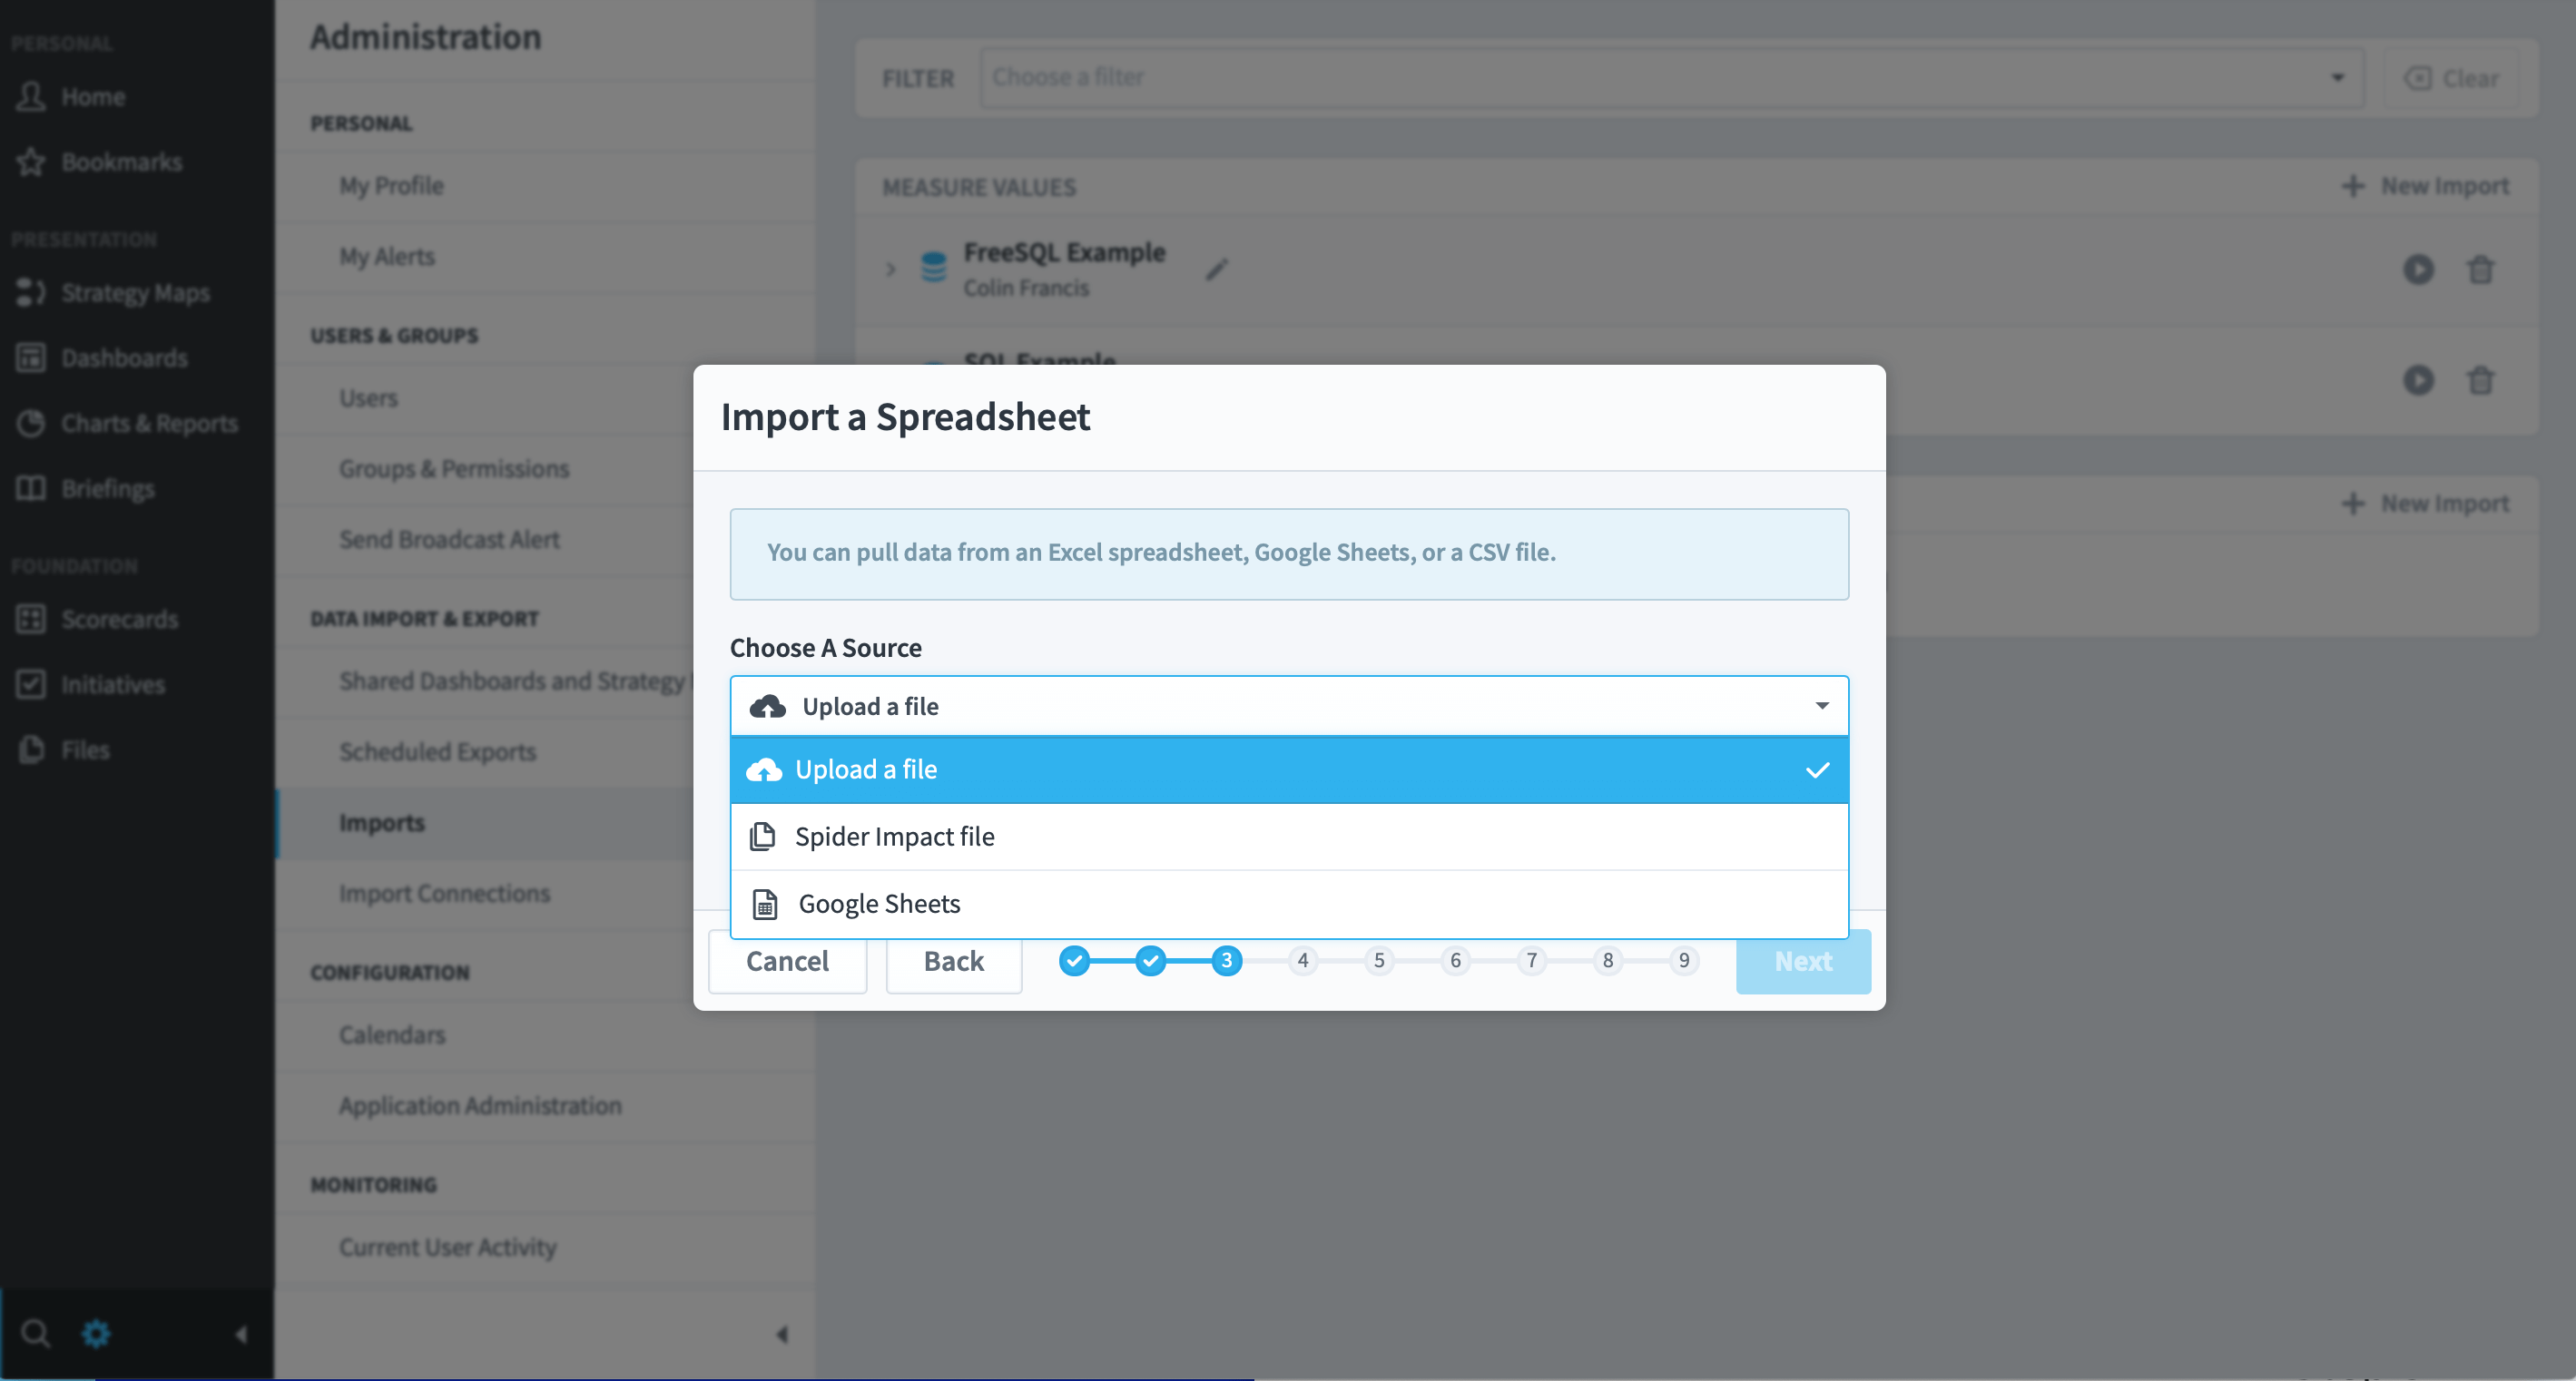
Step 3
Click on the drop-down called Upload a File. You will see two or three entries. By default you can upload a file from a folder on a server or your desktop, or upload from the Spider Impact files system. If you have defined a Google Sheets connection, you will be able to upload from Google Sheets as well. Using the Spider Impact file system is an easy way to ensure your uploaded files are in a safe area.
For this guide, we are going to upload from a secure server folder. Before we go any further, download the following set of acceptable spreadsheet formats:
- Adding historical data: Historical Data Spreadsheet
- Adding data for a specific date – Specific Date with Thresholds
- Adding data for multiple dates – Multiple Dates with Thresholds
- Adding data to initiatives – Initiative Updates
When you have completed a spreadsheet using one of the formats above, you can use it to update the Actual Values of the Measures/KPIs in you system.
The update process is the same for any format. For this guide we will be using the Specific Date with Thresholds spreadsheet. This will allow you to update multiple Measures/KPIs and their thresholds. You can optionally add Notes to each Measure/KPI as well.
Click on Browse and select your spreadsheet from wherever you have saved it. Click Next.
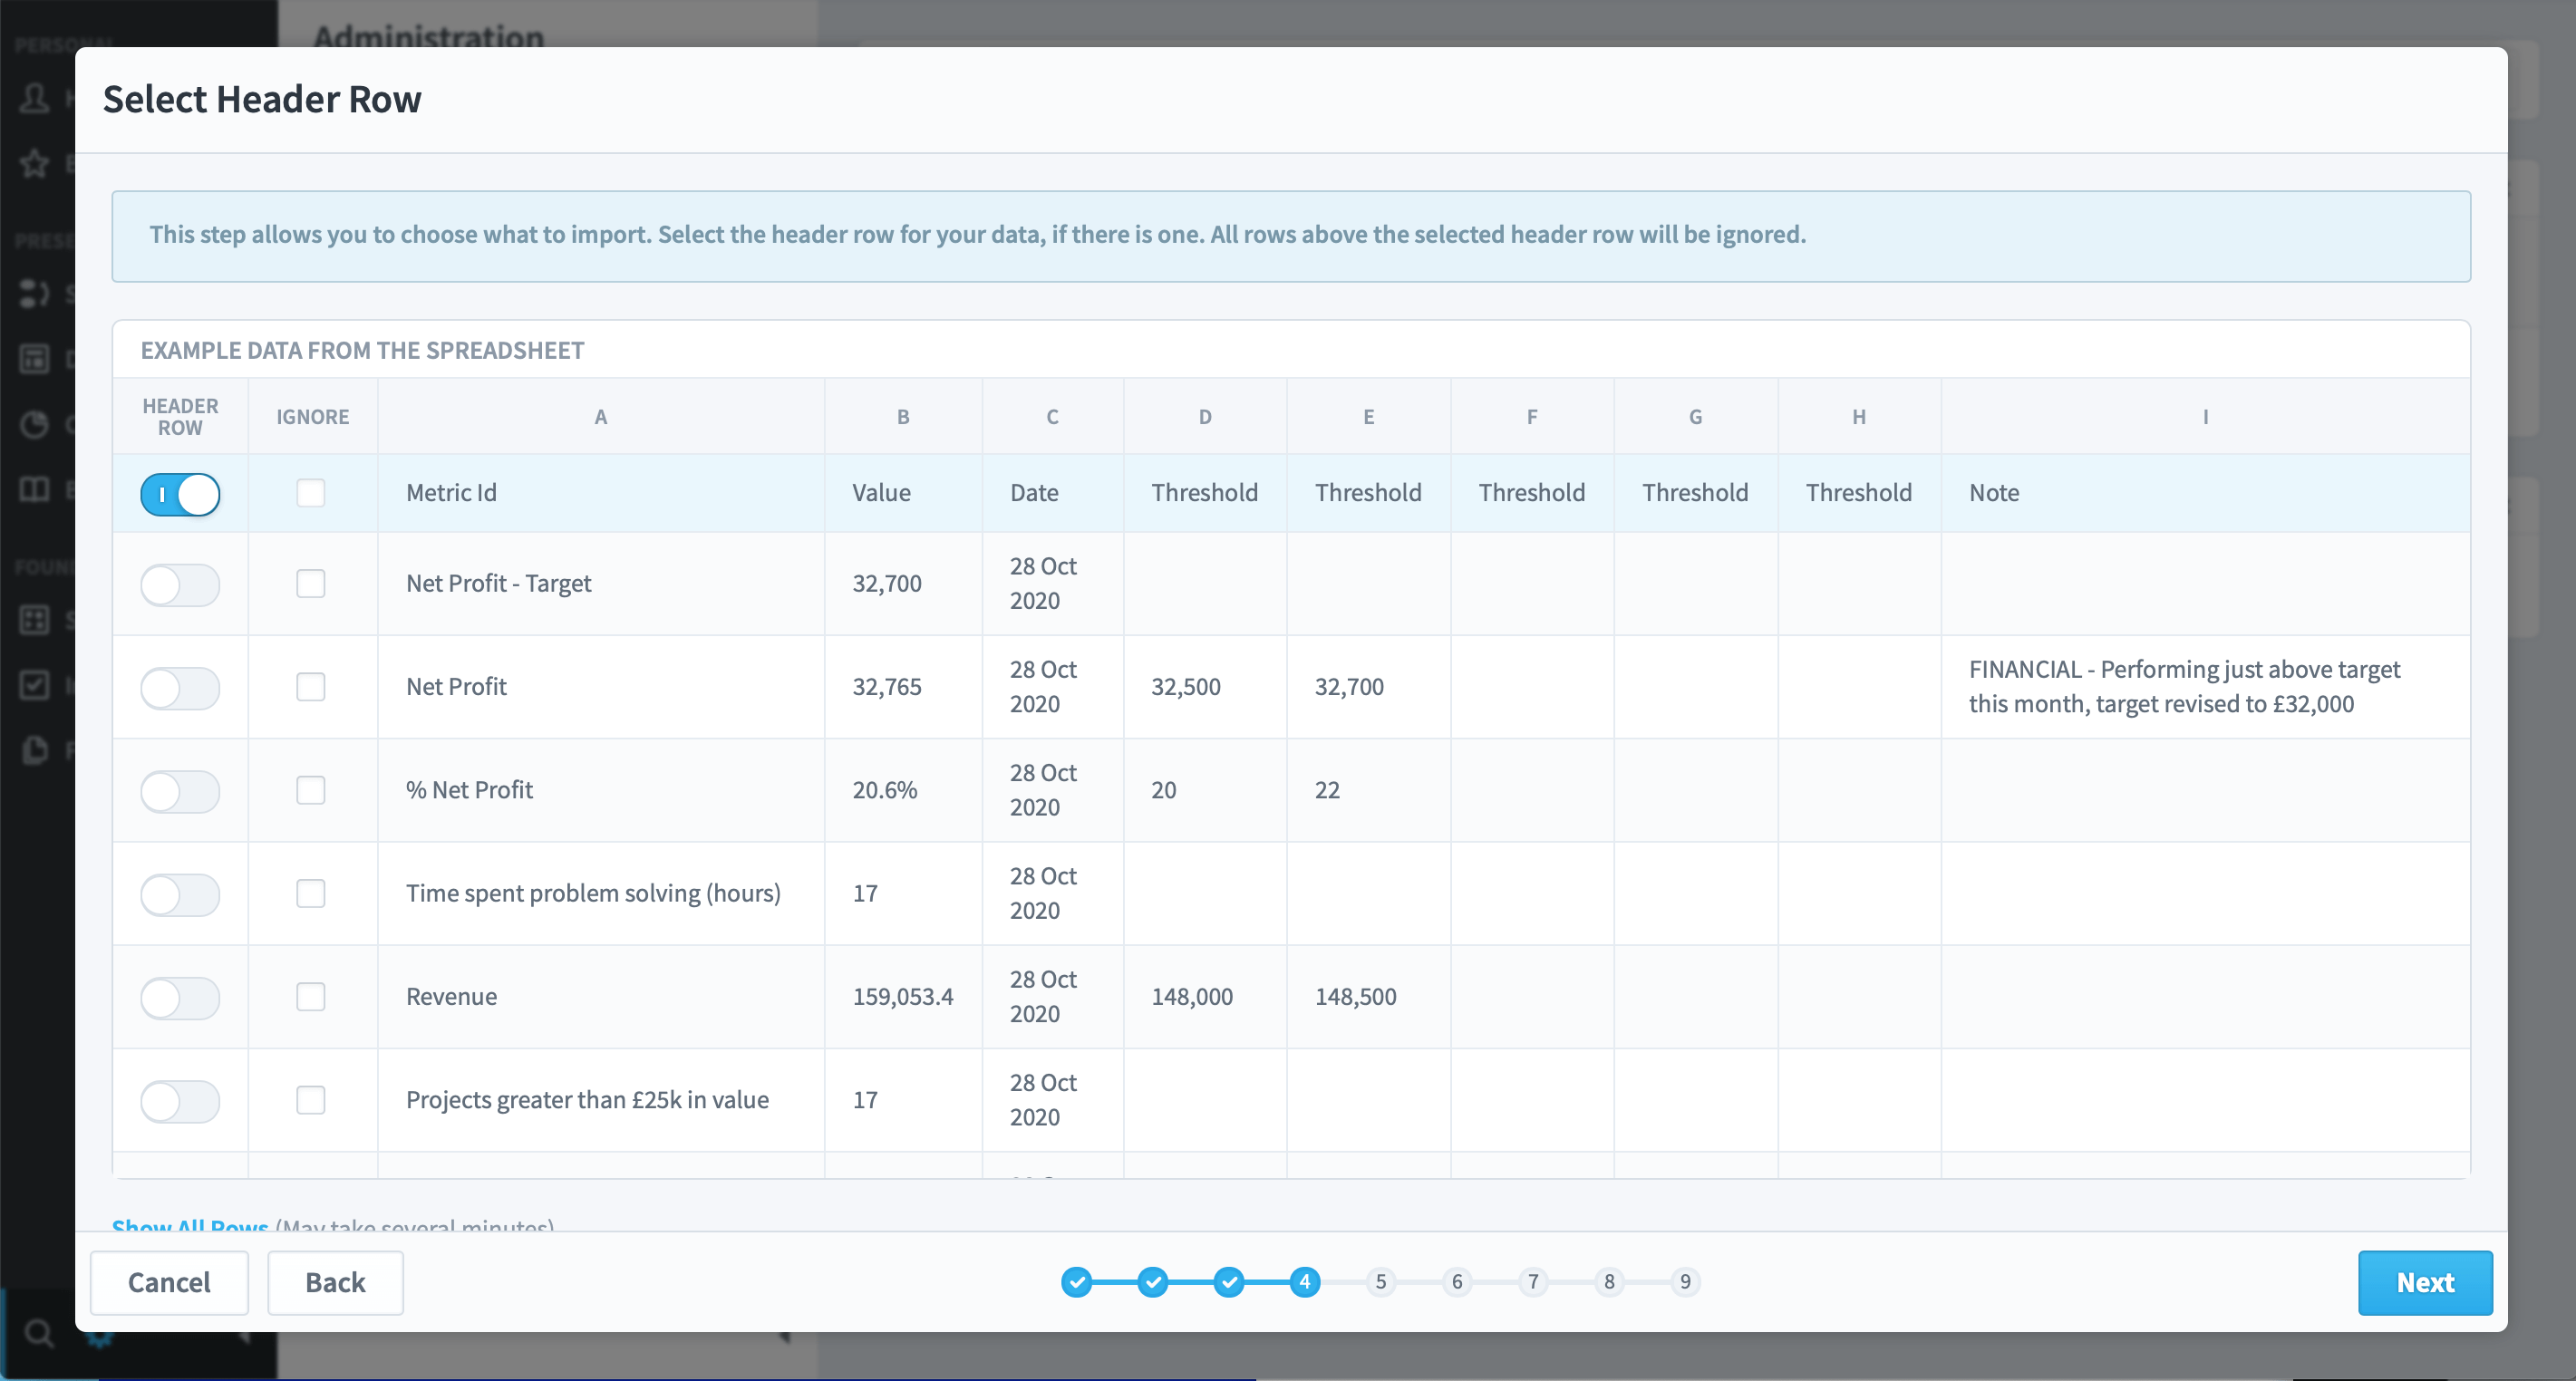
Step 4
The spreadsheet will be uploaded. The header row should be identified automatically. If the header row is not the top row, then you can identify it here. You can also identify any rows you do not want to be included in the import by checking the box in the Ignore column. Click Next.
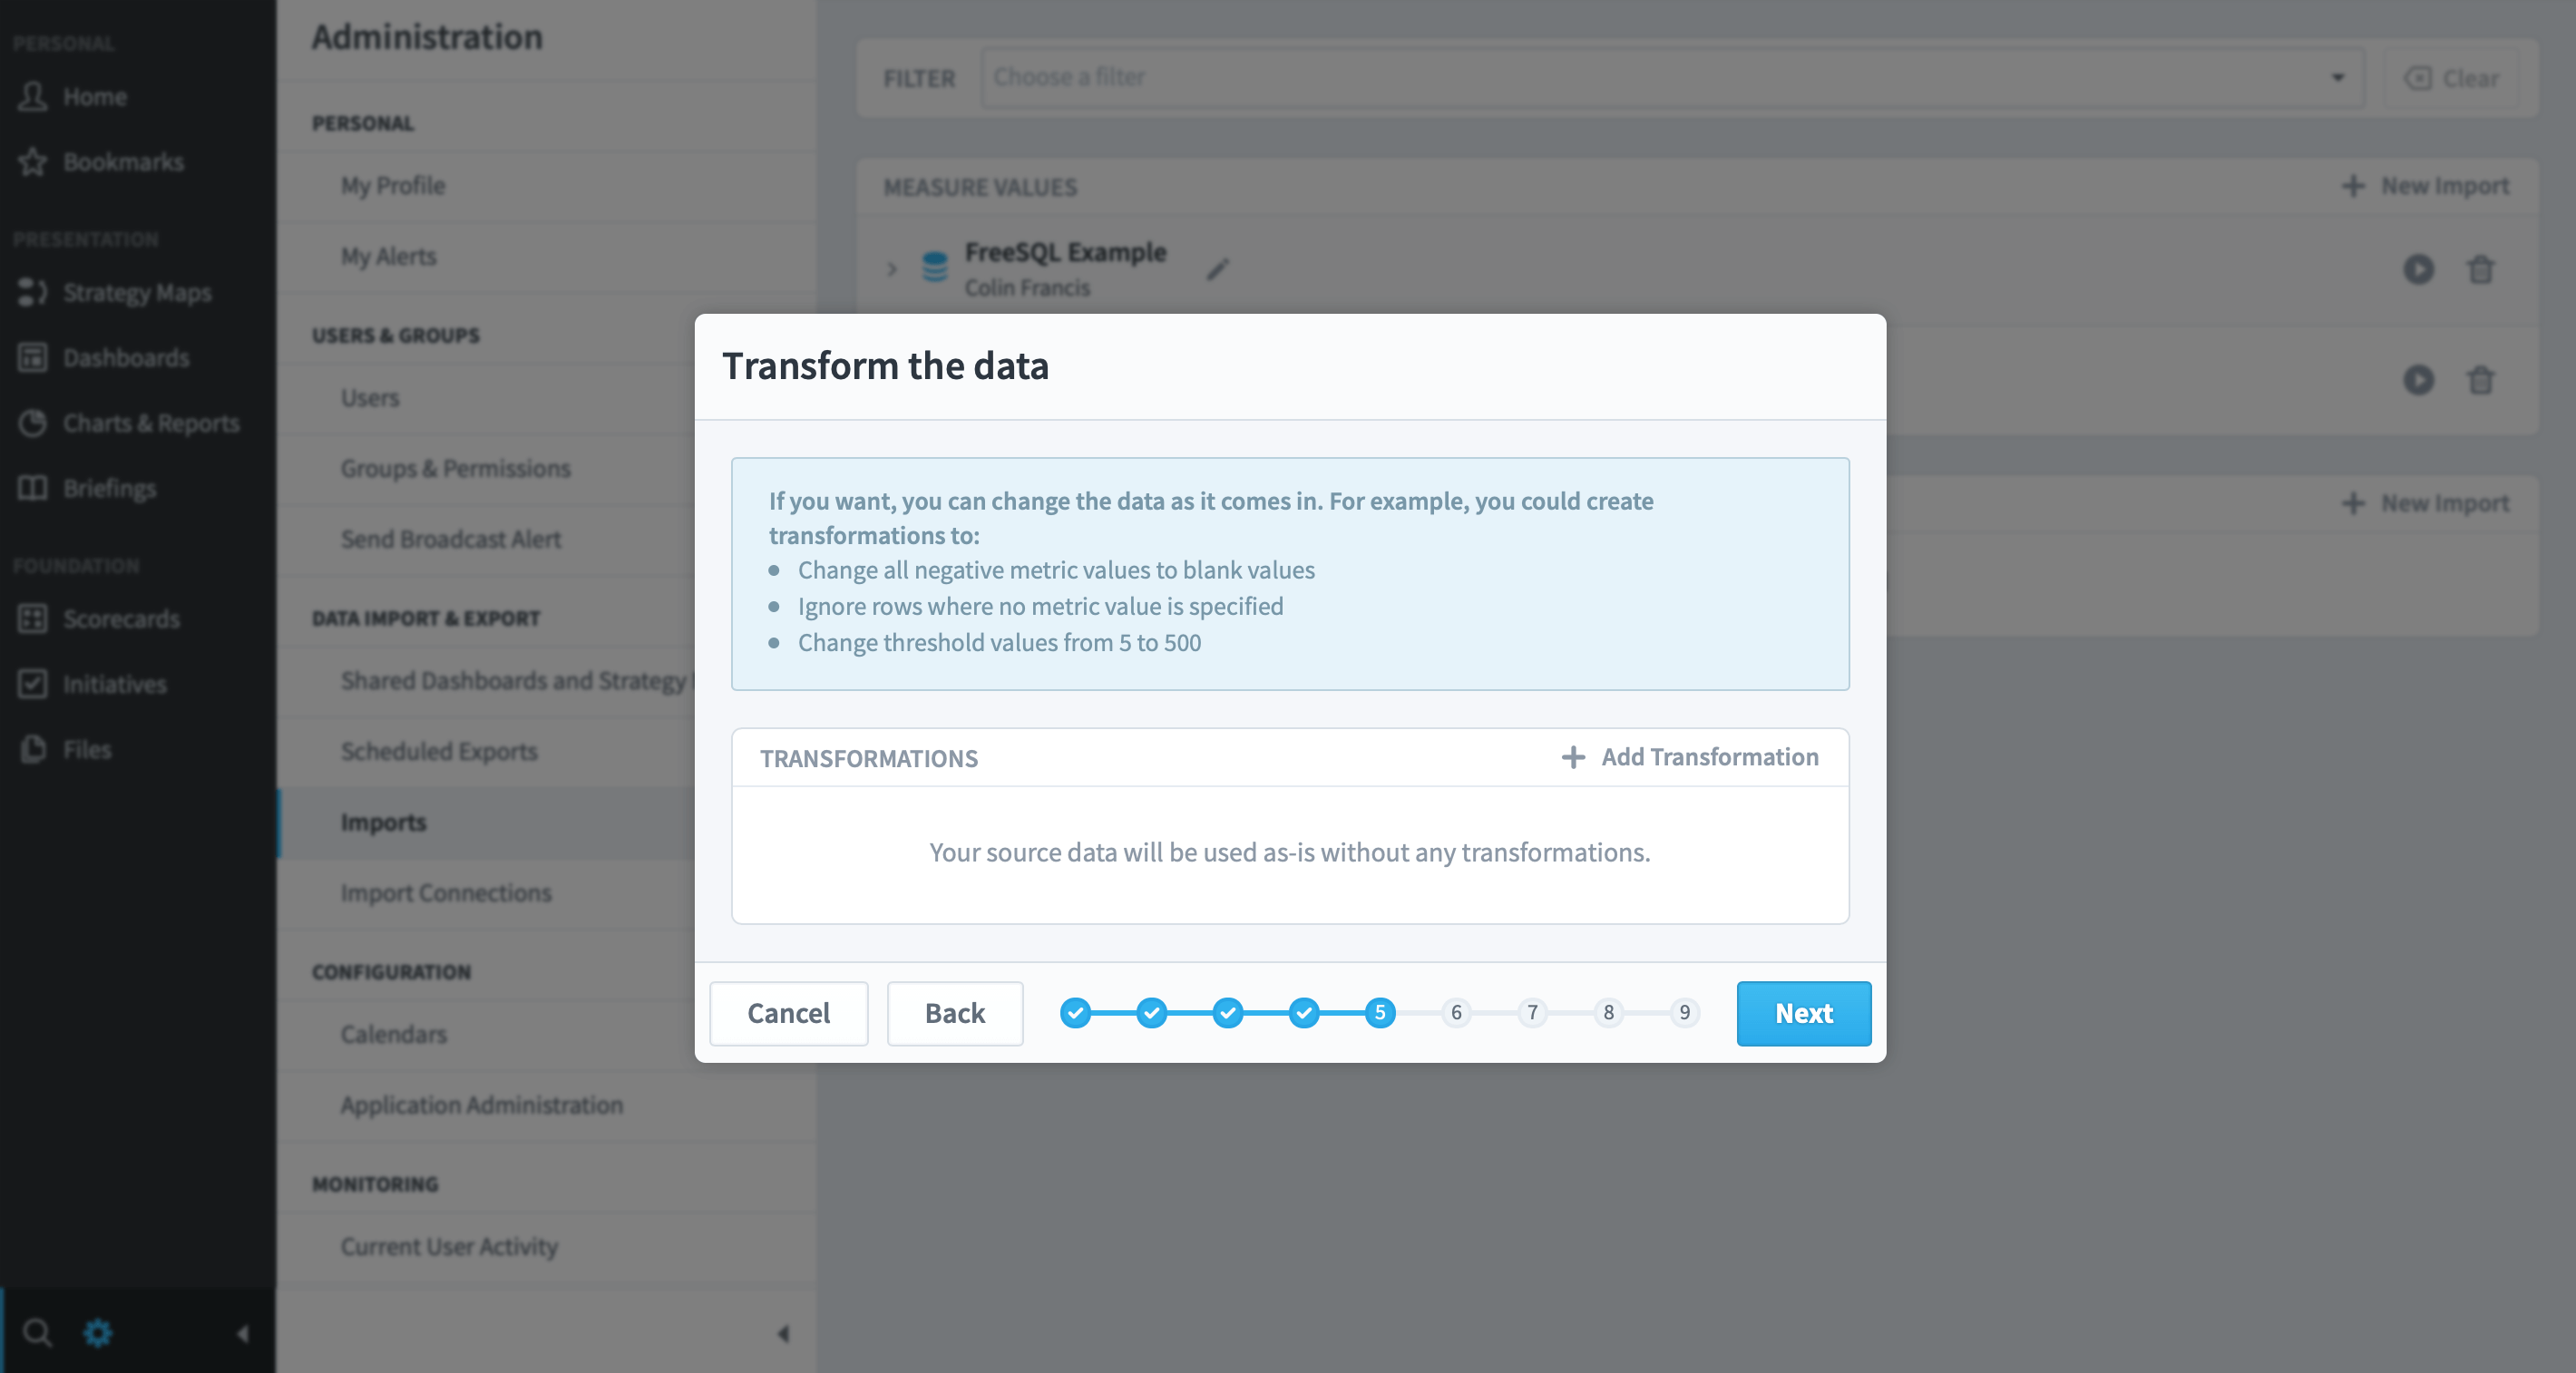
Step 5
In step 5 you can add automatic transformations if required. For example, you may want to transform every value that is Zero to become a Blank. There are many allowable transformations. For this guide, we will miss out this step. Click Next.
Step 6
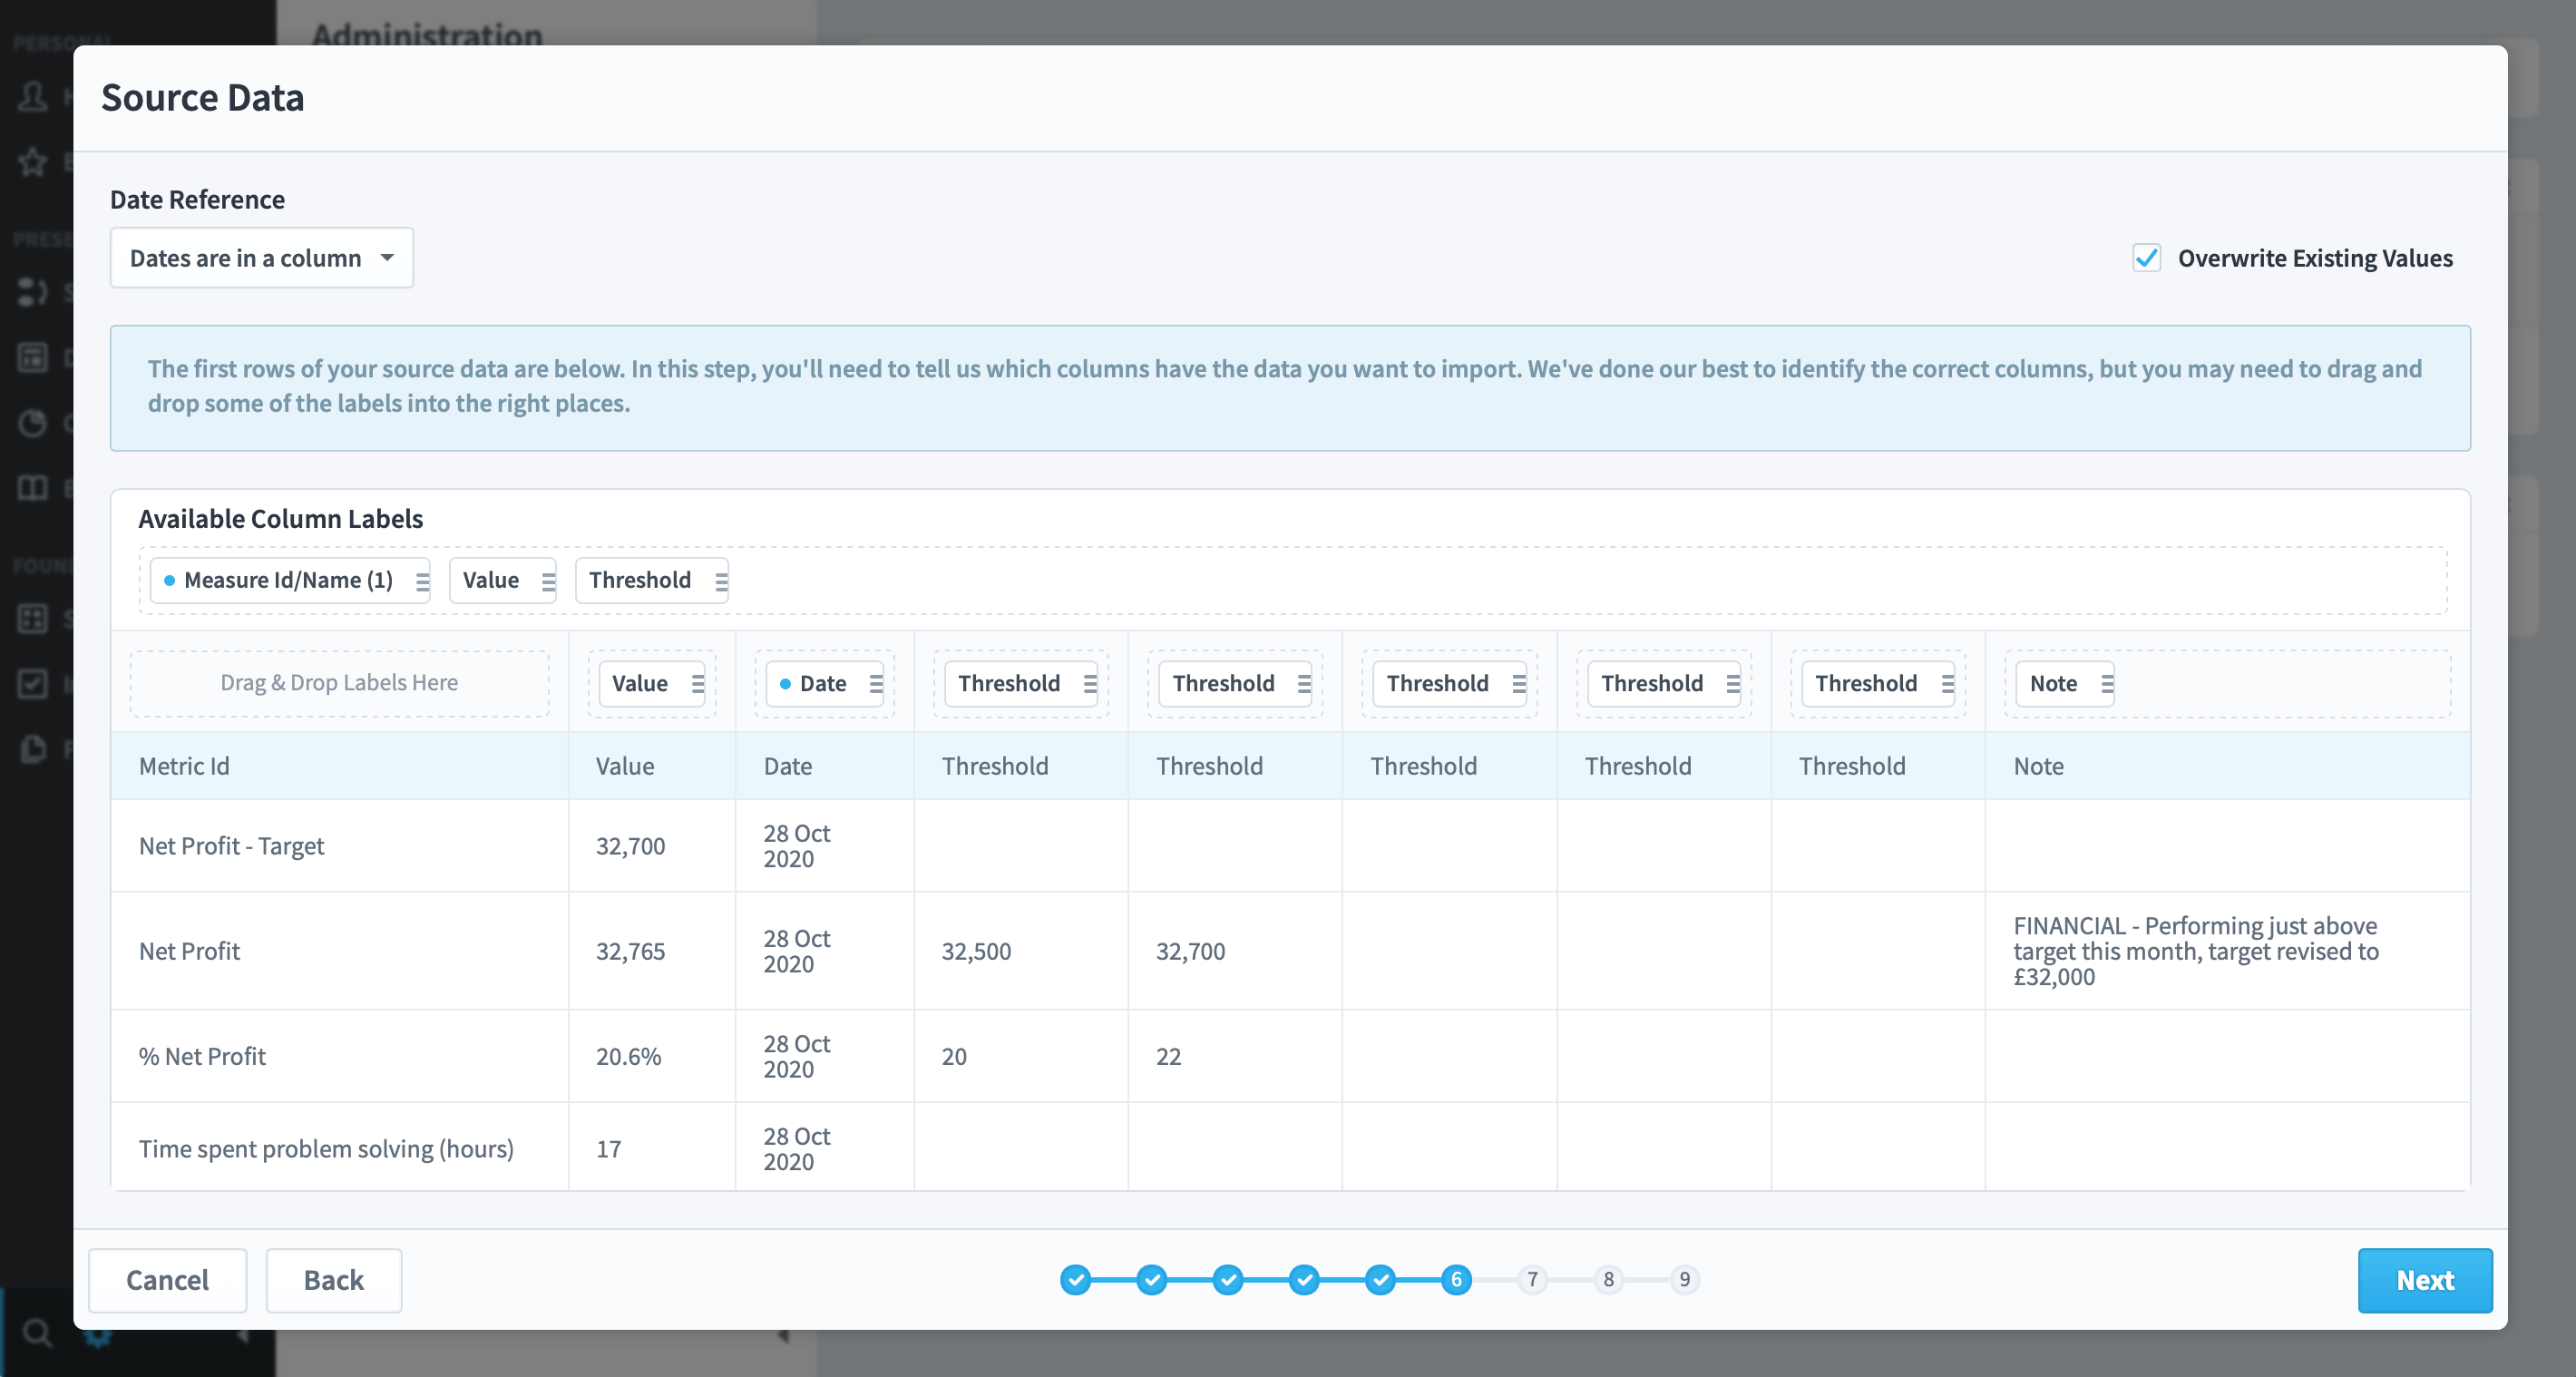
If the columns in your spreadsheet have the same labels as the columns in the application then they will match automatically. If not, you will need to drag and drop the column headers into place. In this example, we can see Mesure Id/Name does not match Metric Id in the spreadsheet and so it will have to be dragged into place.
There are two other things to point out in step 6: First, at the top left of the screen is the Date Reference drop-down. The application will usually default to the correct option, but make sure you check it is correct.
Second, at the top right of the screen is a checkbox. By default, any existing values of the same date are overwritten. If you do not want this to happen, then un-check the box. Click Next
Step 7
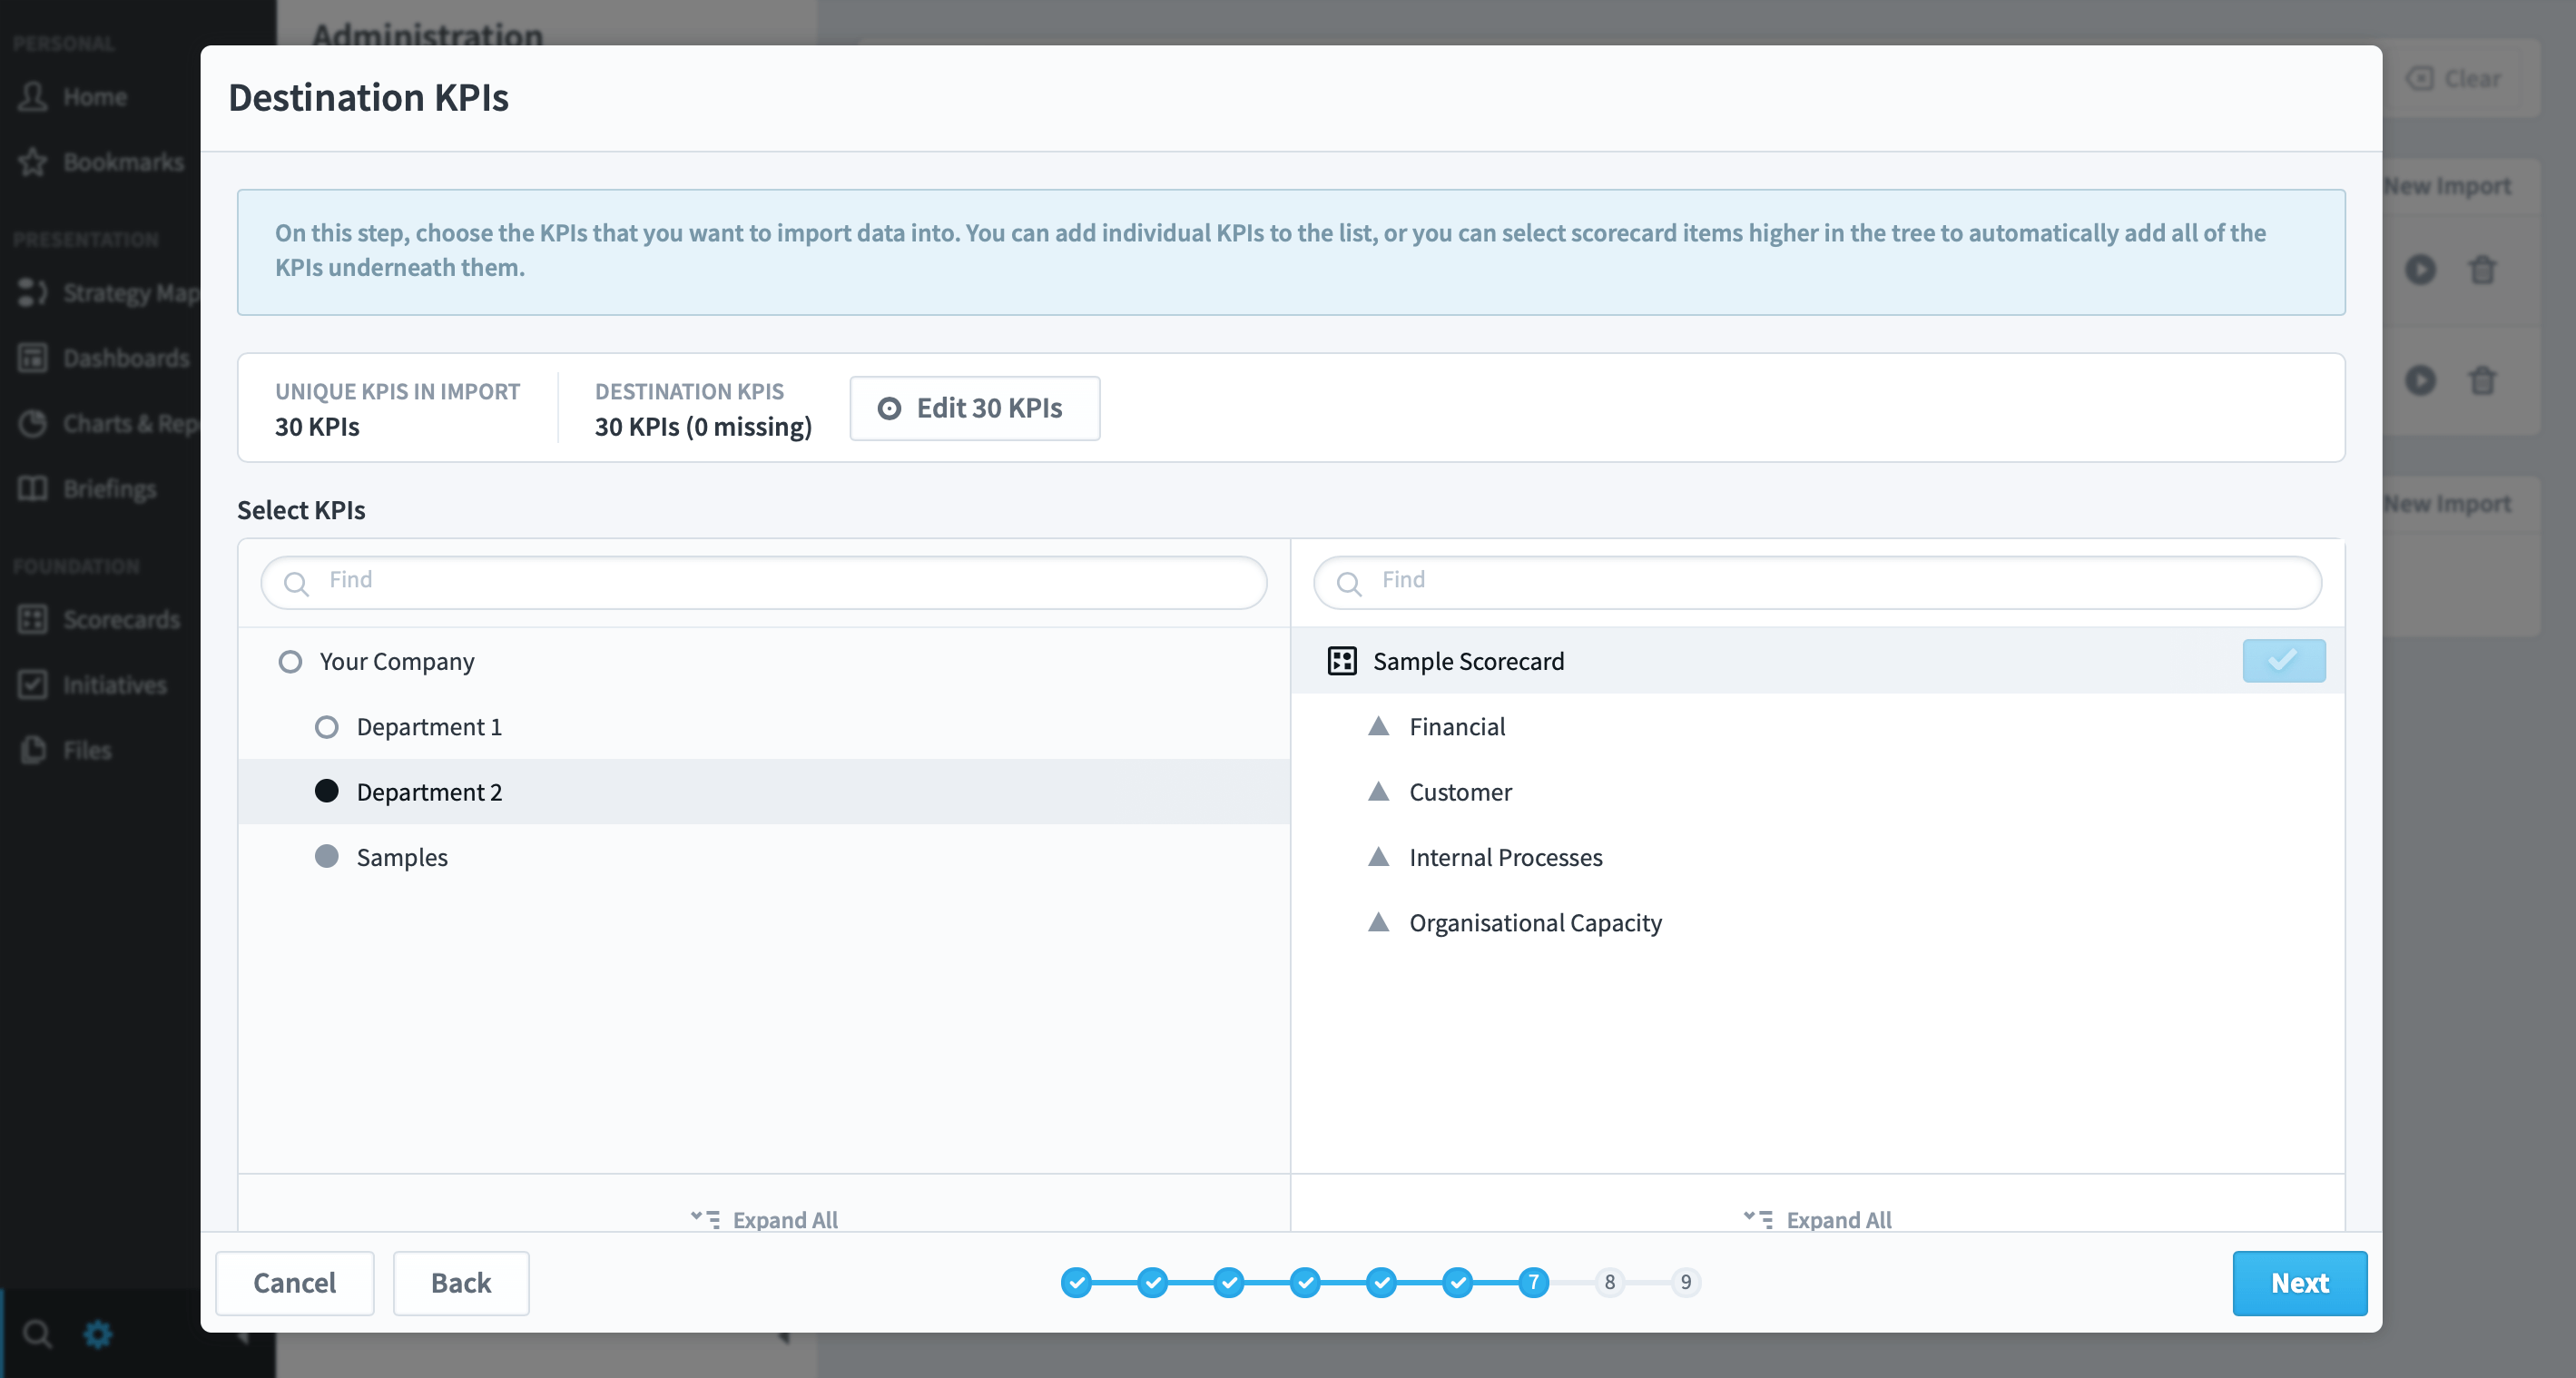
In step 7 you need to tell the application which Measures/KPIs that you want to update. Usually, this is done by highlighting a whole scorecard, but you can selectively identify perspectives, key performance areas, objectives or even individual Measures/KPIs.
Highlight the organisational area in the left panel first. It will appear in the panel on the right. Then select either the whole scorecard or part of it and click Add. You will notice that the Destination Measures and Edit Measure count will change. In this example, we are updating the whole scorecard. Click Next.
Step 8
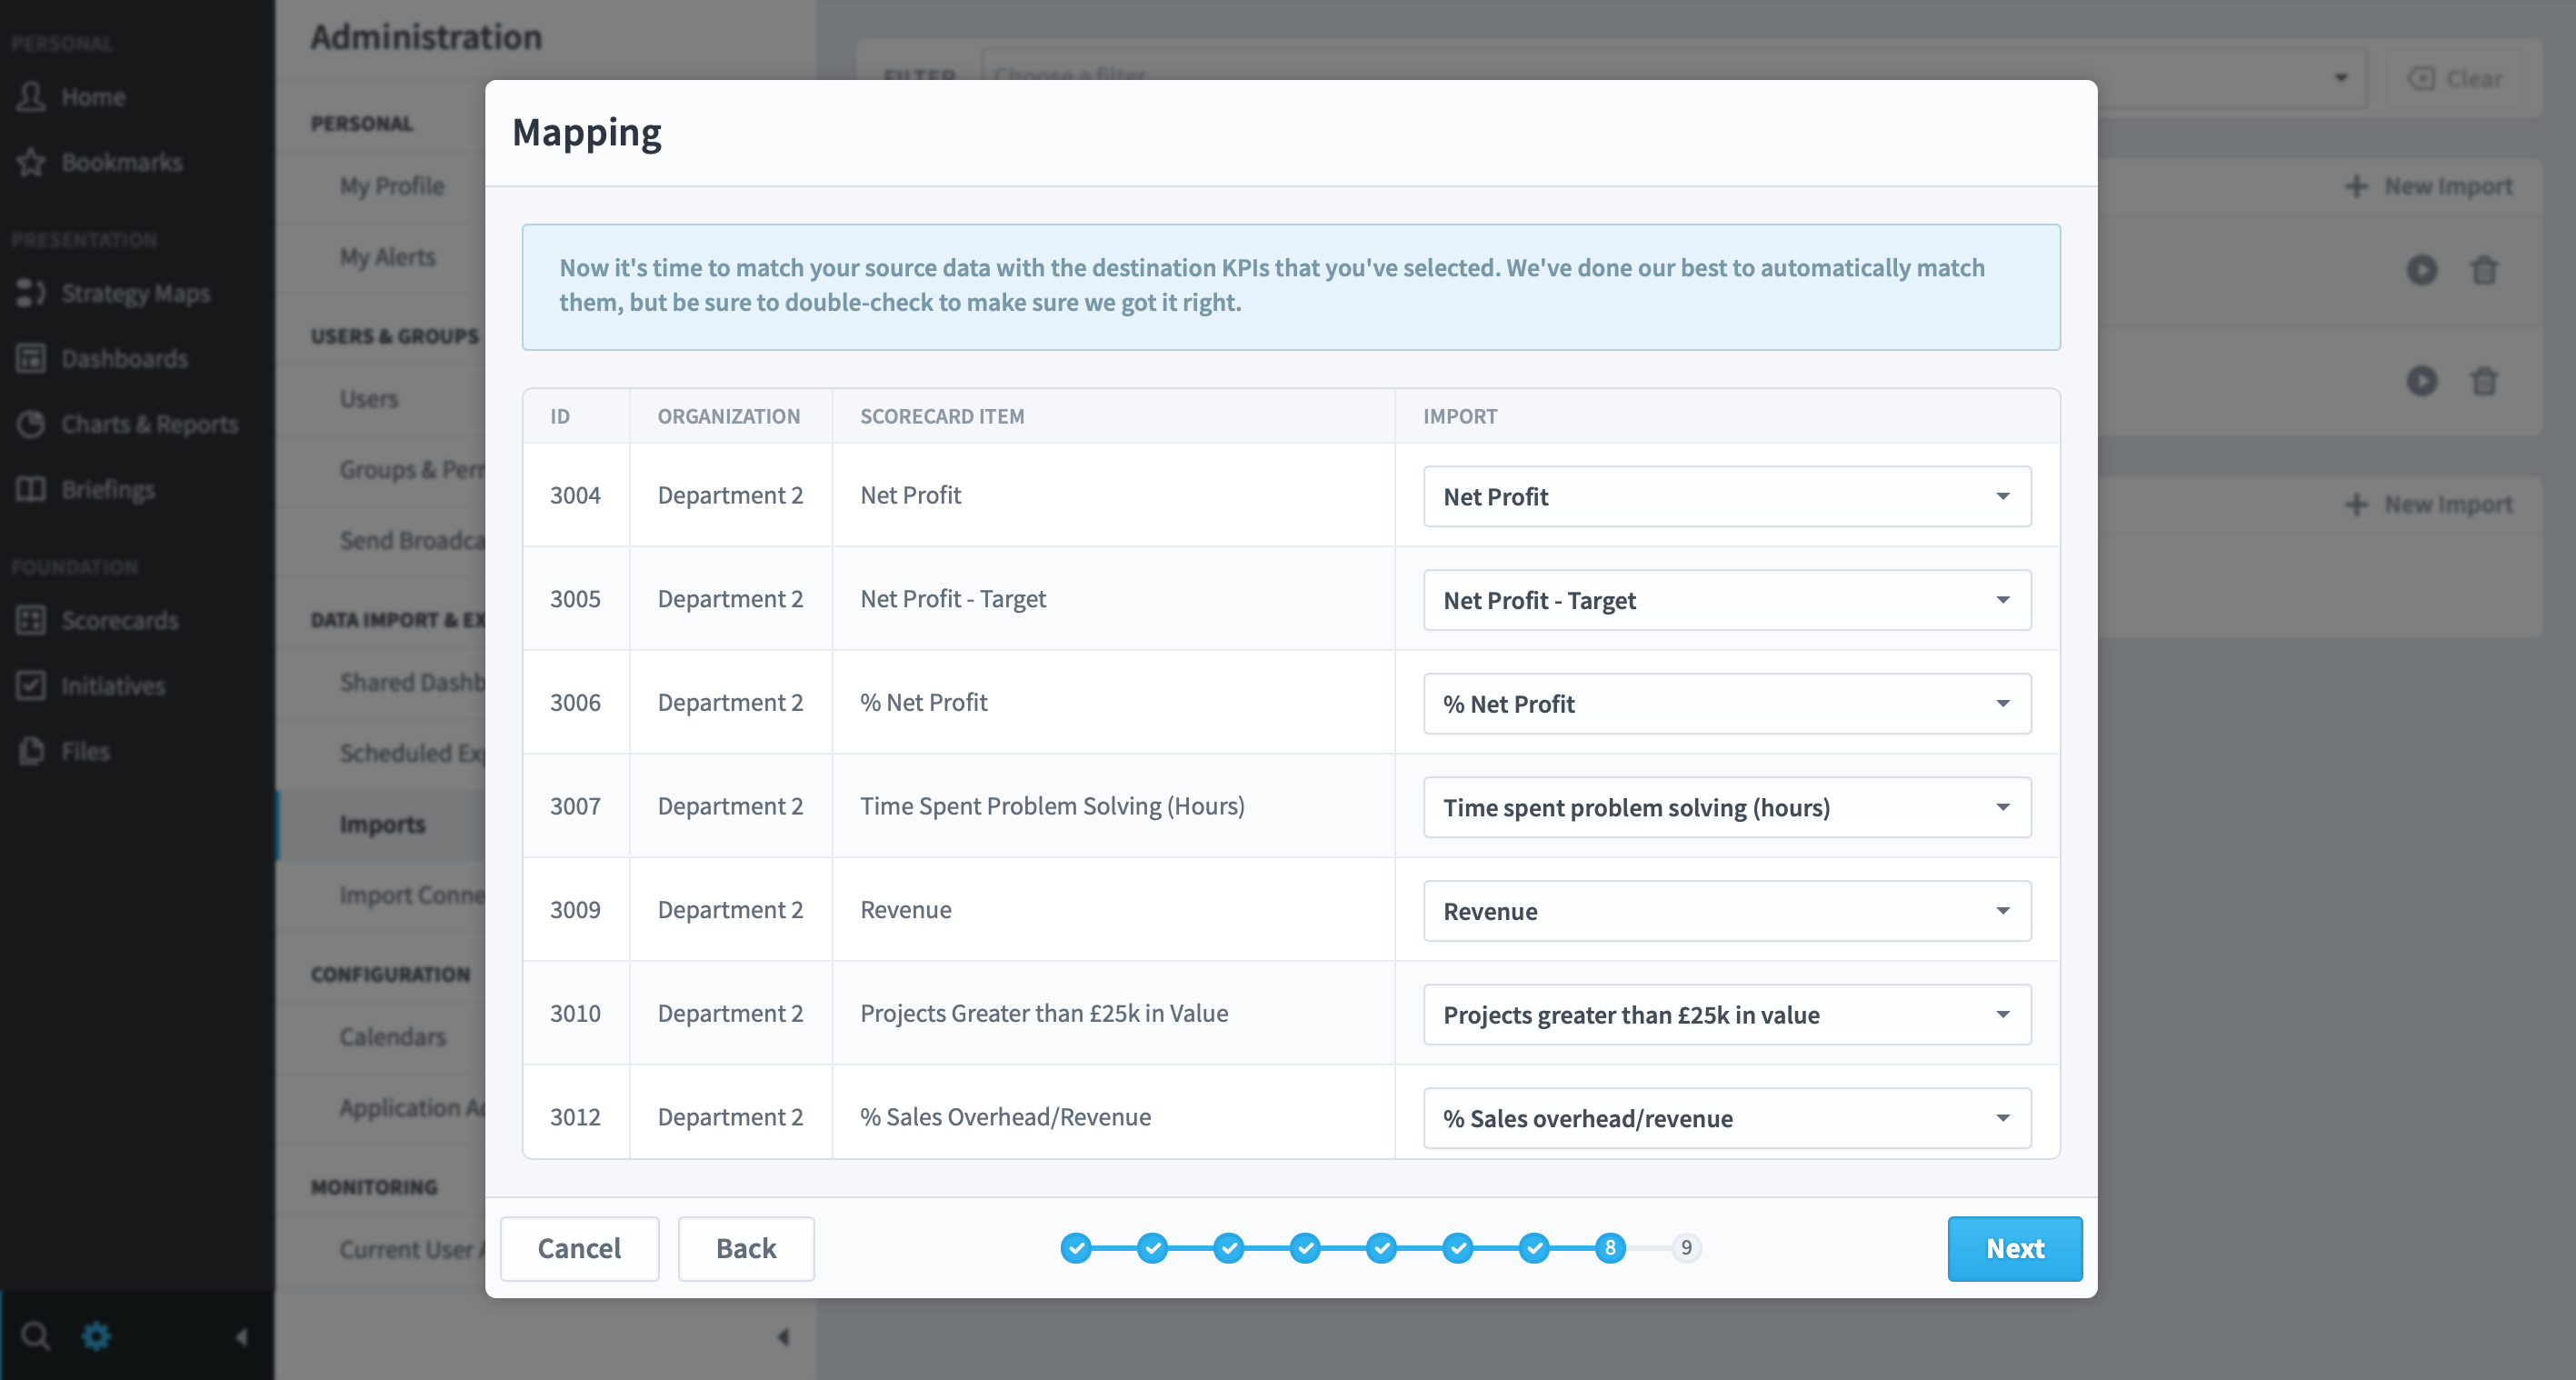
The Measures/KPIs in the Spreadsheet will be mapped automatically to the Measures/KPIs in the application provided the names are the same. Scroll through all of your Measures/KPIs to check this has happened.
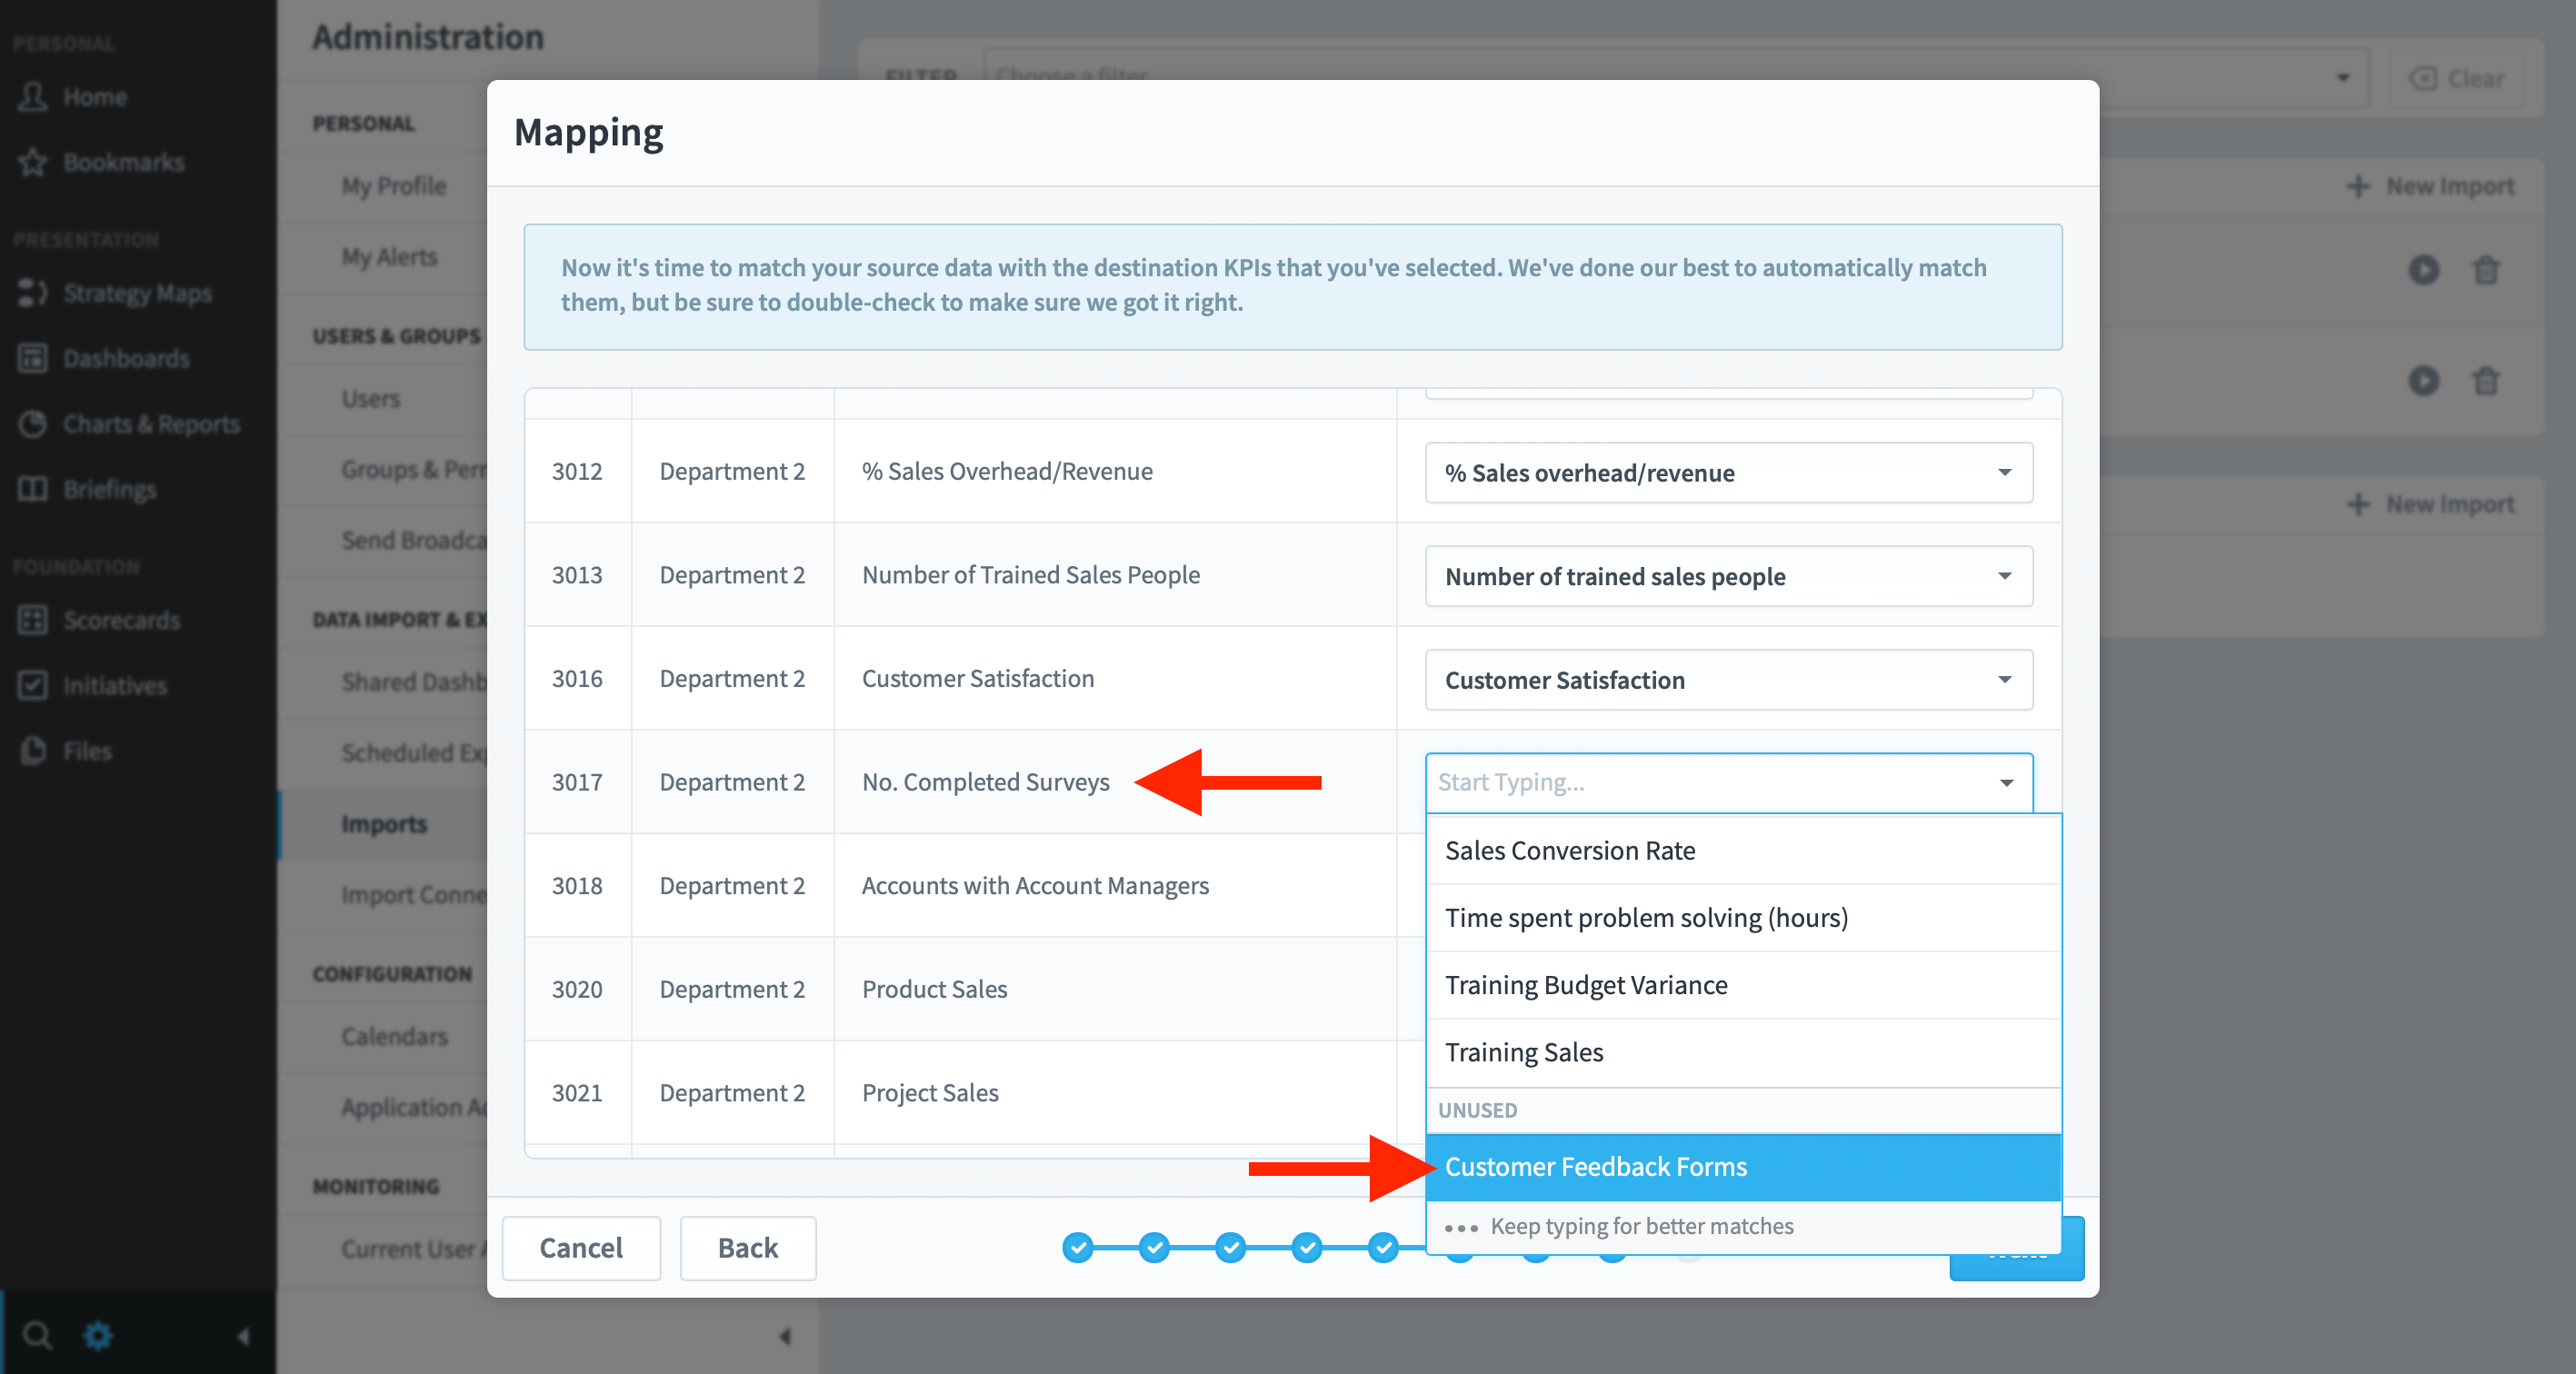
In our example, there is a Mesure in the application scorecard called Number of Surveys Complete, however, in the spreadsheet, it is called Customer Feedback Forms. To map correctly, click on the drop-down and find the correct Measure/KPI and select it. You can see this in the following example:
When you are satisfied that all of the mappings are correct, click Next.
Step 9
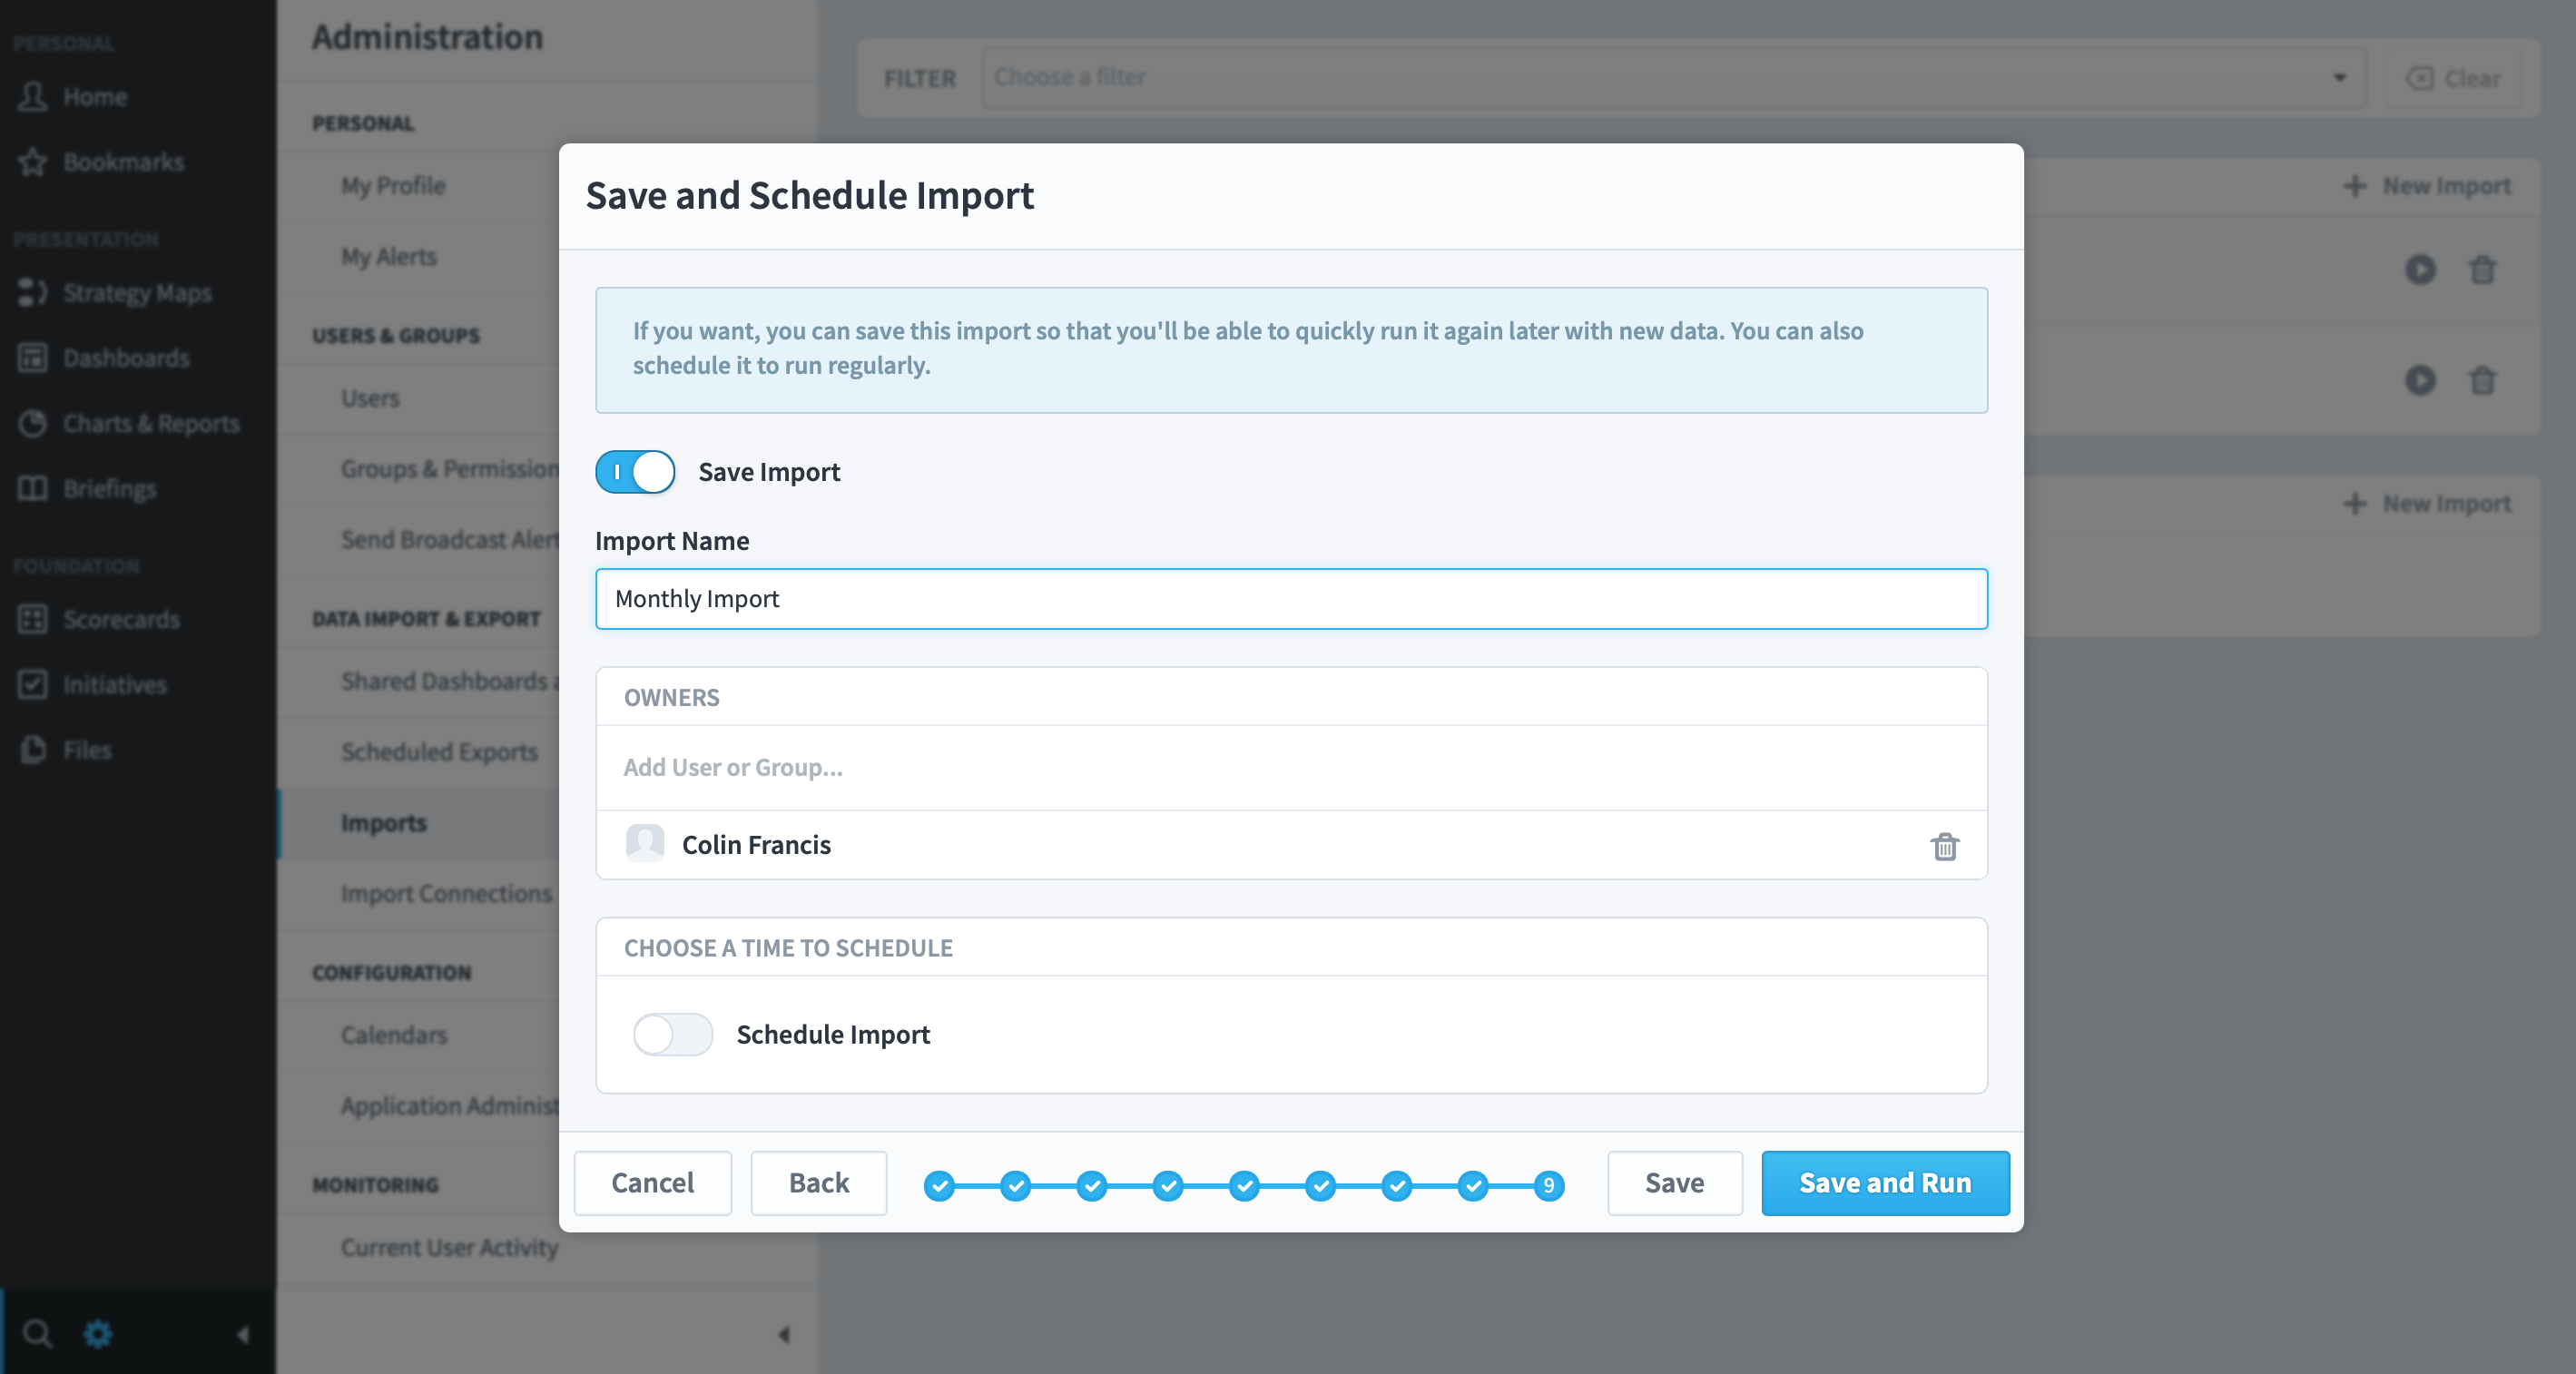
At this stage, you can run your import. However, if you know this import will be run on a regular basis, for example, every week, month or quarter, then you can set up a schedule.
Click on the Save Import slider
Give your import a name, we have called ours ‘Monthly Import’
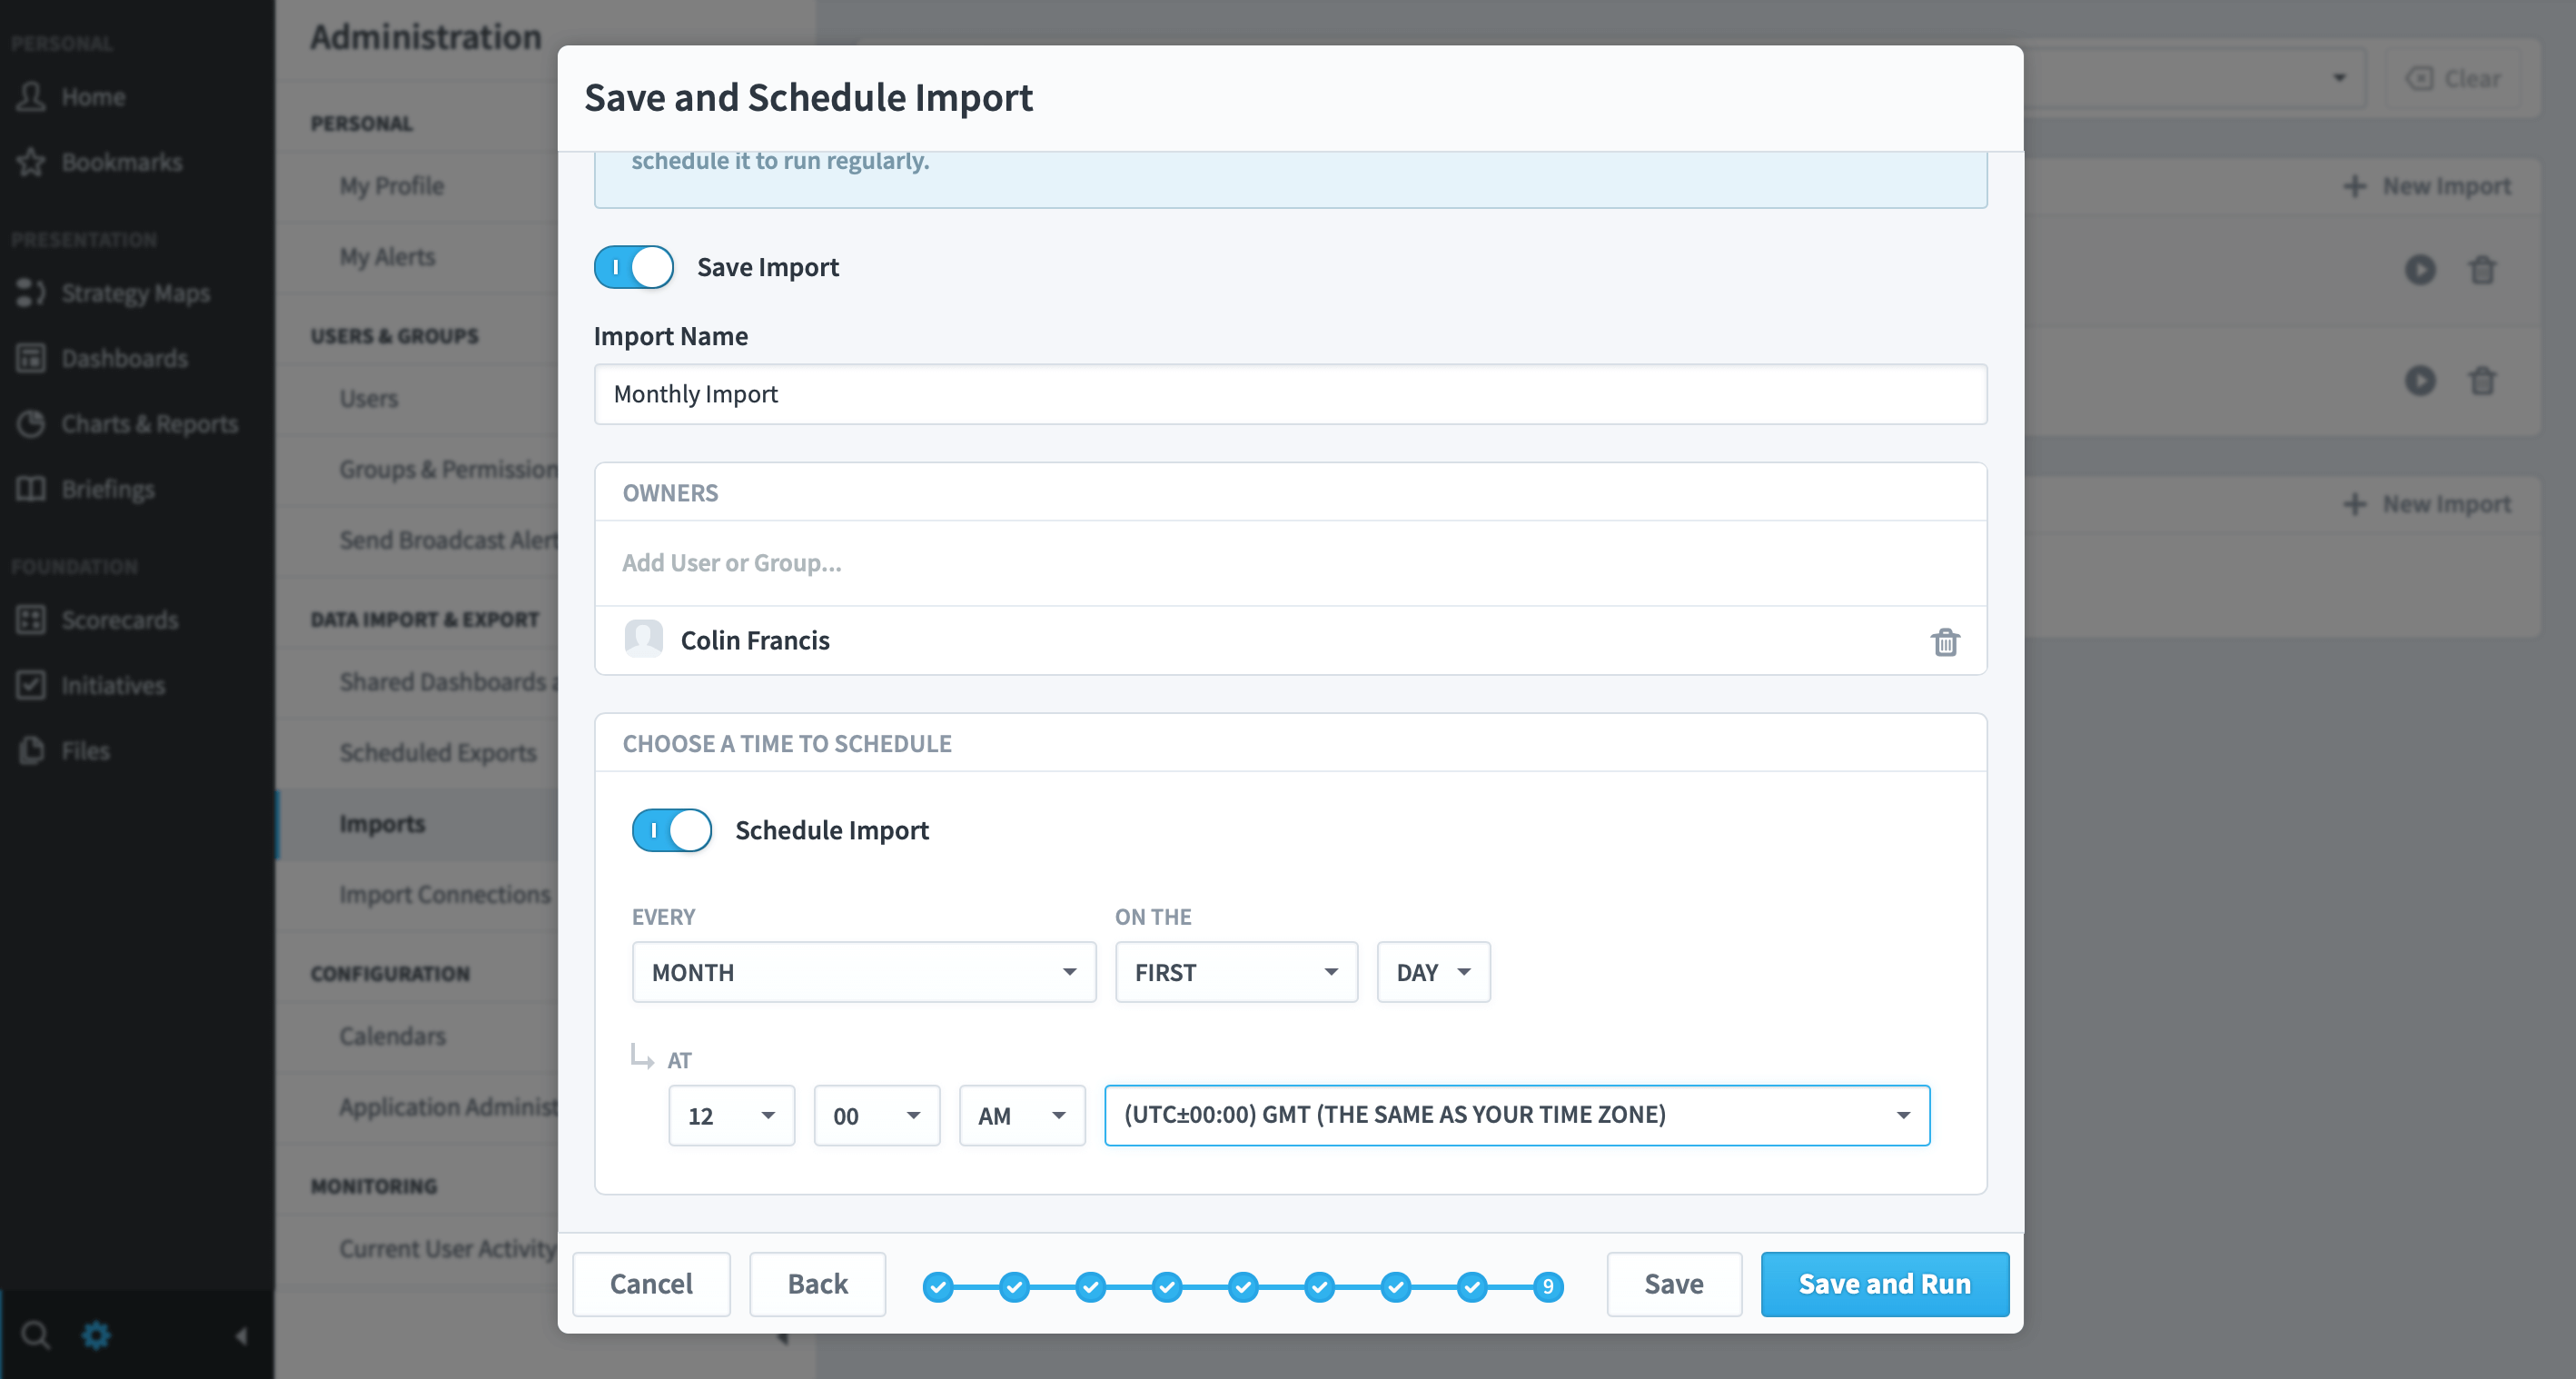
Click on the Schedule Import slider:
Schedule your Import
In the example above you can see we have set the scheduler to pick up a spreadsheet from our secure server on the first day of every month at 12.00am GMT
Click on Save and Run
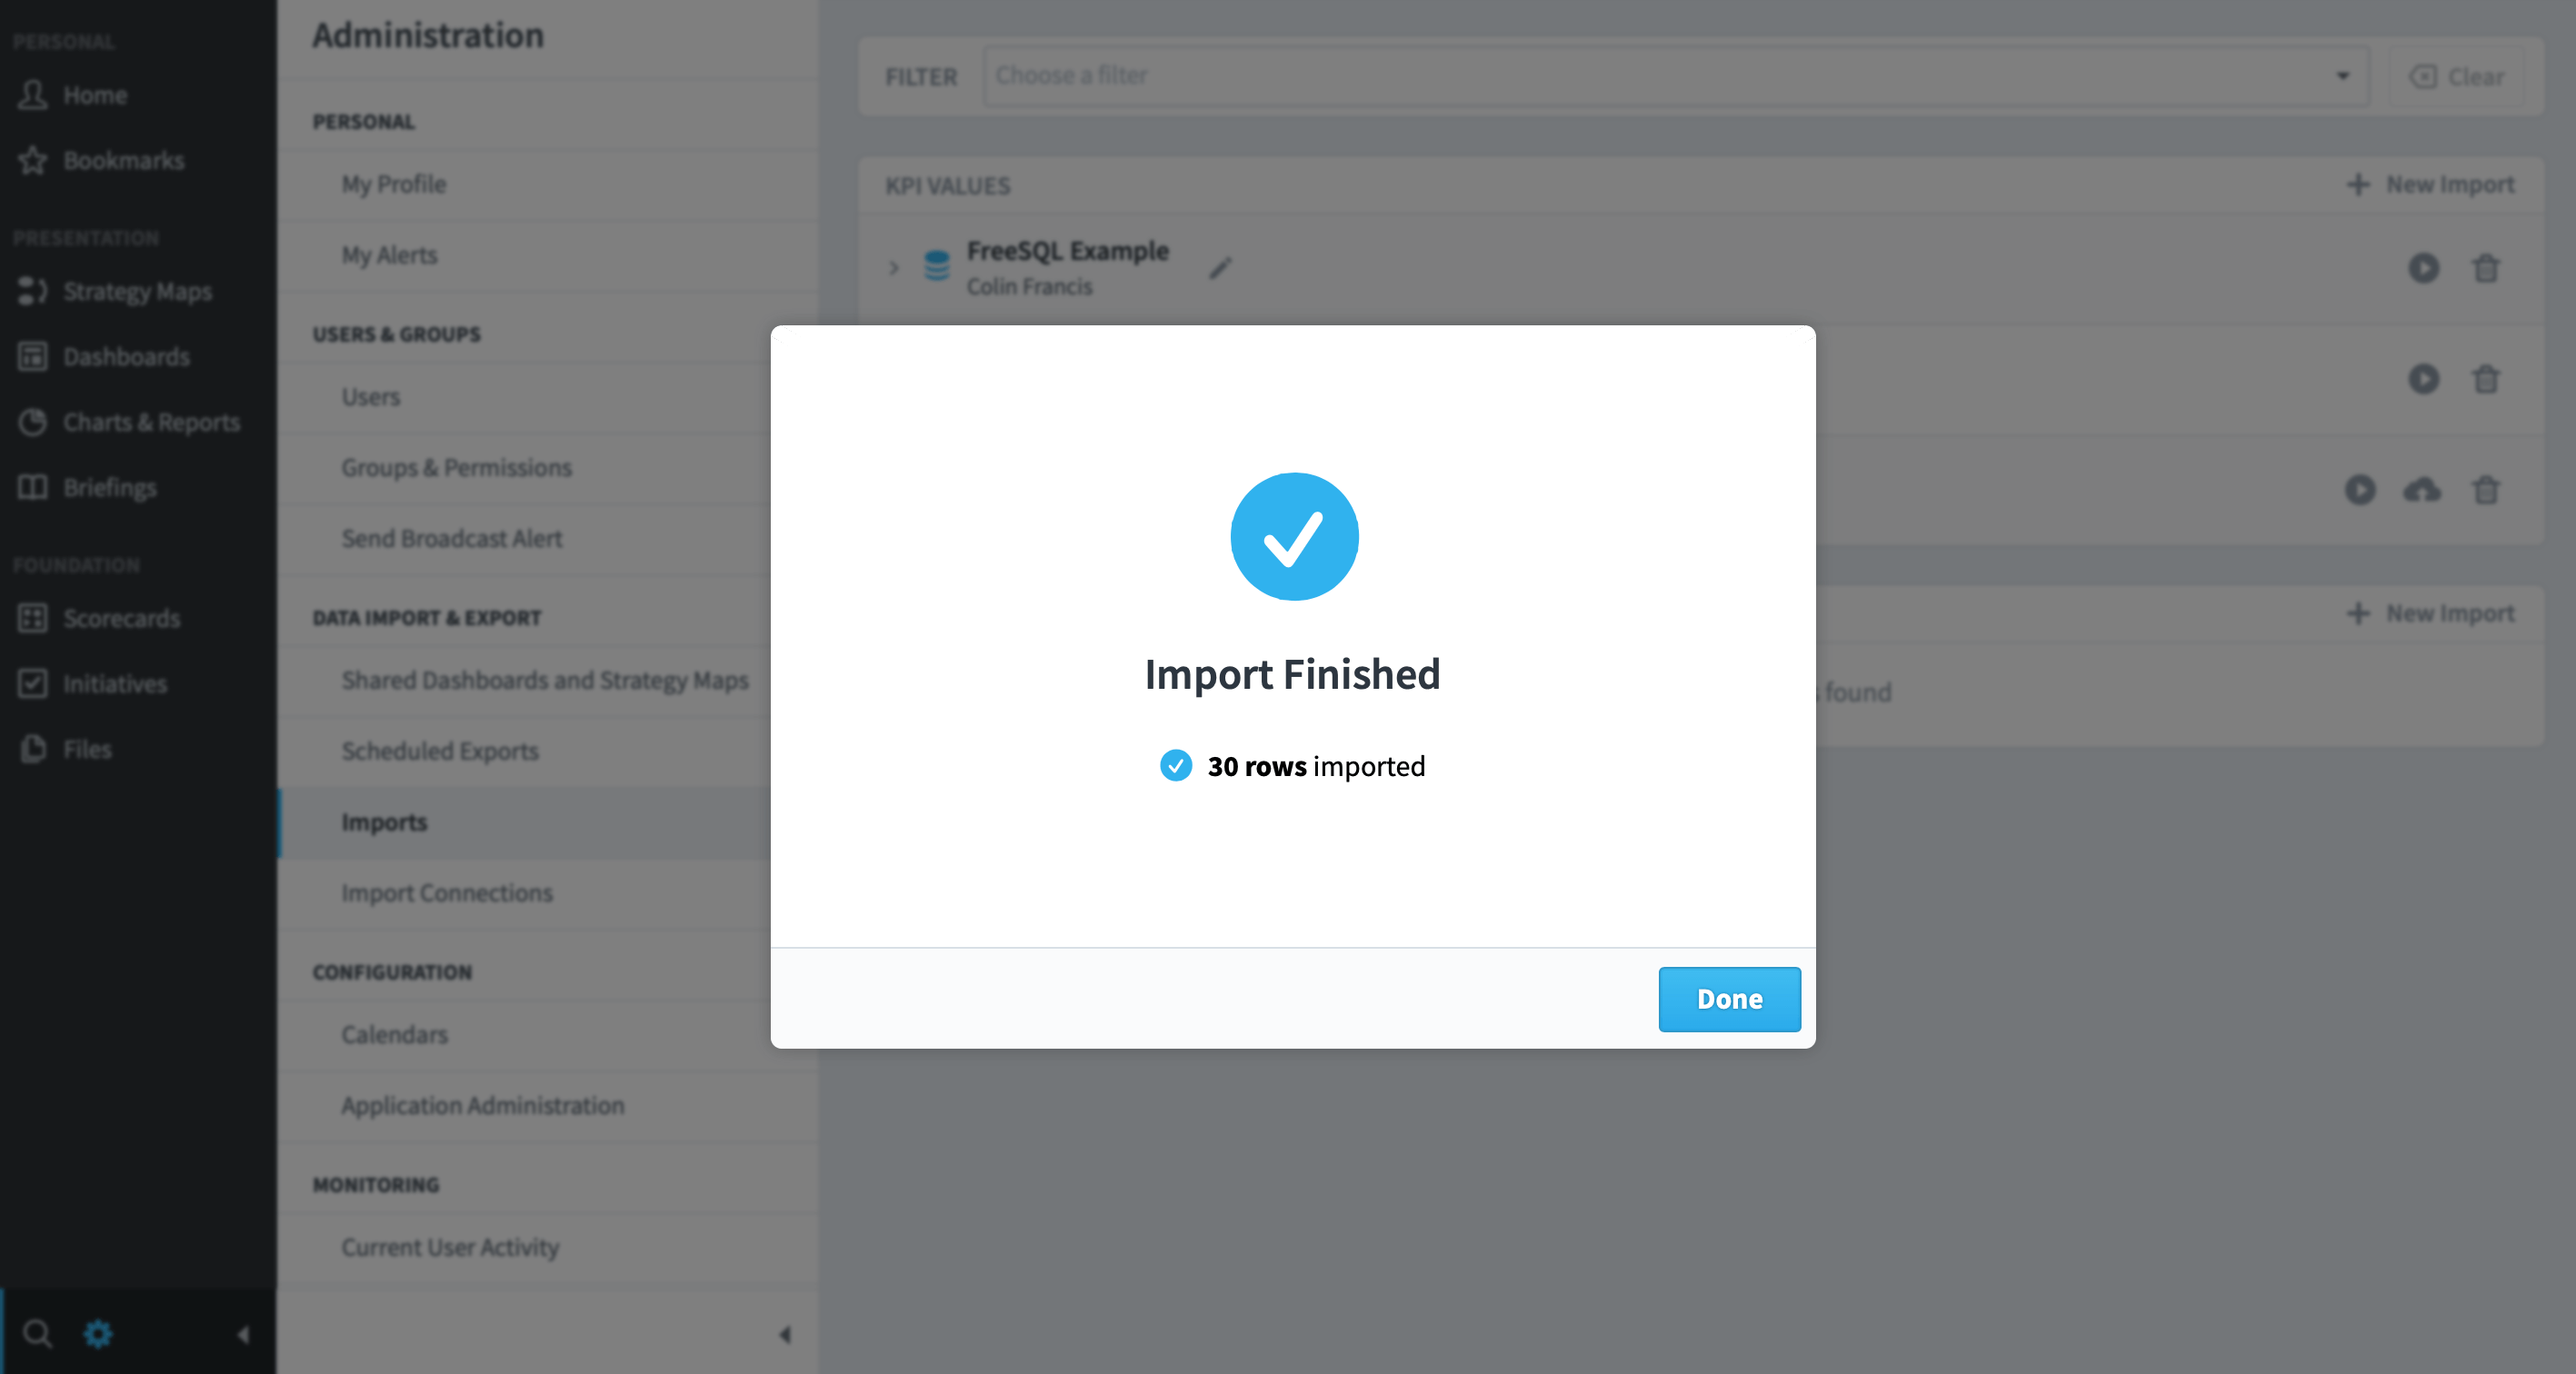
The application will confirm that it has completed the import.
If a mistake has been made and the import has not completed correctly, the application will provide a warning and a button to click to provide information about why the import failed.
Click Done
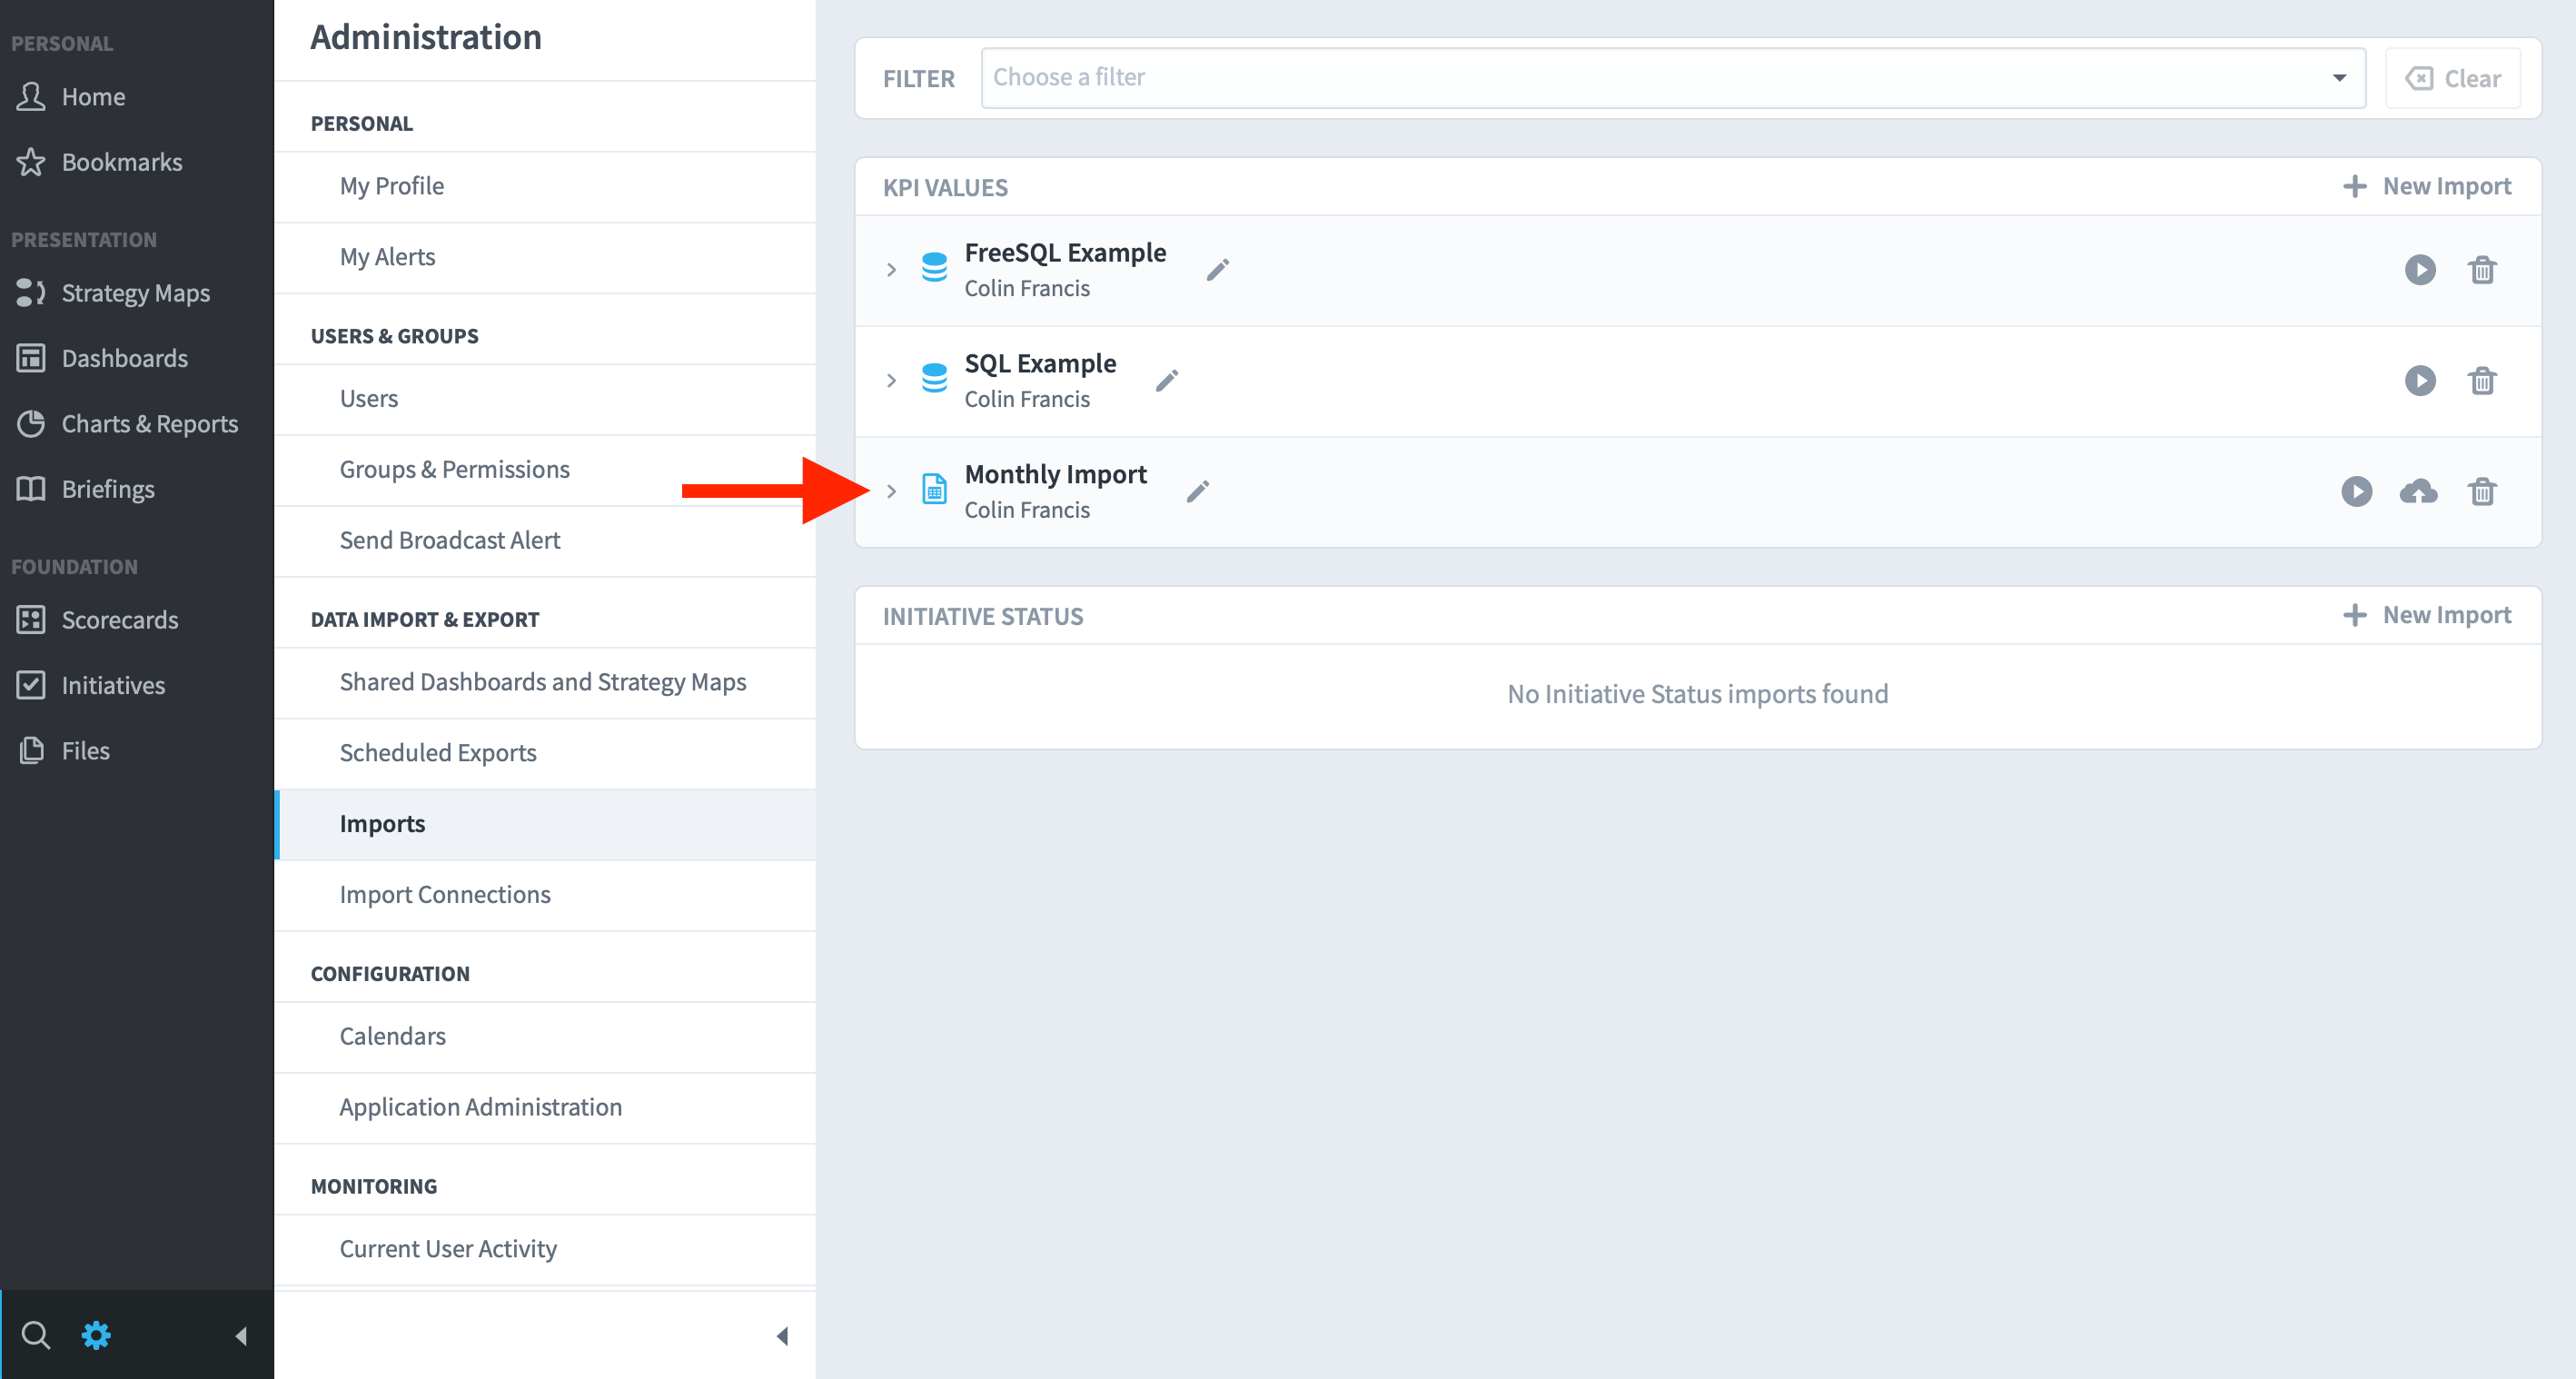
Your saved import will appear in the Import list and will run based on the schedule you have set.
To avoid this problem, we suggest that the repository for your updated spreadsheets is the Spider Impact Files area.

