To automate an update you can connect to any backend SQL server (provided you are hosting QuickScore in your own data environment).
Enter the Connect application: use your usual url and add /connect to the end. Use you usual username and password
First, you need to define the data source, click on the ‘Create New Data Source’ button, a screen like this will appear. You will need to populate it with your SQL Server information.
The example below is populated with a test Spider Strategies SQL database definition:
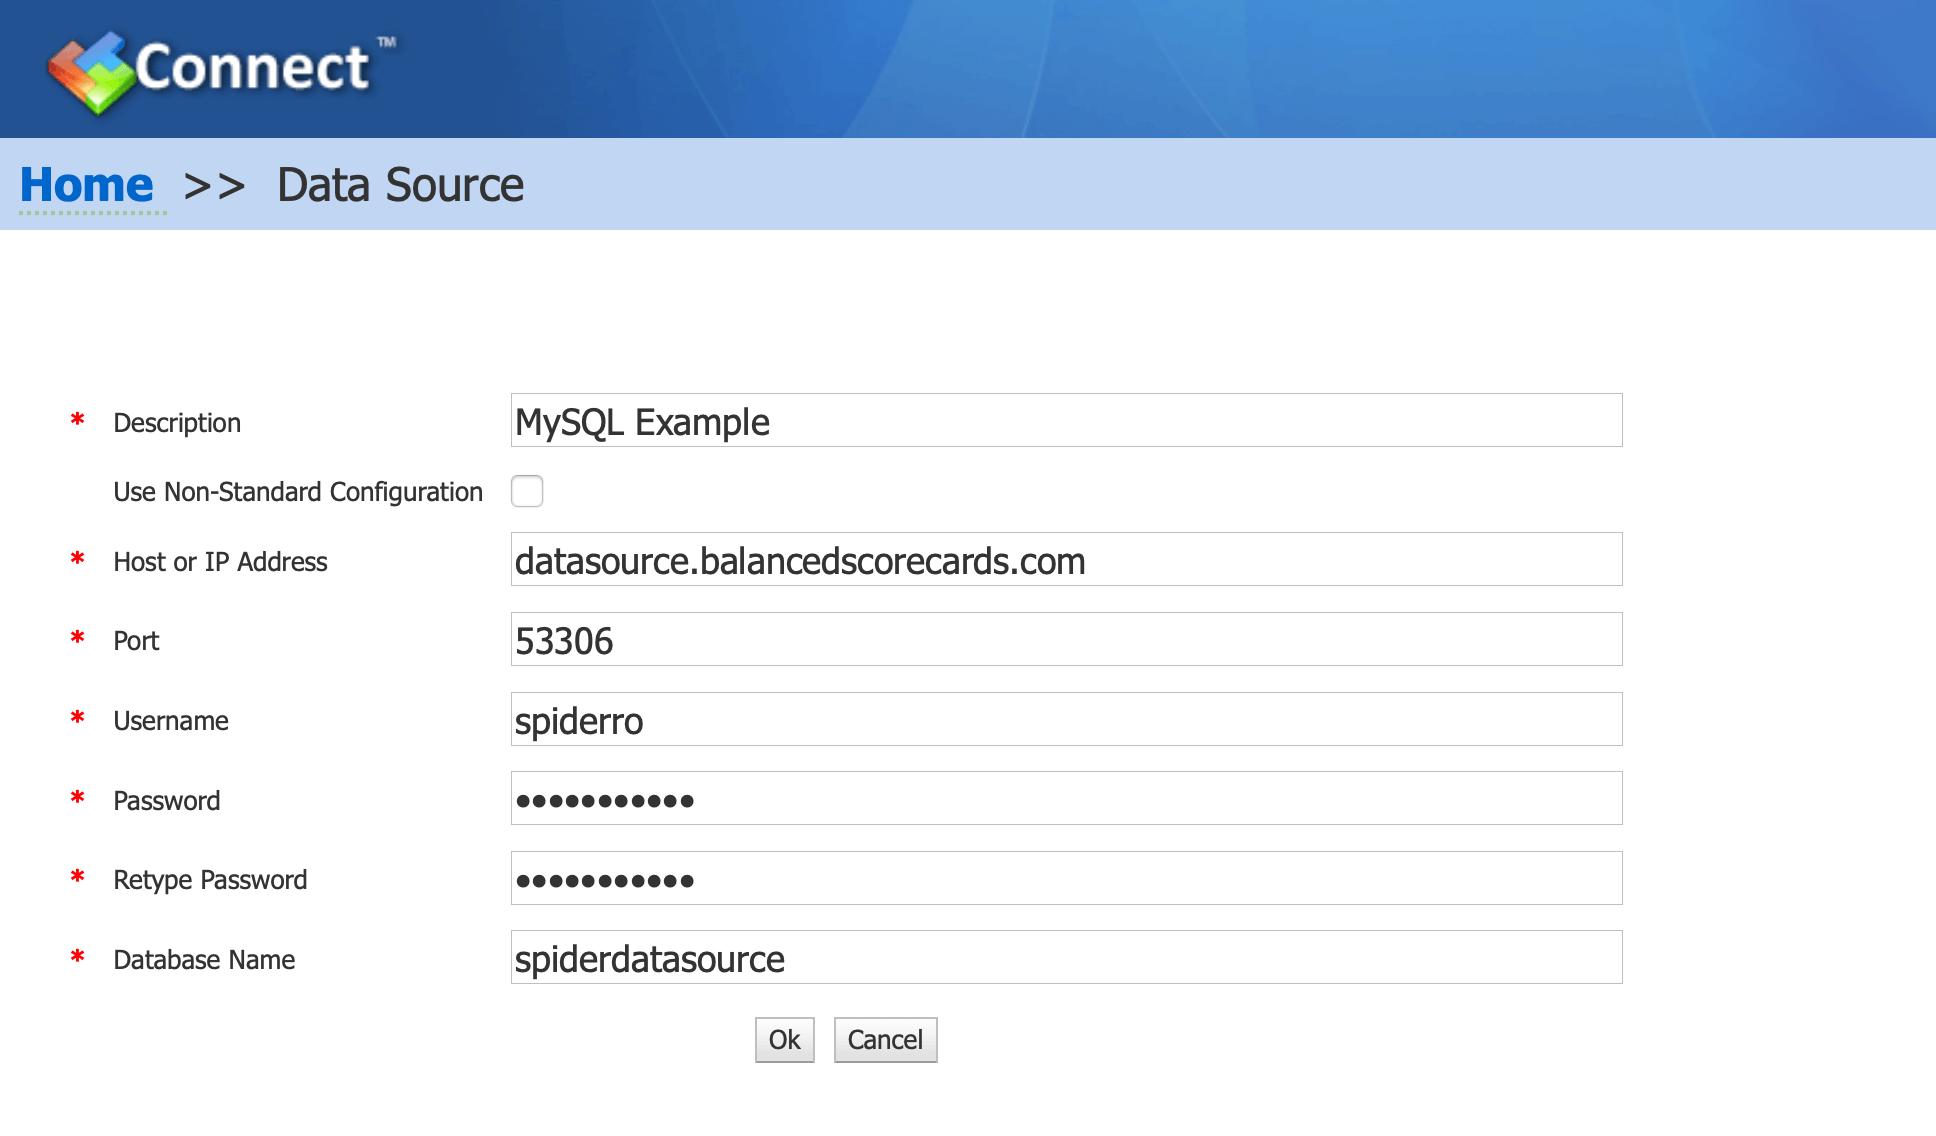
Click on OK to save the definition and return to the Connect home page.
Next, click on the ‘Create New Import’ button.
There are five steps to complete the import setup:
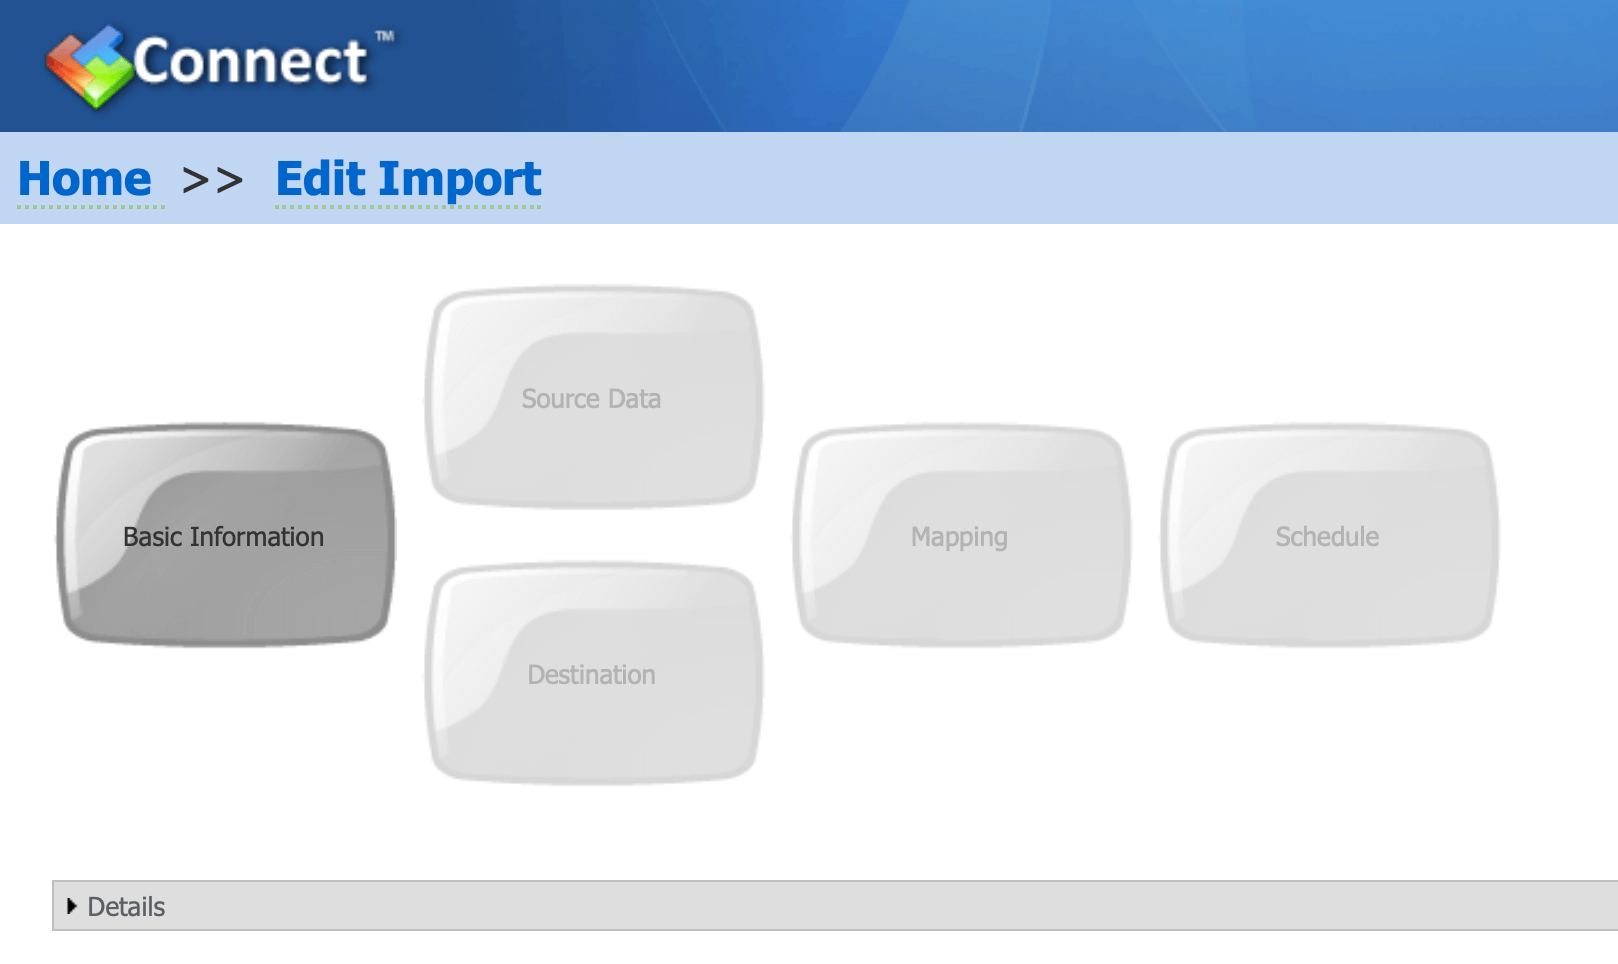
1. Basic Information
Click on the Basic Information button. Add the Name, select the Data Source as the one you have just created, and select the Import Type:
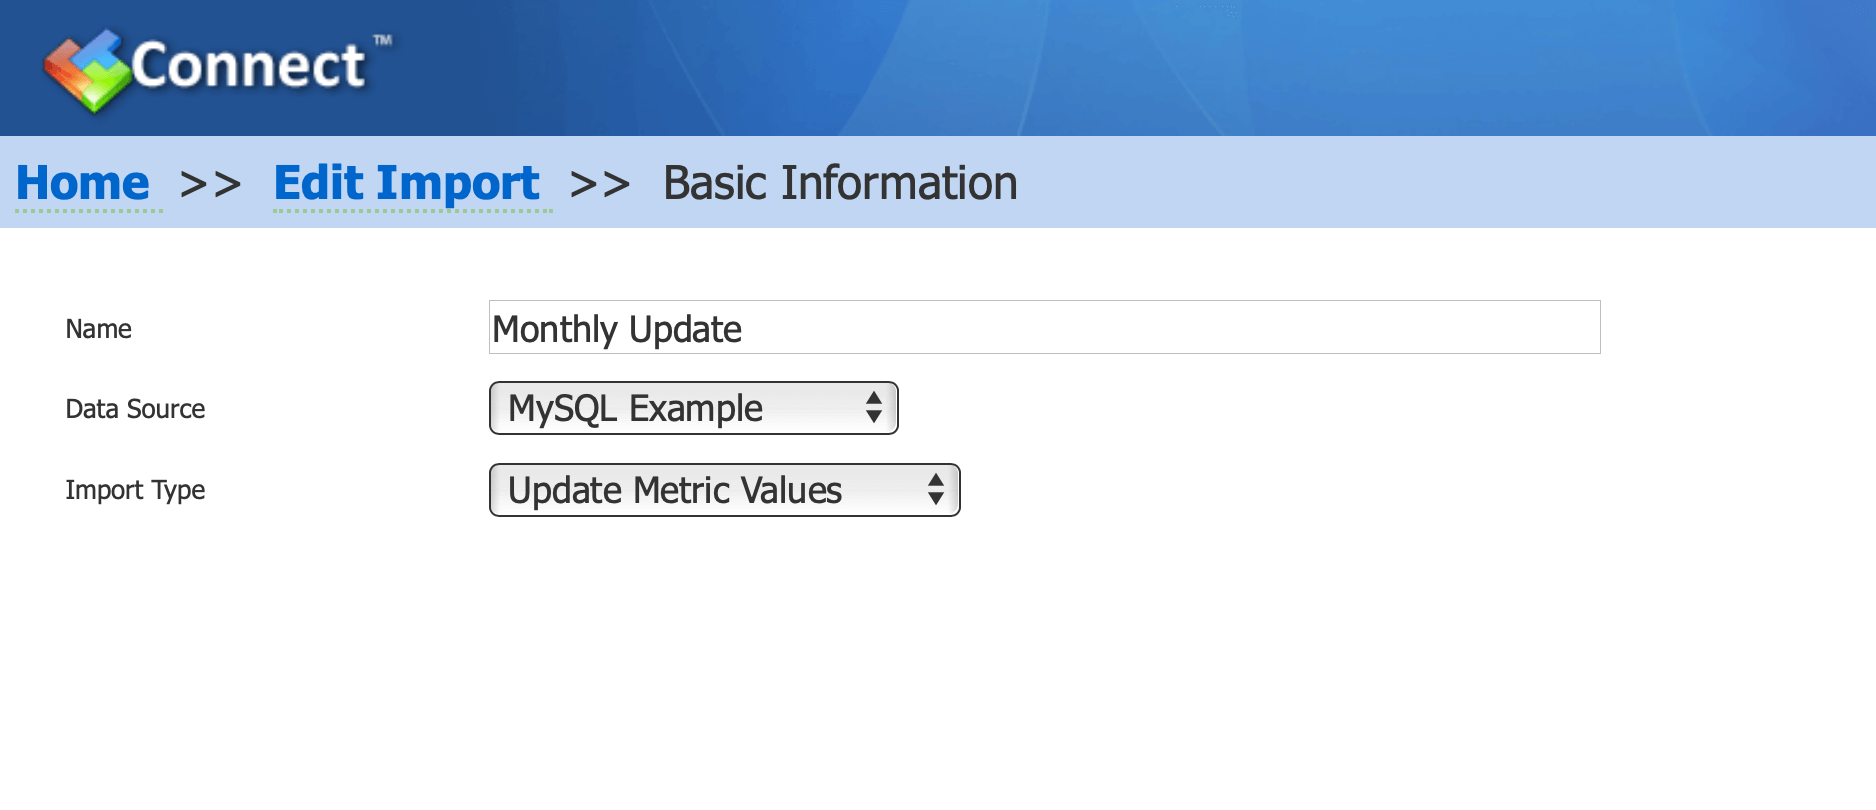
Click OK in the top-right hand corner of the screen
You will see that the Basic Information lozenge has turned blue.
2. Source Data – Adding data from SQL database
Click on Source Data, add your SQL query and click on the Run SQL button.

Move the Metric Id, Date and Value header to the top of the columns to identify the data. Click OK at the top-right of the screen.
You will see that the Source Date lozenge has turned blue.
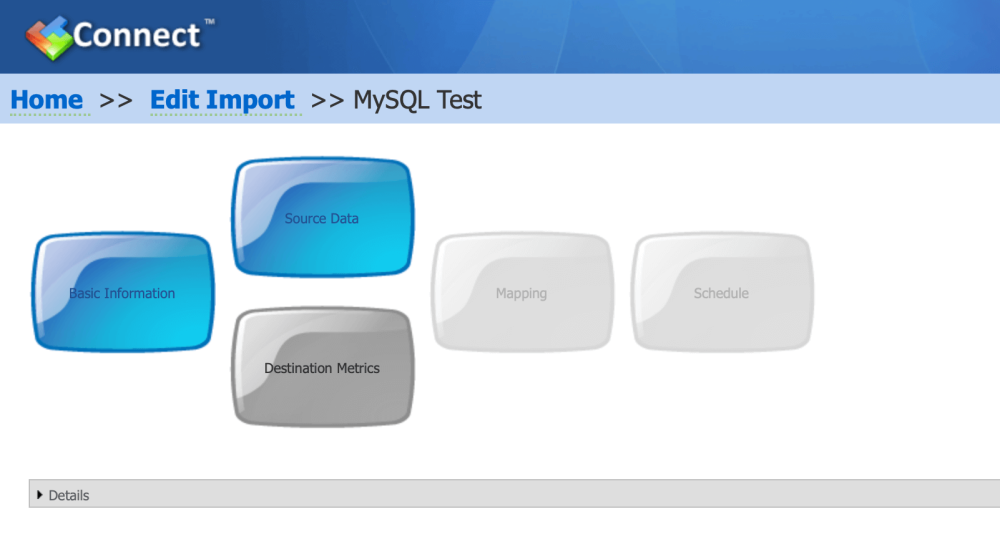
Click on Destination Metrics.
3. Destination Metrics
The organisation tree will appear on the left-hand side of the screen. Select the organisation in which your Measures appear. In the Scorecard Tree on the right-hand side of the screen, select the scorecard area or the actual Measures you want to update. The Measures will appear in the bottom panel. If you want to remove a Measure, click on the X at the left of the Measure in the bottom panel.

Click OK at the top-right of the screen. The Destinations lozenge should be blue. Click on Mapping
4. Mapping
If the names of your measures in your source SQL database are the same as the names of the measures you have set up in QuickScore, then they will automatically map. If they are not drag the Source Date names (in the yellow boxes) over to the Mapped To column on the right.
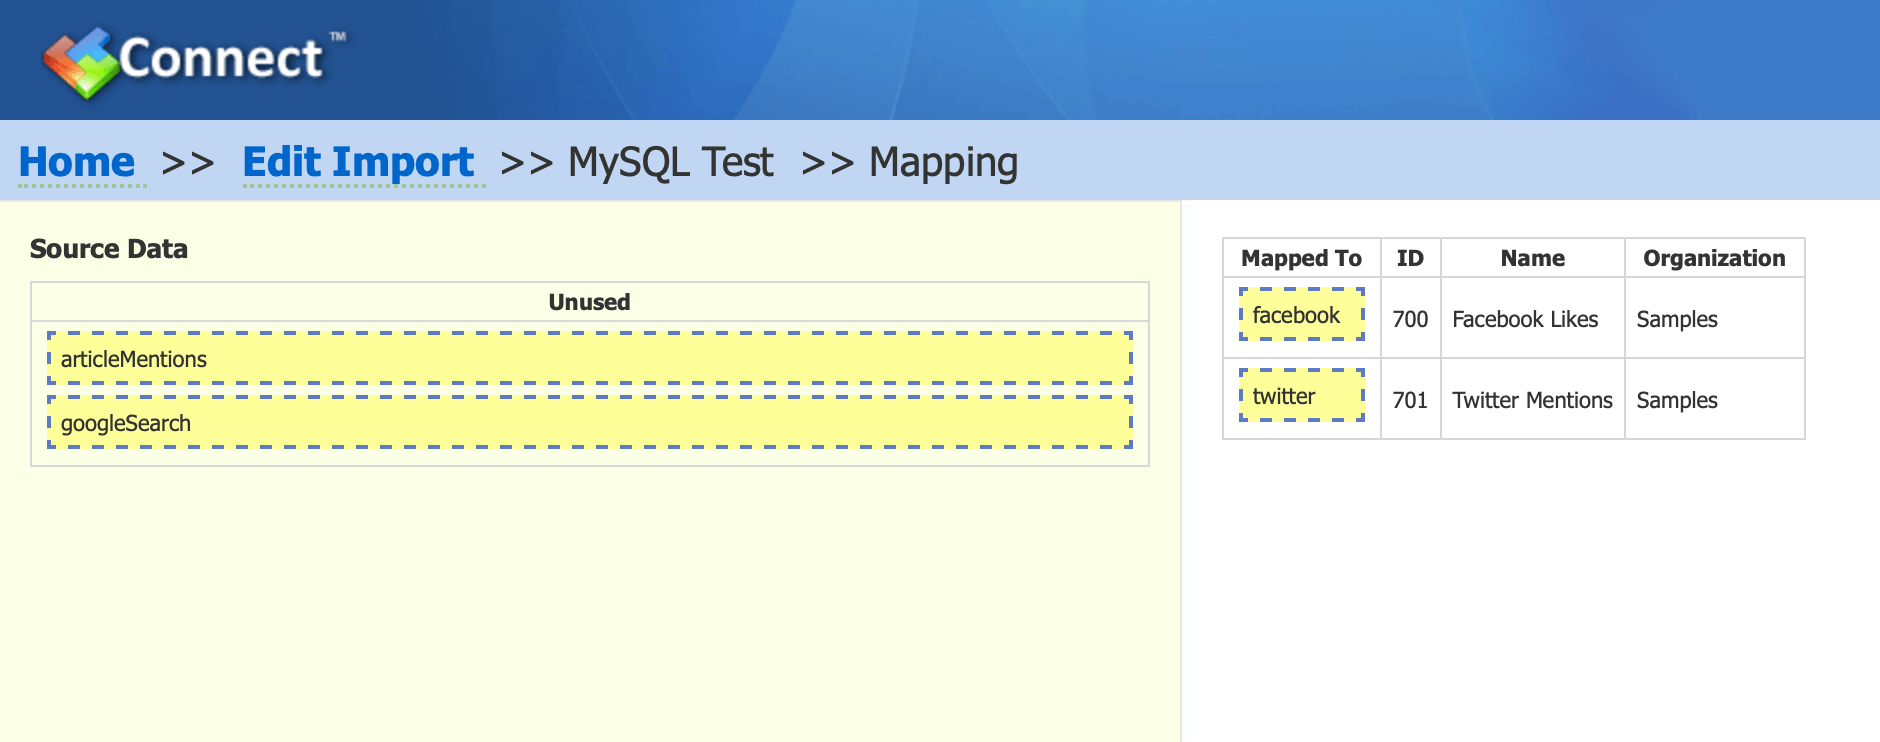
Click OK at the top-right of the screen, you will see the Mapping lozenge has turned blue. You can optionally schedule an update.
5 Schedule
Click on the Schedule lozenge. Click on the New Schedule radio button:
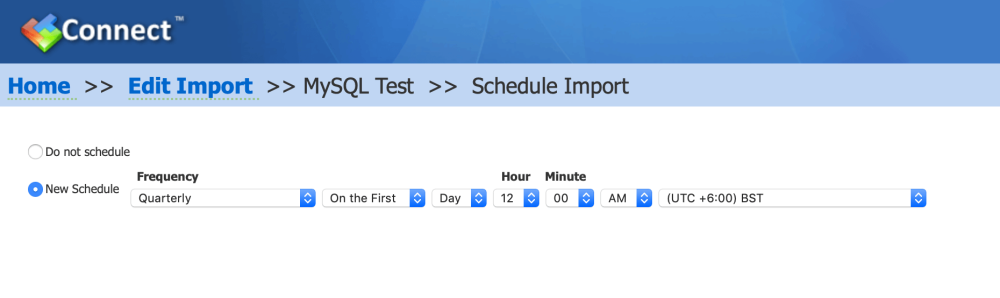
The scheduling options will appear. One note of caution, although you can update every few minutes or every hour, think about how frequently you will be looking at the data.
Click OK at the top-right of the screen and finally click Save.
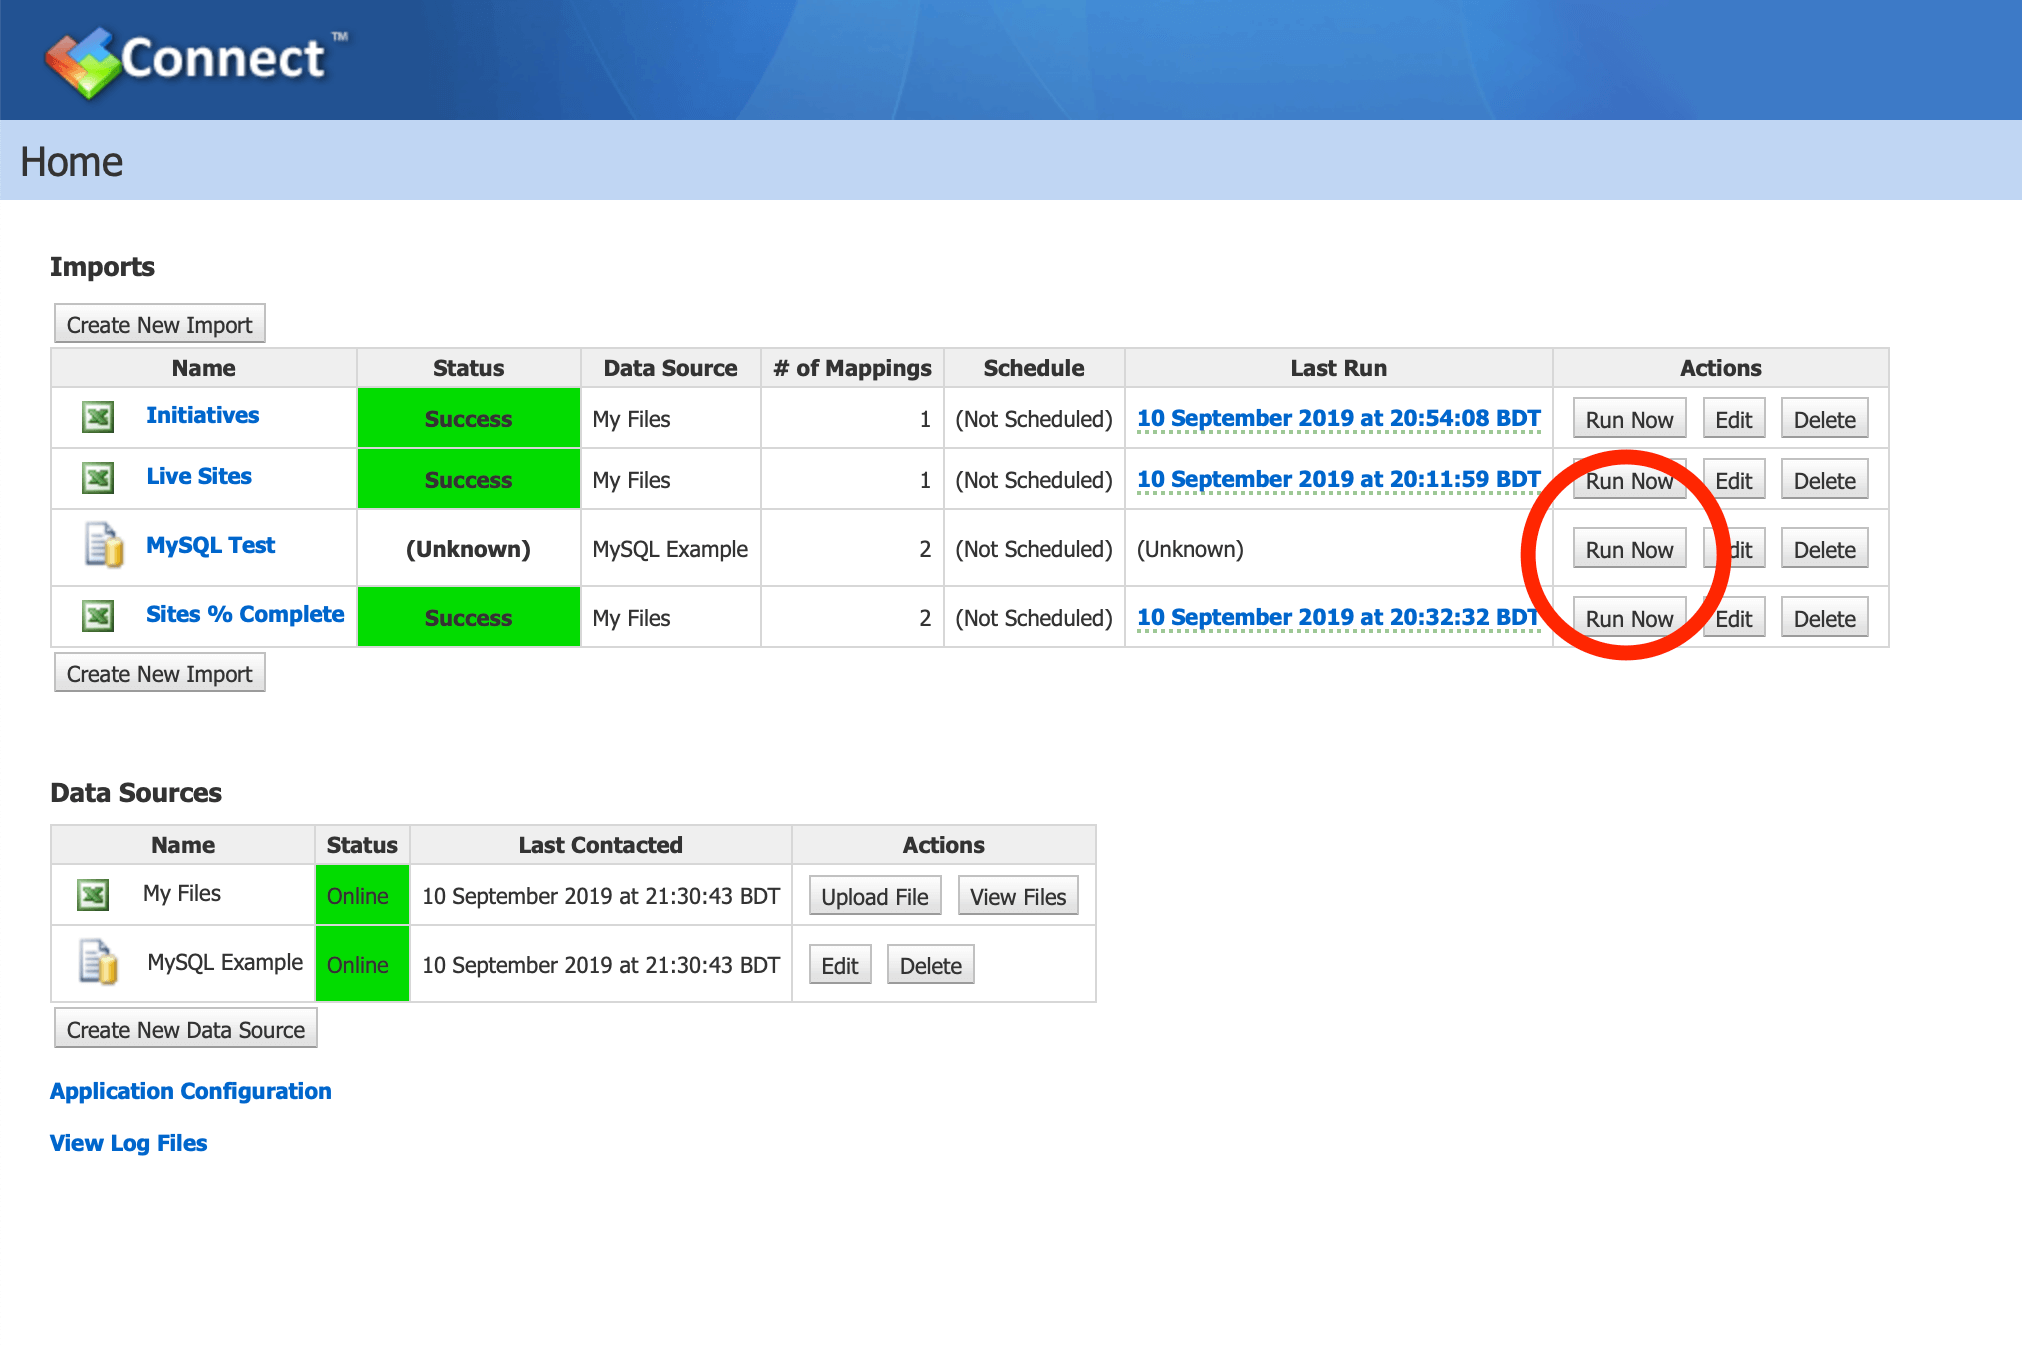
The connection is now complete. This will run automatically if scheduled. If you have decided to run manually, then on the Connect Home page, click Run Now against the import you want to complete.